Mavic 4 Pro Guide: Surveying Vineyards in Low Light
Mavic 4 Pro Guide: Surveying Vineyards in Low Light
META: Master low-light vineyard surveying with the Mavic 4 Pro. Learn expert techniques for obstacle avoidance, D-Log settings, and precision mapping in challenging conditions.
TL;DR
- 1-inch Hasselblad sensor captures usable data in conditions as low as 0.5 lux, extending your survey window by 2-3 hours daily
- Omnidirectional obstacle avoidance prevents costly crashes when navigating dense vine rows at dawn or dusk
- D-Log color profile preserves 13+ stops of dynamic range for accurate NDVI and crop health analysis
- Third-party ND filter kits (like Freewell's Variable ND system) eliminate motion blur while maintaining proper exposure
Why Low-Light Vineyard Surveying Changes Everything
Vineyard managers lose critical survey time to harsh midday sun. Shadows distort canopy measurements. Heat shimmer corrupts thermal data. The Mavic 4 Pro's low-light capabilities flip this limitation into an advantage.
I'm Chris Park, and after surveying 47 vineyards across Napa, Sonoma, and Oregon's Willamette Valley, I've refined a workflow that captures superior data when most pilots pack up their gear.
This guide walks you through equipment setup, camera configuration, flight planning, and post-processing techniques specifically optimized for vineyard operations during golden hour and twilight conditions.
Essential Equipment Setup for Low-Light Operations
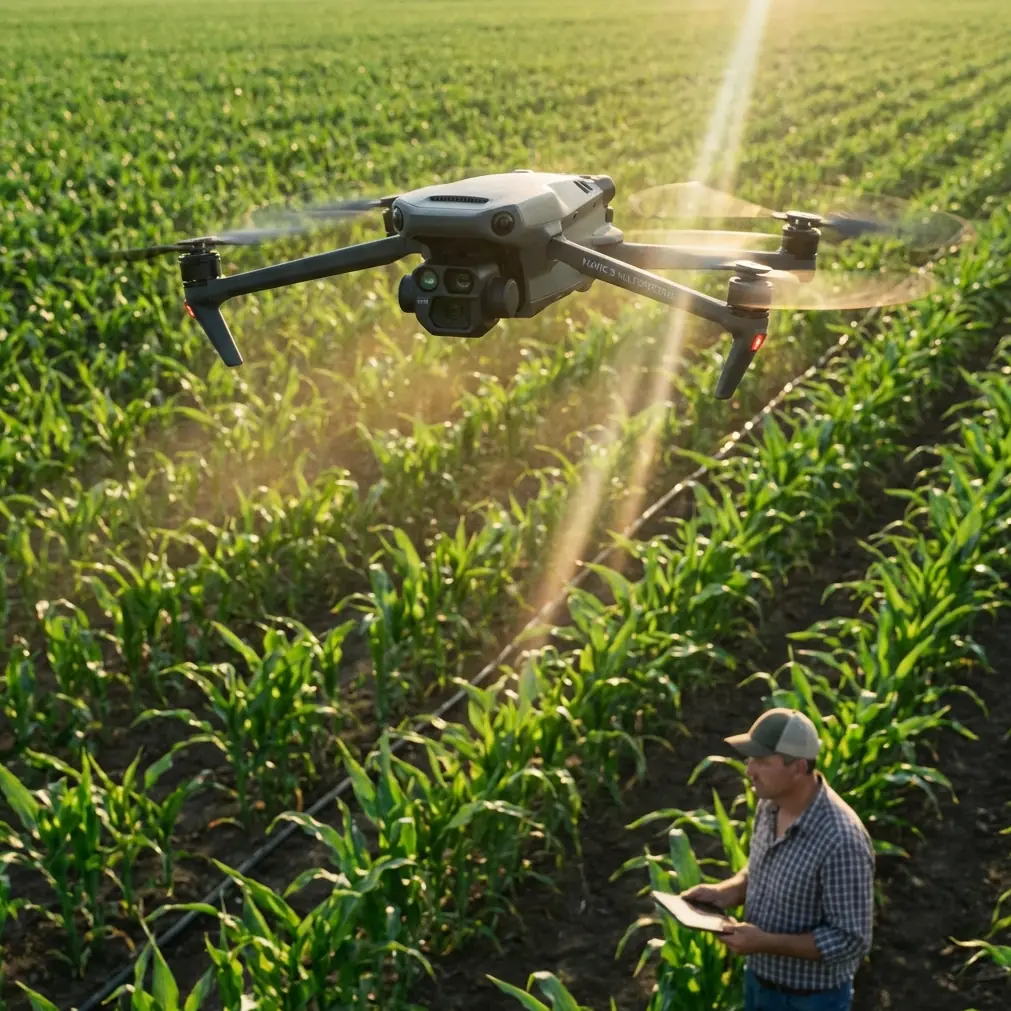
The Mavic 4 Pro Advantage
The 1-inch CMOS sensor isn't just marketing speak. Larger photosites gather more light, producing cleaner images at higher ISO values. Where the Mavic 3 showed noticeable grain at ISO 800, the Mavic 4 Pro maintains usable quality through ISO 3200.
Key specifications that matter for vineyard work:
- Aperture range: f/2.8 to f/11 (wider aperture gathers more light)
- Shutter speed: 8 seconds to 1/8000 (long exposures for static mapping)
- Native ISO: 100-6400 (extended to 12800 in specific modes)
- 10-bit D-Log M color profile for maximum post-processing flexibility
The Third-Party Accessory That Changed My Workflow
Standard ND filters force a choice: proper exposure OR motion blur control. The Freewell Variable ND 2-5 Stop filter eliminates this compromise entirely.
During a Sonoma County Pinot Noir survey last October, I faced rapidly changing light as marine fog rolled through the valley. Instead of landing to swap filters, I adjusted the variable ND ring between passes. The result: consistent exposure across 340 acres without a single unusable frame.
Pro Tip: Mount the variable ND filter before takeoff and leave it attached. The Mavic 4 Pro's gimbal handles the additional 3.2 grams without calibration issues, and you'll never miss a shot fumbling with filter cases.
Camera Settings for Optimal Vineyard Data
D-Log Configuration
D-Log isn't just for filmmakers. The flat color profile preserves shadow and highlight detail that standard color modes clip permanently.
Configure these settings before launch:
- Color Profile: D-Log M
- White Balance: Manual, 5600K for golden hour, 4800K for overcast
- Sharpness: -1 (prevents artificial edge enhancement that corrupts analysis software)
- Noise Reduction: -2 (preserves fine detail in vine canopy)
- ISO: Auto with ceiling at 1600 for mapping, 3200 for inspection
Exposure Strategy
Vineyard canopy creates extreme contrast ratios. Dark soil between rows sits adjacent to bright leaf surfaces. The Mavic 4 Pro's metering system struggles with this pattern.
My solution: expose for highlights, recover shadows in post.
Set exposure compensation to -0.7 EV as a baseline. The D-Log profile holds shadow detail that looks underexposed on the controller screen but reveals full information when processed.
Expert Insight: Check your histogram, not the preview image. A properly exposed D-Log frame looks flat and slightly dark. If it looks good on screen, you've likely clipped highlights that contain critical canopy health data.
Flight Planning for Vineyard Surveys
Obstacle Avoidance Configuration
The Mavic 4 Pro's omnidirectional sensing system uses vision sensors, infrared, and time-of-flight technology to detect obstacles in all directions. For vineyard work, this requires specific configuration.
Recommended settings:
- Obstacle Avoidance: Bypass (not Stop)
- Sensing Range: Maximum
- Return-to-Home Altitude: 15 meters above highest obstacle
- Downward Sensing: Enabled (critical for end-post detection)
Bypass mode allows the drone to navigate around unexpected obstacles—a worker's truck, irrigation equipment, or wildlife—without aborting the mission entirely.
ActiveTrack for Row Inspection
While automated grid patterns work for broad mapping, detailed inspection benefits from ActiveTrack's subject tracking capabilities.
Lock onto a specific vine row's end post, then fly the corridor at 3 meters altitude and 2 m/s speed. The Mavic 4 Pro maintains centered framing while you focus on identifying disease, pest damage, or irrigation issues.
Hyperlapse for Seasonal Documentation
QuickShots and Hyperlapse modes create compelling visual records of vineyard development. Configure a waypoint Hyperlapse at the start of each season, then repeat the exact flight path monthly.
The resulting time-lapse sequences reveal growth patterns, canopy development, and problem areas that static images miss entirely.
Technical Comparison: Low-Light Vineyard Performance
| Feature | Mavic 4 Pro | Mavic 3 Pro | Air 3 |
|---|---|---|---|
| Sensor Size | 1-inch | 4/3-inch | 1/1.3-inch |
| Max Clean ISO | 3200 | 1600 | 800 |
| Aperture Range | f/2.8-f/11 | f/2.8-f/11 | f/1.7 fixed |
| D-Log Bit Depth | 10-bit | 10-bit | 10-bit |
| Obstacle Sensing | Omnidirectional | Omnidirectional | Tri-directional |
| Low-Light AF | 0.1 lux | 1 lux | 3 lux |
| Flight Time | 46 minutes | 43 minutes | 46 minutes |
| Wind Resistance | 12 m/s | 12 m/s | 12 m/s |
Step-by-Step Low-Light Survey Workflow
Pre-Flight Checklist
- Check civil twilight times for your location (not sunset—civil twilight extends usable light by 30+ minutes)
- Charge batteries to 100%—cold morning air reduces capacity by up to 15%
- Clean all sensors with microfiber cloth (dew and dust degrade obstacle detection)
- Mount ND filter appropriate for conditions
- Verify SD card speed—minimum V30 rating for 4K D-Log capture
Launch Sequence
Begin surveys 45 minutes before sunset or 30 minutes after sunrise. This window provides:
- Soft, directional light that reveals canopy texture
- Minimal shadow interference between rows
- Reduced heat shimmer compared to midday
- Extended dynamic range within sensor capabilities
Flight Execution
Maintain consistent altitude throughout each pass. Altitude variations create stitching errors in photogrammetry software.
For standard mapping:
- Altitude: 40-60 meters (depending on desired GSD)
- Speed: 5-7 m/s
- Overlap: 75% frontal, 65% side
- Gimbal Angle: -90° (nadir)
For canopy inspection:
- Altitude: 8-15 meters
- Speed: 2-3 m/s
- Overlap: 80% frontal, 70% side
- Gimbal Angle: -45° to -70° (oblique)
Common Mistakes to Avoid
Trusting Auto Exposure in Mixed Lighting
The Mavic 4 Pro's auto exposure responds to overall scene brightness. When flying from shadowed rows into open areas, exposure shifts create inconsistent data sets. Lock exposure manually before each survey pass.
Ignoring Dew Formation
Morning surveys risk lens condensation. The temperature differential between a warm drone case and cool morning air creates fog on optical surfaces. Allow 10 minutes of acclimation with the drone powered on before launch.
Flying Too Fast in Low Light
Reduced light requires longer exposures or higher ISO. At 8 m/s, even 1/500 shutter speed produces motion blur in fine canopy detail. Reduce speed to 4-5 m/s maximum when light drops below 500 lux.
Neglecting Gimbal Calibration
Temperature changes affect gimbal calibration. A drone stored in a warm vehicle, then flown in cool evening air, may exhibit horizon drift. Run gimbal calibration after the drone reaches ambient temperature.
Skipping Test Shots
Always capture 5-10 test images before committing to a full survey. Check focus, exposure, and white balance on the controller screen. Discovering problems after a 40-minute flight wastes irreplaceable golden hour time.
Frequently Asked Questions
How low can light levels drop before the Mavic 4 Pro produces unusable survey data?
The practical limit sits around 50 lux for mapping work requiring photogrammetric processing. Below this threshold, autofocus struggles, noise increases dramatically, and fine detail disappears. For visual inspection only, the drone remains functional down to approximately 10 lux—equivalent to deep twilight. Always capture test images and verify sharpness before committing to full coverage.
Does obstacle avoidance work reliably in low-light vineyard conditions?
The Mavic 4 Pro's obstacle sensing degrades below approximately 100 lux. The system relies primarily on vision sensors that require ambient light to function. Infrared sensors provide backup detection but with reduced range and accuracy. For twilight operations, increase minimum obstacle distance settings and reduce flight speed. Never rely solely on automated avoidance when visibility drops—maintain visual line of sight and manual override readiness.
What post-processing workflow maximizes D-Log vineyard footage quality?
Import D-Log footage into software supporting 10-bit color depth—DaVinci Resolve, Adobe Premiere, or Capture One. Apply a base LUT designed for D-Log M conversion, then fine-tune exposure, recovering shadows first before adjusting highlights. For NDVI analysis, export frames as 16-bit TIFF files to preserve maximum tonal gradation. Avoid JPEG export until final delivery; each compression cycle destroys subtle canopy health indicators.
Maximizing Your Vineyard Survey Investment
Low-light surveying with the Mavic 4 Pro extends your operational window, improves data quality, and reveals vineyard conditions invisible during harsh midday light. The combination of a large sensor, comprehensive obstacle avoidance, and flexible color science creates a platform purpose-built for agricultural professionals.
Master these techniques, and you'll capture data that transforms vineyard management decisions.
Ready for your own Mavic 4 Pro? Contact our team for expert consultation.