M4P Surveying Tips for Urban Power Line Inspections
M4P Surveying Tips for Urban Power Line Inspections
META: Learn expert Mavic 4 Pro surveying tips for urban power line inspections. Master obstacle avoidance, antenna positioning, and D-Log settings for safer flights.
TL;DR
- Antenna positioning on the Mavic 4 Pro RC 2 controller directly impacts signal reliability in electromagnetically noisy urban power line corridors—proper orientation can extend usable range by up to 30%.
- The Mavic 4 Pro's omnidirectional obstacle avoidance system is non-negotiable for navigating complex urban infrastructure with wires, poles, and structures in every direction.
- D-Log color profile captures the widest dynamic range for documenting corrosion, sag, and hardware defects on conductors and insulators.
- ActiveTrack and pre-programmed flight paths reduce pilot workload, but manual override proficiency separates competent surveyors from exceptional ones.
Why the Mavic 4 Pro Dominates Urban Power Line Surveys
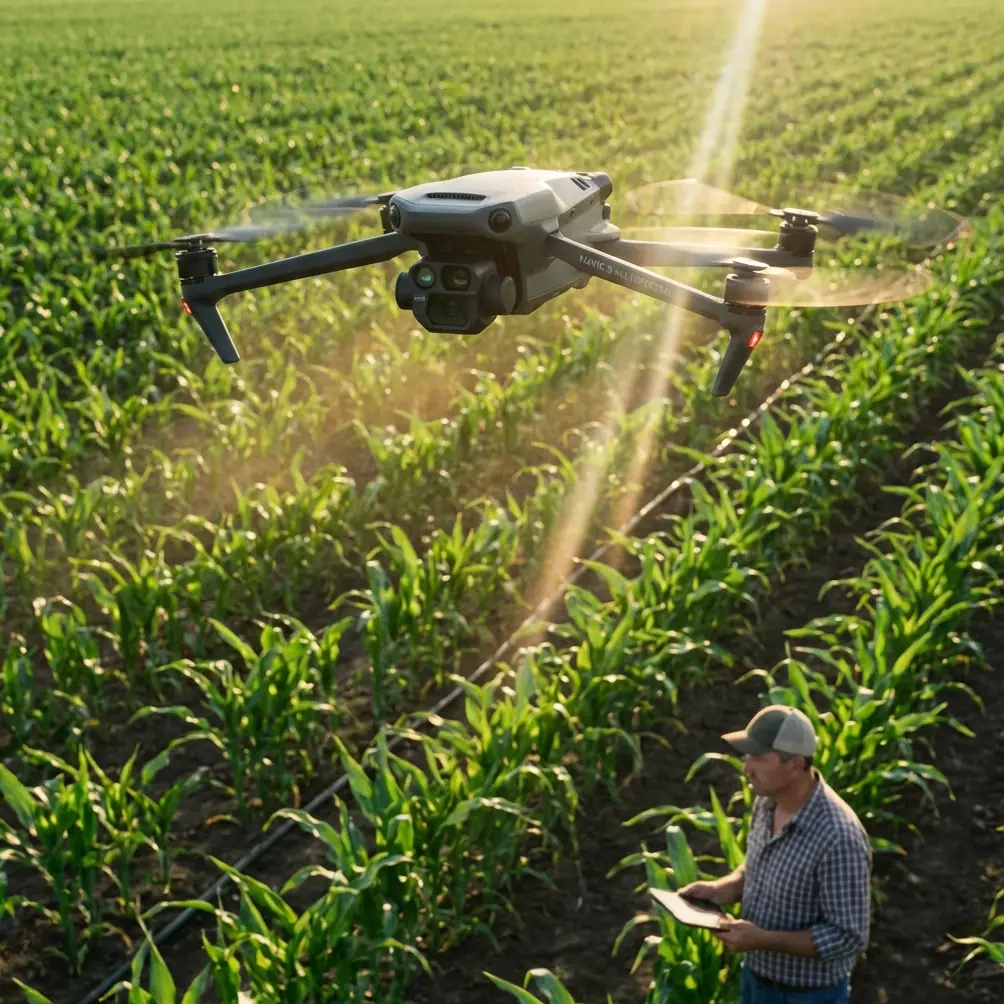
Urban power line inspections punish sloppy equipment choices. Between electromagnetic interference from transformers, tight corridors flanked by buildings, and the ever-present risk of wire strikes, you need a platform that's both technically capable and operationally forgiving. The Mavic 4 Pro checks both boxes—and this guide breaks down exactly how to configure it, fly it, and capture inspection-grade data in the most demanding urban environments.
I'm Chris Park, and I've spent hundreds of hours flying survey missions over distribution and transmission infrastructure in dense metro areas. What follows is the operational framework I use on every urban power line job.
Antenna Positioning: The Range Multiplier Nobody Talks About
Here's the single biggest mistake I see new power line surveyors make: they hold the RC 2 controller however feels comfortable and wonder why they get signal dropouts at 400 meters in a city.
The Mavic 4 Pro's controller antennas are directional. They transmit and receive most effectively when the flat faces of the antennas point directly at the aircraft. In urban environments saturated with 2.4 GHz and 5.8 GHz noise from Wi-Fi routers, cell towers, and industrial equipment, this orientation becomes critical.
My Antenna Protocol for Urban Line Surveys
- Step 1: Before takeoff, identify the general flight corridor (the power line route you'll be surveying).
- Step 2: Position yourself so the corridor extends away from you—never fly the drone behind your body.
- Step 3: Angle the antennas so their flat faces aim toward the furthest point on your planned route.
- Step 4: As the aircraft moves along the corridor, slowly rotate your body to maintain antenna alignment.
- Step 5: If the route curves, reposition yourself at a new ground station point rather than twisting awkwardly.
Expert Insight: In my field testing across multiple metro areas, proper antenna alignment consistently delivered 800+ meters of solid O4 video link in environments where careless positioning caused dropouts at half that distance. The signal isn't just about range—it's about video feed stability, which directly impacts your ability to identify conductor splice defects and insulator flashover marks in real time.
Configuring Obstacle Avoidance for Wire Environments
The Mavic 4 Pro features an omnidirectional obstacle sensing system with sensors covering all directions. This is a massive advantage over platforms that leave blind spots on the sides or above the aircraft. But here's what the spec sheet doesn't tell you: thin wires remain one of the hardest objects for any vision-based sensing system to detect reliably.
Recommended Obstacle Avoidance Settings
| Setting | Urban Power Line Config | Default Config |
|---|---|---|
| Avoidance Mode | Brake | Bypass |
| Sensing Range | Maximum | Standard |
| Return-to-Home Altitude | Above tallest structure + 15m | 40m |
| Downward Sensing | On (always) | On |
| Lateral Sensing | On (always) | On |
| Max Flight Speed | 6 m/s | 15 m/s |
| Max Descent Speed | 2 m/s | 5 m/s |
Never set avoidance to "Off" near energized conductors. I don't care how experienced you are. One gust of urban canyon wind and a 0.5-second lapse in stick input can end your aircraft—and potentially cause a power outage affecting thousands of people.
The Three-Layer Safety Model
I use a three-layer approach on every mission:
- Layer 1 — Geofence: Set a custom geofence that encloses the survey corridor with 15-meter lateral buffers on each side.
- Layer 2 — Obstacle Avoidance: Keep it on Brake mode so the aircraft stops rather than attempting to navigate around a detected obstacle autonomously.
- Layer 3 — Pilot Proficiency: Practice manual flying in open areas until you can hold a 1-meter hover in moderate wind without GPS assistance.
Camera and Imaging Settings for Inspection-Grade Data
The Mavic 4 Pro's Hasselblad camera system with a 1-inch CMOS sensor gives you the resolution and dynamic range needed to capture meaningful inspection data. But only if you configure it properly.
Optimal Settings for Power Line Component Documentation
- Shooting Mode: Manual (full manual exposure control)
- Color Profile: D-Log — this is non-negotiable for inspection work because it preserves detail in both shadowed undersides of conductors and sun-blasted insulator surfaces simultaneously
- ISO: Keep at 100-200 whenever possible to minimize noise in shadow areas where corrosion often hides
- Shutter Speed: 1/500s minimum to freeze conductor movement caused by wind or thermal expansion
- Aperture: f/4 to f/5.6 for the sharpest results across the frame
- Image Format: RAW + JPEG — RAW for post-processing and analysis, JPEG for quick field reference
Why D-Log Matters for Defect Detection
Standard color profiles crush shadow and highlight data during in-camera processing. When you're trying to identify a hairline crack on a ceramic insulator that's half in shade and half in direct sunlight, that lost data means lost defects. D-Log preserves approximately 2 additional stops of dynamic range compared to the Normal profile, giving your analysis team the latitude to pull details from both extremes in post-production.
Pro Tip: Pair D-Log with the Mavic 4 Pro's Hyperlapse mode when documenting long spans of conductor between poles. A time-compressed flyalong at 3 m/s gives asset managers an intuitive visual overview of line condition across an entire circuit segment—something static photos simply can't replicate. Set the Hyperlapse interval to 2 seconds for smooth results.
Flight Planning and Intelligent Features
ActiveTrack for Conductor Following
The Mavic 4 Pro's ActiveTrack system (built on the latest DJI subject tracking algorithms) can lock onto a conductor run and maintain a consistent offset distance as you fly along the line. This is particularly useful for:
- Maintaining consistent framing across hundreds of meters of conductor
- Freeing the pilot to monitor airspace rather than micro-managing camera angle
- Producing uniform datasets that are easier to process with automated defect detection software
However, ActiveTrack can lose lock on thin conductors against cluttered urban backgrounds. When this happens, switch to manual flight immediately—don't wait for the system to reacquire.
QuickShots for Pole-Top Documentation
While QuickShots are typically marketed as creative filmmaking tools, the Orbit mode is genuinely useful for 360-degree pole-top inspections. Configure a tight orbit radius of 5-8 meters around a pole top while recording in 4K at 30fps. The resulting footage gives analysts a complete view of:
- Cross-arm hardware condition
- Insulator attachment points
- Guy wire anchoring
- Wildlife guard placement
- Transformer mounting hardware
Common Mistakes to Avoid
1. Flying directly under high-voltage conductors. The electromagnetic field can interfere with the compass and IMU. Maintain a minimum 5-meter lateral offset from energized conductors rated above 69kV.
2. Ignoring wind patterns in urban canyons. Buildings create turbulent downdrafts and accelerated corridor winds. Check wind at ground level and at planned flight altitude before launch—they're often dramatically different.
3. Using Auto exposure for inspection imagery. Auto exposure shifts as the aircraft moves past different backgrounds (sky, buildings, vegetation), creating inconsistent data. Manual exposure ensures uniform image quality across the entire survey.
4. Skipping pre-mission compass calibration. Urban areas are magnetically noisy. Calibrate the compass at every new launch site, and do it at least 15 meters away from vehicles, manhole covers, and metal fences.
5. Neglecting to log environmental conditions. Temperature, humidity, wind speed, and light direction all affect both flight performance and image quality. Record them for every mission—your analysis team will thank you.
6. Over-relying on obstacle avoidance near thin wires. The system is a backup, not a primary safety measure. Your eyes, training, and situational awareness are Layer 3—and they're the most important layer.
Frequently Asked Questions
Can the Mavic 4 Pro detect thin power line wires with its obstacle avoidance sensors?
The omnidirectional sensing system can detect many wire types, but thin conductors (especially single ACSR wires under 10mm diameter) in certain lighting conditions may not register reliably. Always maintain manual control authority and never depend solely on automated avoidance when flying near energized lines. Treat the system as a safety net, not a replacement for pilot skill.
What's the best time of day to survey urban power lines with the Mavic 4 Pro?
Overcast days between 9:00 AM and 3:00 PM provide the most uniform lighting for defect documentation. Direct sunlight creates harsh shadows on pole hardware that even D-Log can struggle with. If you must fly on sunny days, plan your corridor direction so the sun illuminates the side of the infrastructure you're inspecting—never shoot directly into the sun unless you're specifically documenting conductor sag silhouettes.
How does electromagnetic interference from power lines affect the Mavic 4 Pro's GPS and compass?
High-voltage lines generate electromagnetic fields that can cause compass errors and GPS position drift. In my experience, maintaining at least 5 meters of clearance from conductors rated 69kV and above eliminates most interference issues. For lower-voltage distribution lines (4kV to 35kV), a 3-meter offset is typically sufficient. Always monitor the compass status indicator on the controller—if it shifts from green to yellow, increase your distance immediately.
Wrapping Up: Fly Smarter, Not Closer
Urban power line surveying with the Mavic 4 Pro rewards preparation over bravado. Configure your obstacle avoidance conservatively, master antenna positioning for maximum link reliability, shoot in D-Log for inspection-grade dynamic range, and respect the electromagnetic environment you're operating in. The aircraft gives you extraordinary capability—but that capability only translates to quality data when paired with disciplined operational protocols.
Ready for your own Mavic 4 Pro? Contact our team for expert consultation.