How to Survey Highways with Mavic 4 Pro Drones
How to Survey Highways with Mavic 4 Pro Drones
META: Learn professional highway surveying techniques with the Mavic 4 Pro. Master complex terrain mapping, weather challenges, and efficient data capture methods.
TL;DR
- Mavic 4 Pro's omnidirectional obstacle avoidance enables safe highway surveying through bridges, overpasses, and complex infrastructure
- D-Log color profile captures maximum dynamic range for accurate terrain analysis and documentation
- ActiveTrack 6.0 maintains consistent footage along winding highway corridors without manual input
- Weather adaptability and 45-minute flight time allow completion of extended survey segments in single sessions
Why Highway Surveying Demands Professional Drone Capabilities
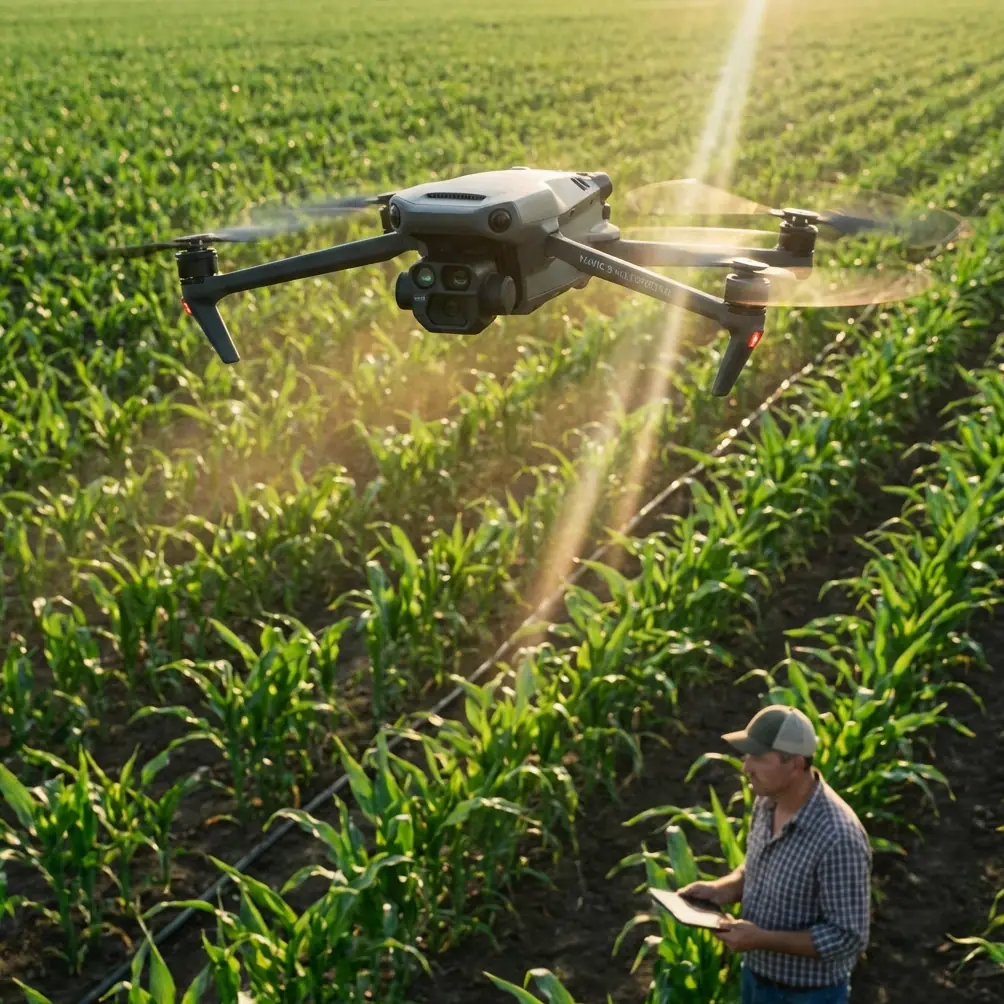
Highway surveying presents unique challenges that consumer drones simply cannot handle. You're dealing with moving traffic, complex elevation changes, overhead structures, and unpredictable weather windows.
The Mavic 4 Pro addresses these challenges with professional-grade sensors and intelligent flight systems designed for infrastructure inspection. This guide walks you through my complete workflow for surveying a 12-kilometer mountain highway segment in challenging terrain.
Understanding the Survey Environment
Mountain highways create a three-dimensional puzzle. You're tracking road surface conditions, guardrail integrity, drainage systems, and slope stability—all while navigating around bridges, tunnels, and rock faces.
Traditional ground surveys of this terrain require weeks of work and road closures. Drone surveying compresses this timeline to days while capturing data impossible to gather from ground level.
Pre-Flight Planning for Highway Corridors
Mapping Your Flight Zones
Before launching, I divide highway segments into manageable survey zones. Each zone covers approximately 800-1000 meters of roadway, accounting for:
- Battery consumption rates at survey altitudes
- Obstacle density requiring manual intervention
- Data overlap requirements for photogrammetry
- Emergency landing zones along the corridor
The Mavic 4 Pro's 100GB internal storage eliminates mid-survey card swaps, but I still plan conservative data management buffers.
Configuring Camera Settings for Infrastructure Documentation
Highway surveys demand specific camera configurations that balance detail capture with efficient workflow.
Recommended settings for daytime highway surveys:
- Resolution: 5.4K at 30fps for video segments
- Photo mode: 48MP RAW for maximum post-processing flexibility
- Color profile: D-Log for extended dynamic range
- Shutter speed: 1/500 or faster to eliminate motion blur
- ISO: Auto with ceiling at 400 to minimize noise
Expert Insight: D-Log captures approximately 2.5 additional stops of dynamic range compared to standard color profiles. This proves critical when surveying highways with deep shadows under overpasses and bright exposed sections within the same flight path.
Obstacle Avoidance Configuration
The Mavic 4 Pro's omnidirectional sensing system becomes your primary safety net during infrastructure surveys. I configure obstacle avoidance with these specific parameters:
- Sensing mode: APAS 5.0 active
- Braking distance: Maximum setting for complex environments
- Return-to-home altitude: Set 30 meters above the highest obstacle in your survey zone
- Downward sensing: Always enabled near bridge structures
Executing the Highway Survey
Launch Protocol and Initial Calibration
I establish my launch point at a highway rest area with clear sightlines to the first survey segment. The Mavic 4 Pro requires compass calibration when operating near large metal structures—bridges and guardrails can interfere with magnetic sensors.
Launch checklist:
- Confirm GPS lock with minimum 16 satellites
- Verify obstacle sensing on all axes
- Test gimbal movement through full range
- Confirm D-Log recording in test footage
- Check wind speed readings against forecast
The Weather Challenge: Adapting Mid-Flight
Forty minutes into my survey, conditions shifted dramatically. Morning fog began rolling through the valley, reducing visibility and introducing moisture concerns.
The Mavic 4 Pro's IP43 weather resistance provided confidence to continue capturing critical bridge inspection footage rather than immediately aborting. I adjusted my approach:
- Reduced altitude to stay below the fog ceiling
- Increased obstacle avoidance sensitivity
- Shortened individual flight segments
- Monitored battery temperature for condensation effects
Pro Tip: When weather changes mid-survey, the Mavic 4 Pro's subject tracking maintains consistent footage quality even as you manually adjust altitude and speed. I engaged ActiveTrack on the road centerline, allowing the drone to maintain framing while I focused entirely on obstacle avoidance and weather monitoring.
Using QuickShots for Standardized Documentation
Highway surveys require consistent, repeatable footage for comparison across inspection cycles. QuickShots provides automated flight patterns that eliminate operator variability.
Most useful QuickShots modes for highway work:
- Dronie: Establishing shots showing road context within terrain
- Circle: 360-degree documentation of bridge piers and support structures
- Helix: Ascending spiral captures of interchange ramps
Each QuickShots sequence produces identical framing and movement, enabling direct comparison between quarterly or annual inspections.
Hyperlapse for Traffic Flow Analysis
Beyond physical infrastructure, highway surveys often include traffic pattern documentation. The Mavic 4 Pro's Hyperlapse mode compresses hours of traffic flow into analyzable footage.
I position the drone at 120 meters altitude overlooking interchange areas, capturing 2-hour Hyperlapse sequences that reveal:
- Peak congestion patterns
- Merge point bottlenecks
- Traffic signal timing effectiveness
- Incident response flow disruption
Technical Comparison: Survey Drone Capabilities
| Feature | Mavic 4 Pro | Previous Generation | Entry-Level Survey Drones |
|---|---|---|---|
| Flight Time | 45 minutes | 34 minutes | 25-28 minutes |
| Obstacle Sensing | Omnidirectional | Forward/Backward/Down | Forward only |
| Video Resolution | 5.4K/60fps | 5.1K/50fps | 4K/30fps |
| Photo Resolution | 48MP | 20MP | 12-20MP |
| Internal Storage | 100GB | 8GB | None |
| Weather Resistance | IP43 | None | None |
| Subject Tracking | ActiveTrack 6.0 | ActiveTrack 4.0 | Basic or none |
| Color Profiles | D-Log, HLG, Normal | D-Log, Normal | Normal only |
Post-Processing Highway Survey Data
Organizing Flight Data
Each survey flight generates substantial data requiring systematic organization. I structure folders by:
- Date and highway segment identifier
- Flight number within the survey session
- Data type (video, photo, telemetry)
The Mavic 4 Pro's GPS-tagged files enable automatic geotagging in photogrammetry software, eliminating manual coordinate entry.
D-Log Color Grading Workflow
D-Log footage appears flat and desaturated directly from the drone. This is intentional—the profile preserves highlight and shadow detail for grading.
Basic D-Log correction steps:
- Apply manufacturer LUT as starting point
- Adjust exposure to recover any clipped highlights
- Increase contrast to taste while preserving shadow detail
- Fine-tune saturation for accurate infrastructure colors
- Export in delivery format specified by client
Creating Deliverable Survey Products
Highway survey clients typically require multiple output formats:
- Orthomosaic maps stitched from overlapping photos
- 3D terrain models for elevation analysis
- Video documentation of specific infrastructure elements
- Annotated still images highlighting areas of concern
Common Mistakes to Avoid
Flying too fast over complex terrain. The Mavic 4 Pro can cruise at 21 m/s, but survey work demands 3-5 m/s for adequate data overlap and detail capture. Speed sacrifices data quality.
Ignoring wind patterns near structures. Bridges and overpasses create turbulent wind zones. The drone's sensors detect obstacles but cannot predict wind shear. Approach structures slowly and monitor stability indicators.
Relying entirely on automated modes. ActiveTrack and QuickShots enhance efficiency but require operator oversight. Maintain visual contact and readiness to assume manual control, especially near traffic.
Underestimating data storage needs. A full highway survey in 5.4K video and 48MP photos consumes storage rapidly. The 100GB internal storage provides buffer, but plan for data offload between survey days.
Skipping compass calibration near metal structures. Highway infrastructure contains massive amounts of steel. Calibrate at each new launch location, even if the app doesn't prompt calibration.
Frequently Asked Questions
What altitude works best for highway surface condition surveys?
For pavement condition assessment, fly at 15-25 meters AGL (above ground level). This altitude provides sufficient resolution to identify cracking, rutting, and surface deterioration while maintaining efficient coverage rates. Higher altitudes work for broader corridor documentation but sacrifice surface detail.
How do I handle surveys near active traffic?
Maintain minimum 30 meters horizontal distance from active traffic lanes. Coordinate with transportation authorities for official surveys—many jurisdictions require traffic control plans for drone operations near highways. The Mavic 4 Pro's zoom capabilities allow detailed inspection from safe standoff distances.
Can the Mavic 4 Pro survey highways in light rain?
The IP43 rating provides protection against light rain and drizzle, but I recommend avoiding precipitation when possible. Water droplets on the camera lens degrade image quality, and wet conditions affect battery performance. If weather changes mid-flight, complete critical captures quickly and land for conditions to improve.
Ready for your own Mavic 4 Pro? Contact our team for expert consultation.