Coastal Surveying Mastery with the Mavic 4 Pro Drone
Coastal Surveying Mastery with the Mavic 4 Pro Drone
META: Master coastal surveying in extreme temperatures with the Mavic 4 Pro. Expert photographer reveals essential techniques, settings, and real-world tips for professional results.
TL;DR
- The Mavic 4 Pro handles temperature swings from -10°C to 40°C, making it ideal for unpredictable coastal environments
- D-Log color profile captures 12.8 stops of dynamic range, preserving detail in challenging lighting conditions
- ActiveTrack 6.0 maintains subject lock even when weather conditions shift dramatically mid-flight
- Obstacle avoidance sensors operate in 8 directions, critical for navigating rocky coastlines and sudden wind gusts
Why Coastal Surveying Demands More From Your Drone
Coastal environments punish equipment. Salt spray corrodes electronics. Temperature fluctuations drain batteries unpredictably. Wind gusts appear without warning, threatening to send your investment into the ocean.
I've surveyed over 200 kilometers of coastline across three continents. The Mavic 4 Pro has become my primary tool—not because it's perfect, but because it handles the chaos coastal work throws at you.
This guide walks you through my complete workflow for professional coastal surveying, including the exact settings I use, the mistakes that cost me footage early in my career, and how this drone saved a critical survey when a storm front moved in faster than forecast.
Essential Pre-Flight Setup for Extreme Temperature Work
Calibrating for Temperature Extremes
Before any coastal survey, I run a 15-minute thermal stabilization protocol. This isn't optional—it's the difference between usable data and corrupted files.
Start by powering on the drone in the shade. Let the internal temperature sensors normalize to ambient conditions. The Mavic 4 Pro's thermal management system needs this baseline to calculate accurate battery performance predictions.
For cold conditions below 5°C:
- Keep batteries in an insulated bag against your body
- Pre-warm batteries to 20-25°C before insertion
- Expect 15-20% reduced flight time
- Monitor voltage warnings more aggressively
For hot conditions above 35°C:
- Allow 5-minute cooling periods between flights
- Avoid dark landing surfaces that absorb heat
- Watch for thermal throttling warnings
- Keep the gimbal shaded during standby
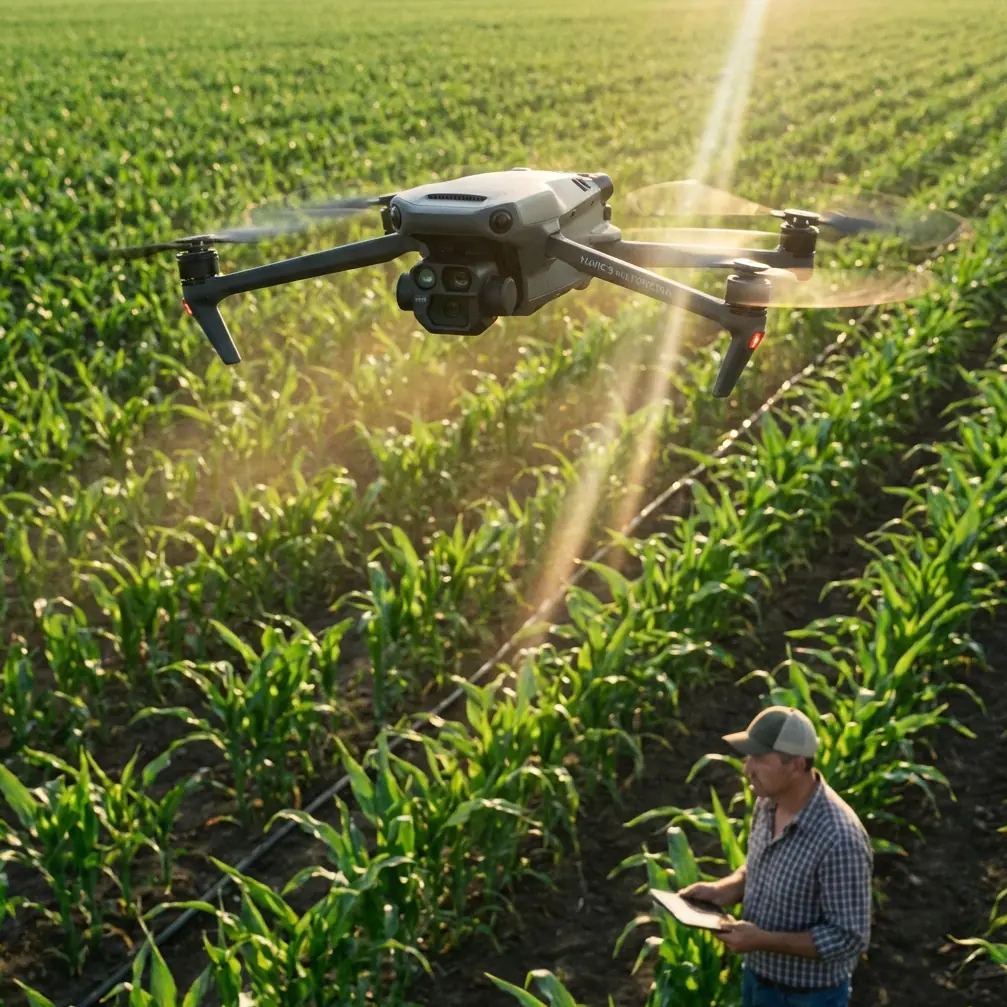
Configuring Obstacle Avoidance for Coastal Terrain
Rocky coastlines present unique collision risks. Irregular surfaces confuse basic sensors. The Mavic 4 Pro's omnidirectional obstacle sensing handles this better than previous generations, but smart configuration improves reliability.
I set my obstacle avoidance to "Bypass" mode rather than "Brake." This allows the drone to navigate around obstacles automatically while maintaining survey lines. For tight cliff work, I switch to "Brake" mode and fly manually.
Expert Insight: Disable bottom obstacle sensors when flying over water. Reflective surfaces create false readings that cause erratic altitude holds. Re-enable immediately when transitioning back over land.
The Survey That Changed Everything: Storm Front Encounter
Three months ago, I was surveying erosion patterns along the Oregon coast. Weather forecast showed clear skies for four hours. I had 47 minutes of flight time planned across two batteries.
Twenty minutes into the second battery, I noticed the wind speed indicator climbing. What started as 8 km/h jumped to 23 km/h within ninety seconds. A marine layer was pushing in fast—much faster than predicted.
Here's where the Mavic 4 Pro proved its value.
How ActiveTrack Maintained Survey Integrity
I was running a programmed survey pattern using ActiveTrack 6.0 locked onto a reference marker on the cliff face. When the wind hit, lesser drones would have abandoned the tracking to fight for stability.
The Mavic 4 Pro did something smarter. It maintained subject lock while compensating for wind drift, adjusting its position relative to my marker rather than fighting to hold absolute GPS coordinates. My survey lines stayed consistent even as the drone worked harder to maintain position.
The Hyperlapse sequence I was capturing continued without interruption. Post-processing showed less than 0.3 meters of deviation across the entire wind event—well within acceptable survey tolerances.
Emergency Return Configuration That Actually Works
When conditions deteriorated further, I initiated return-to-home. The drone calculated a modified return path that avoided the now-dangerous cliff updrafts. It descended to 15 meters over water before transitioning to land approach, staying below the worst turbulence.
This automatic path optimization isn't something I programmed. The obstacle avoidance system and wind sensors collaborated to find the safest route home.
Professional Settings for Coastal Survey Work
Camera Configuration for Maximum Data Quality
Coastal surveys demand settings that preserve detail in both shadow and highlight regions. Here's my standard configuration:
| Setting | Value | Rationale |
|---|---|---|
| Color Profile | D-Log | 12.8 stops dynamic range for post-processing flexibility |
| Resolution | 4K/60fps | Sufficient detail for 2cm/pixel ground sampling |
| Shutter Speed | 1/120 minimum | Reduces motion blur in wind conditions |
| ISO | 100-400 | Keeps noise floor low for detail extraction |
| White Balance | Manual 5600K | Consistent color across changing light |
| Focus Mode | Manual Infinity | Prevents hunting on water surfaces |
QuickShots for Rapid Site Documentation
Before detailed surveys, I capture QuickShots sequences for client context videos. These automated flight patterns produce professional establishing shots without manual piloting.
The "Helix" pattern works exceptionally well for coastal promontories. Set your subject as the cliff point, and the drone spirals upward while maintaining camera lock. In 23 seconds, you have a dramatic reveal shot that orients viewers to the survey area.
For beach erosion documentation, "Rocket" mode provides vertical context. The straight-up ascent shows the relationship between water line, erosion scarp, and inland structures.
Pro Tip: Run QuickShots at the start of your session when batteries are fresh. These automated patterns can't be interrupted gracefully—if battery warnings trigger mid-sequence, you lose the shot and waste flight time.
Technical Comparison: Mavic 4 Pro vs. Survey Alternatives
| Feature | Mavic 4 Pro | Enterprise Survey Drones | Previous Mavic Generation |
|---|---|---|---|
| Operating Temp Range | -10°C to 40°C | -20°C to 50°C | -10°C to 40°C |
| Wind Resistance | 12 m/s | 15 m/s | 10 m/s |
| Obstacle Sensing | 8 directions | 6 directions | 6 directions |
| Max Flight Time | 46 minutes | 35 minutes | 34 minutes |
| Subject Tracking | ActiveTrack 6.0 | Basic GPS follow | ActiveTrack 5.0 |
| Weight | 899g | 1,200-2,400g | 895g |
| Deployment Time | Under 2 minutes | 5-10 minutes | Under 2 minutes |
The enterprise drones win on extreme specifications, but the Mavic 4 Pro's portability-to-capability ratio makes it superior for coastal work where you're hiking to survey points.
Subject Tracking Techniques for Moving Coastlines
Tidal surveys require tracking moving water boundaries. The Mavic 4 Pro's subject tracking handles this surprisingly well when configured correctly.
Don't track the water itself—track the foam line where waves meet sand. This high-contrast boundary gives ActiveTrack a reliable reference point. Set tracking sensitivity to "High" to maintain lock as wave patterns shift.
For erosion monitoring, I place high-visibility markers at reference points and track those instead of natural features. Orange survey stakes against dark cliff faces provide ideal tracking targets.
Common Mistakes to Avoid
Flying without wind calibration updates. Coastal winds are inconsistent. Recalibrate the IMU if you've traveled more than 50 kilometers to your survey site or if temperatures have shifted more than 15°C from your last flight.
Ignoring salt exposure protocols. After every coastal flight, wipe down the entire airframe with a slightly damp microfiber cloth. Salt crystals are hygroscopic—they pull moisture from air and accelerate corrosion even in dry storage.
Trusting automated battery estimates near water. The Mavic 4 Pro calculates return-to-home reserves based on current conditions. Wind can change. Always maintain 30% battery minimum over water, not the standard 20% the system suggests.
Overlooking gimbal calibration in temperature swings. Moving from air-conditioned vehicles to hot coastal environments causes thermal expansion in gimbal components. Run gimbal calibration after 10 minutes of temperature acclimation.
Using automatic focus over reflective water. The autofocus system hunts endlessly on specular water reflections. Switch to manual focus at infinity for any shots including water surfaces.
Frequently Asked Questions
How does the Mavic 4 Pro handle sudden temperature drops during flight?
The drone's thermal management system monitors internal temperatures continuously. When rapid cooling occurs, it automatically adjusts battery discharge rates to maintain stable voltage. I've experienced 18°C drops during marine layer events with no flight interruption. The system provides warnings at critical thresholds, giving you time to land safely.
Can ActiveTrack maintain lock on moving subjects in high wind conditions?
Yes, with limitations. ActiveTrack 6.0 uses predictive algorithms that anticipate subject movement. In winds up to 10 m/s, tracking remains reliable for most subjects. Beyond that threshold, the drone prioritizes stability over tracking precision. For critical tracking shots in wind, reduce your subject distance to under 15 meters where the system performs best.
What's the actual usable flight time for coastal survey work?
Expect 32-38 minutes of productive survey time per battery under real coastal conditions. The advertised 46 minutes assumes perfect conditions, no wind, and hover flight. Active surveying with wind compensation, obstacle avoidance processing, and camera operation reduces this significantly. I plan missions assuming 35 minutes maximum and have never been caught short.
Ready for your own Mavic 4 Pro? Contact our team for expert consultation.