How to Use Mavic 4 Pro Around Wildlife in Dusty Conditions
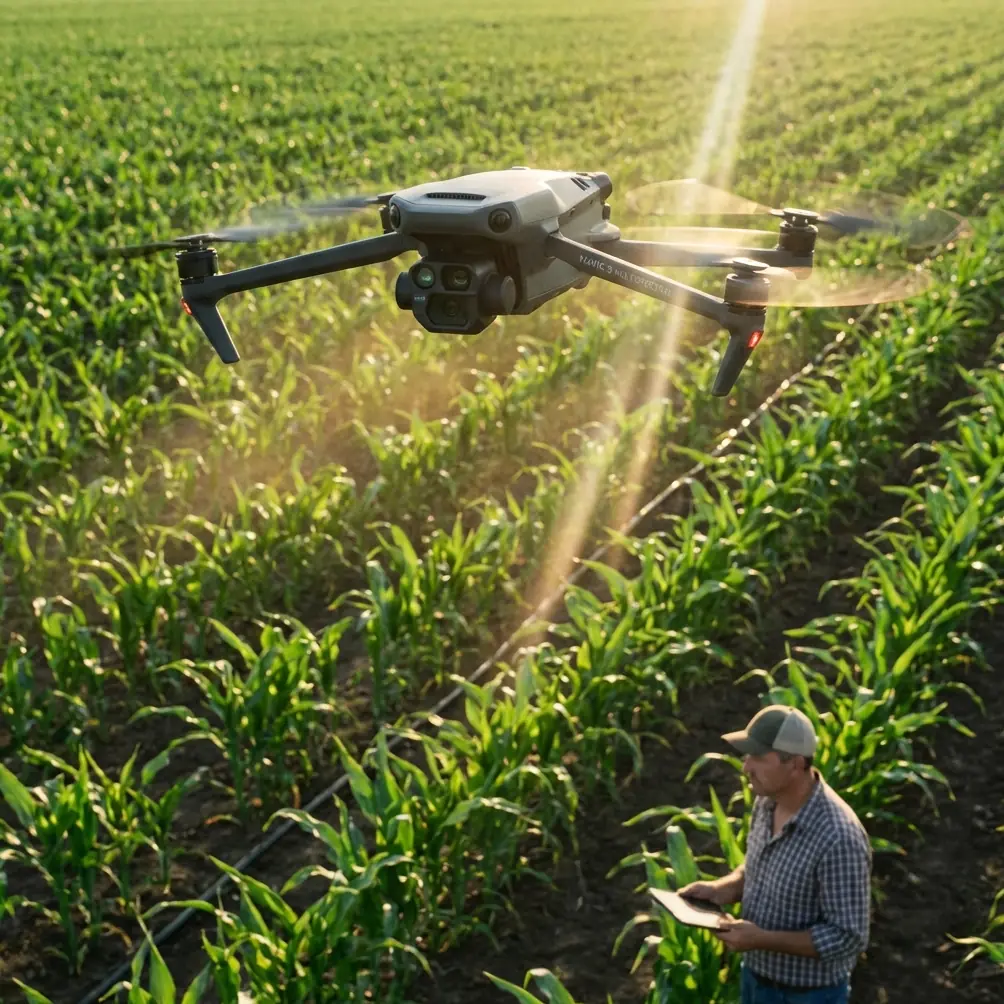
How to Use Mavic 4 Pro Around Wildlife in Dusty Conditions: Safe Flying, Clean Footage, and Better Signal
META: A practical Mavic 4 Pro tutorial for dusty wildlife work, covering obstacle avoidance, ActiveTrack, D-Log, Hyperlapse, QuickShots, and antenna positioning for stable range and safer flights.
Dust changes everything.
It softens contrast, clogs moving parts, confuses vision sensors, and turns what looks like a routine wildlife shoot into a test of discipline. If you’re planning to use a Mavic 4 Pro around wildlife in dusty terrain, the goal is not just getting airborne and bringing back attractive footage. The real job is balancing image quality, aircraft reliability, and animal welfare without letting the environment punish sloppy habits.
One clarification up front: for civilian wildlife fieldwork, a Mavic 4 Pro is suited to observation, habitat documentation, and visual monitoring. It is not a spraying platform. If your project involves wildlife management in dry, dusty areas, the drone’s strength is in aerial assessment and imaging, not liquid application. That distinction matters because it changes how you plan the mission, how low you fly, and how much rotor wash you allow near animals and loose soil.
I’ve spent enough time around cameras to know that “good conditions” are overrated. Dust, glare, moving subjects, and uneven terrain are exactly where a premium camera drone earns its place. But only if you use its tools properly.
Start with the mission, not the mode
A lot of pilots launch first and solve problems in the air. Around wildlife, especially in dry environments, that’s backwards.
Before powering up the Mavic 4 Pro, define which of these jobs you’re actually doing:
- locating animals over a large area
- observing behavior without disturbing movement patterns
- collecting cinematic footage for conservation storytelling
- documenting terrain, water access, or habitat stress
- recording repeatable visual passes for comparison over time
Each objective points to different flight settings. Subject tracking sounds useful for everything, but it isn’t always the best choice when shrubs, dust plumes, and low-angle sun can interfere with clean visual recognition. QuickShots may create elegant motion, yet they can also produce flight paths that are too close or too dramatic for sensitive animals. Hyperlapse can be excellent for showing landscape change, but only when the route is planned well clear of birds, tree lines, and thermal turbulence.
The aircraft has the intelligence to automate a lot. Your job is deciding when automation helps and when it adds risk.
Dust is not just a cleanliness issue
Pilots often think of dust as an after-flight maintenance problem. In reality, it affects the whole mission.
In dry wildlife areas, dust matters in four operational ways:
1. Vision-based systems can lose confidence
Obstacle avoidance depends on sensors interpreting the environment correctly. Fine airborne dust, flat light, and low-texture terrain can reduce how clearly the system “sees” branches, rocks, fencing, or scrub. That does not mean obstacle avoidance is useless. It means you should treat it as a support layer, not a promise.
Operational significance: if you’re flying near brush lines or isolated trees while tracking an animal, don’t assume the drone will always read every obstacle perfectly in dusty haze. Build wider margins than you would on a clean coastal shoot.
2. Rotor wash can create a self-made visibility problem
Flying low over dusty ground can kick up a cloud that affects footage and sensor confidence at the same time. It also risks stressing wildlife by adding noise and debris.
Operational significance: a slightly higher altitude often gives you cleaner footage, steadier tracking, and less disturbance. The best wildlife work is frequently the least intrusive.
3. Dust exaggerates bad landing habits
A rushed ground landing in powdery soil is one of the easiest ways to expose the aircraft to unnecessary contamination.
Operational significance: use a clean landing pad, a firm case lid, or hand-catch only if you are properly trained and conditions allow it safely. Keep the motors away from loose dust whenever possible.
4. Contrast drops fast
Dust in the air can flatten scenes and reduce color separation. That’s where recording choices matter.
Operational significance: if you want flexibility in post, D-Log gives you room to recover highlights and shape muted scenes more carefully than a heavily baked profile. In dry, bright environments, that extra grading latitude can be the difference between washed-out footage and something usable for publication.
Wildlife first: distance is part of your technique
There’s a temptation to use a high-end drone as a shortcut to intimacy. Resist that.
The Mavic 4 Pro’s camera system and intelligent tracking features are most valuable when they let you stay farther away. Subject tracking and ActiveTrack are not just convenience tools for solo operators. In wildlife work, they can reduce stick corrections and help you maintain a smoother, more consistent offset from the subject.
That matters because erratic pilot inputs often disturb animals more than the aircraft’s presence alone. A drone that surges, brakes, yaws abruptly, or repeatedly repositions overhead can alter behavior quickly.
Use ActiveTrack when:
- the animal is moving predictably in open terrain
- the route is clear of branches, wires, and abrupt elevation changes
- light and contrast allow the drone to identify the subject cleanly
- you can maintain a respectful standoff distance
Avoid relying on it when:
- the subject disappears behind brush repeatedly
- multiple animals overlap visually
- dust trails obscure body shape
- terrain clutter increases collision risk
The point is not to prove the feature works. The point is to gather usable footage without changing what the animal was doing before you arrived.
Obstacle avoidance helps, but route planning matters more
Obstacle avoidance is one of the most searched Mavic topics for a reason. It reduces workload. It can save aircraft. It is especially useful when attention is split between composition, animal movement, and airspace awareness.
But dusty wildlife flying tends to expose the limit of every automated safeguard.
If you’re following a moving subject along a scrub edge, the aircraft may need to distinguish between fine branches, irregular shadows, and blowing debris. Even in a capable drone, that can become ambiguous. The better approach is to plan camera angles that keep the aircraft on the clean side of the terrain.
A few practical examples:
- If animals are moving parallel to a tree line, fly outside the line, not between scattered trees.
- If the ground is extremely loose, avoid low frontal passes that force the drone to push dust toward itself.
- If the light is harsh and shadows are deep, choose a higher, more lateral angle that keeps obstacle geometry easier to read.
- If the area includes dead branches or thin fencing, assume manual caution is still your primary protection.
Obstacle avoidance is there to assist your judgment. It does not replace route discipline.
Antenna positioning advice for maximum range
This is the small detail pilots ignore until signal quality starts bouncing.
For the strongest connection, antenna positioning should favor alignment between the controller and the aircraft, not direct “pointing” like a flashlight. Keep the broad face of the controller antennas oriented toward the drone’s position rather than aiming the antenna tips straight at it. In practical terms, think side-on exposure to the aircraft, with your body not blocking the signal path.
Operational significance: in dusty wildlife zones, you’re often dealing with rolling ground, sparse vegetation, vehicles, and improvised field positions. A weak signal is not always a distance problem. It can be a human-positioning problem. If the drone moves low behind a rise or you turn your body while watching animals, signal quality can dip even when the aircraft is well within a normal working envelope.
A few habits make a real difference:
- face the aircraft whenever possible during critical shots
- avoid standing behind vehicles, metal fencing, or structures
- raise the controller slightly if vegetation is blocking line of sight
- if the drone is far out and low, reposition yourself before the signal degrades
- don’t let your torso sit directly between the controller and aircraft
Maximum range in the field is usually the result of clean line of sight and correct antenna orientation, not wishful thinking.
If you need field-specific setup help, flight planning suggestions, or accessory recommendations, this direct WhatsApp contact is an easy way to ask practical questions before launch.
Camera settings that work in dry, bright habitats
Dusty conditions create a visual trap: the scene looks dramatic to your eyes but records flatter than expected. The answer is not always more contrast in-camera.
For wildlife documentation and polished conservation visuals, D-Log is often the smarter choice. It preserves more grading flexibility in bright skies, pale ground, and reflective surfaces. When dust haze lifts the blacks and dulls the midtones, you’ll appreciate that flexibility later.
Here’s a sensible approach:
- use D-Log when the goal is edited footage with careful color work
- use a standard profile when quick delivery matters more than grading latitude
- watch shutter speed if animals are moving quickly; dust and motion together can turn into smear
- protect highlights first in harsh daylight, especially around pale sand or dry grass
This is one of those areas where the drone’s imaging capability has direct operational value. You are not just collecting prettier files. You are preserving detail in difficult lighting that may matter for habitat interpretation, media use, or comparative records.
QuickShots and Hyperlapse: use them selectively
QuickShots can be useful in wildlife-adjacent storytelling, particularly when the subject is not an animal but a landscape feature such as a waterhole, migration corridor, dry riverbed, or restoration area. They give solo operators clean, repeatable moves with minimal stick input.
What they are not: a license to orbit closely around wildlife.
The same goes for Hyperlapse. It’s excellent for showing shifting light, vehicle approach to a monitoring site, or the visual scale of a dry habitat. It can also tell a powerful story about environmental pressure over time. But if animals are nearby, repeated automated motion over one area may be more intrusive than a short manual pass from a greater distance.
Use these features for context, not pressure.
A good field sequence often looks like this:
- high establishing shot of habitat
- controlled tracking pass at respectful distance
- detail shot of terrain or environmental condition
- optional Hyperlapse from a fixed, non-intrusive vantage point after the animals have moved off
That gives you narrative variety without turning the aircraft into a constant disturbance.
Subject tracking is strongest when you simplify the scene
Pilots sometimes blame tracking when the real issue is scene complexity. ActiveTrack and similar subject-tracking tools perform best when the target is visually distinct and the background is not chaotic.
Dust makes backgrounds less readable. Brush creates occlusion. Similar-colored animals can blend into the terrain. So the smartest move is often to simplify before you activate the feature.
Try this:
- start tracking when the subject is clearly separated from background clutter
- avoid initiating track during a crossing through shadows or airborne dust
- give the system a clean side profile or top-down visual, depending on terrain and movement
- be ready to cancel and resume manual control immediately if the route tightens
This is not about mistrusting the drone. It’s about understanding what helps the system succeed.
After-flight care matters more in dust than most pilots admit
A Mavic 4 Pro used in dry wildlife areas should be treated like field equipment, not a toy that goes back into the bag as-is.
After each mission:
- inspect the airframe and gimbal area for fine dust
- check propellers carefully
- clean gently before contamination builds
- examine vents and landing areas
- review footage for any recurring haze or vibration signatures that could indicate dust interference or poor launch technique
A clean aircraft is not just nice to have. It protects sensor reliability, image stability, and long-term consistency.
The real skill is restraint
The most impressive Mavic 4 Pro wildlife footage in dusty conditions usually comes from pilots who did less, not more.
They stayed higher. They avoided dramatic low passes. They used obstacle avoidance as backup, not bravery. They trusted ActiveTrack only when the subject and terrain made sense. They recorded in D-Log because dust and bright light are hard on footage. They used QuickShots and Hyperlapse for habitat context rather than forcing automation onto every scene. And they paid attention to antenna orientation because stable signal is part of smooth, low-stress flying.
If your aim is wildlife work with a Mavic 4 Pro, think like a field operator first and a content creator second. The footage improves when the aircraft feels almost absent.
Ready for your own Mavic 4 Pro? Contact our team for expert consultation.