Mavic 4 Pro for Remote Solar Farm Work: The Pre
Mavic 4 Pro for Remote Solar Farm Work: The Pre-Flight Accuracy Habits That Matter
META: A practical expert guide to using Mavic 4 Pro around remote solar farms, with pre-flight cleaning, terrain-based planning, and mapping accuracy targets grounded in photogrammetry standards.
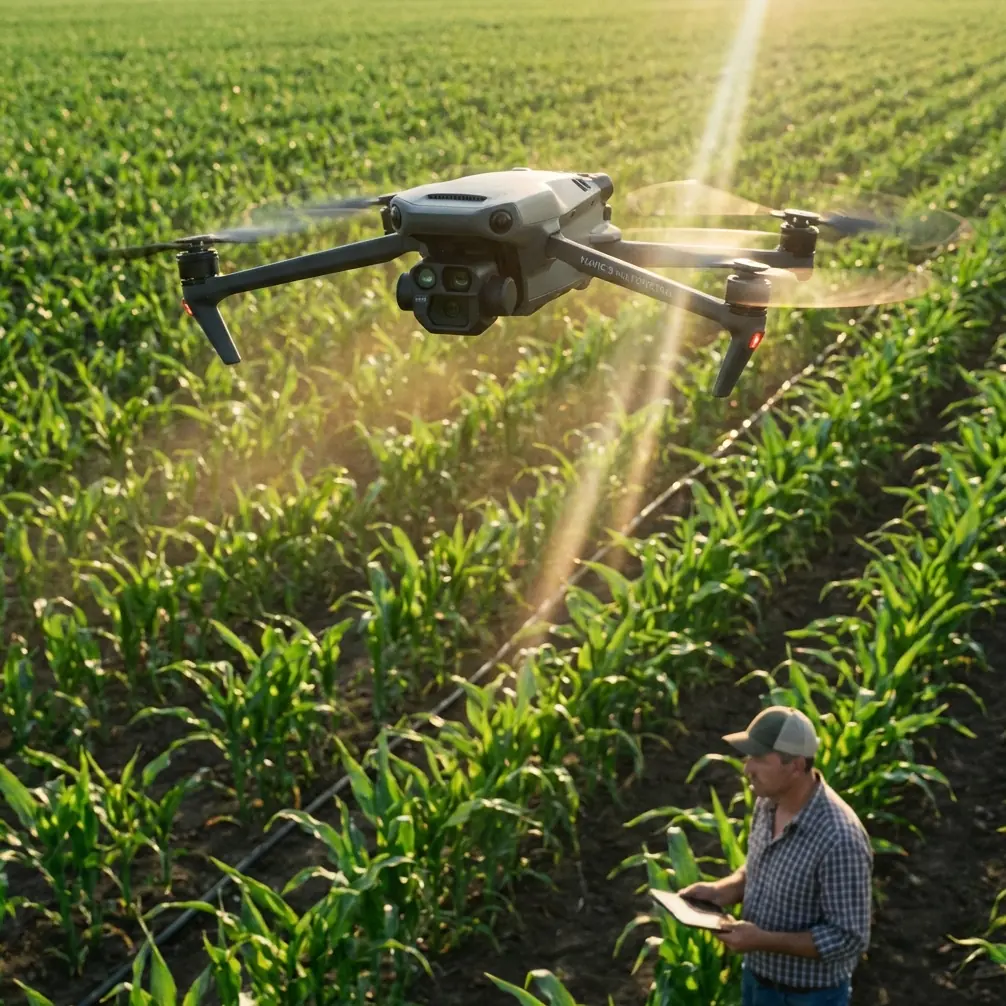
Remote solar farms look simple from altitude. Long rows. Repetition. Open sky. In practice, they can be unforgiving places to fly.
Dust builds up fast. Panel glare confuses visual perception. Terrain is rarely as flat as it first appears. And when your Mavic 4 Pro is supporting inspection, planning, vegetation management, or spray-route scouting around large solar arrays, small errors in setup can ripple into bad data, awkward flight behavior, or missed problem areas.
That is why the real conversation around Mavic 4 Pro for solar work should not start with cinematic modes or headline features. It should start on the ground, before takeoff, with the discipline that keeps obstacle sensing reliable and the mission data usable.
This is the workflow I would use.
Start with the one step pilots skip: clean the vision system before every solar site flight
If you fly remote solar facilities often, you already know the environment is hard on aircraft surfaces. Fine dust, dry residue, pollen, and road grit settle on everything. On a platform like the Mavic 4 Pro, that matters most at the camera glass, obstacle sensing elements, and any optical surfaces used for stabilization and positioning.
People tend to think of pre-flight cleaning as cosmetic. It is not. It is operational.
When you fly over or beside solar tables, obstacle avoidance and tracking-related functions depend on clear optical input. Even if you are not leaning heavily on automated modes like ActiveTrack, subject tracking, QuickShots, or Hyperlapse, the underlying sensing system still benefits from clean surfaces. A smudged or dusty sensor can reduce confidence in the aircraft’s environmental read. Near repetitive panel geometry, support posts, cable runs, fencing, and maintenance vehicles, that margin matters.
My rule is simple:
- Clean lenses and sensing windows before powering on
- Inspect for dust streaks after transport
- Recheck after any landing in loose soil or gravel
- Never assume “it looks fine” is good enough in high-glare solar environments
The reason this is especially relevant for solar farms is visual complexity. Panel rows create repetitive patterns. Reflected light can wash parts of a scene. If your aircraft is already working with reduced optical clarity because of dust, you are stacking uncertainty on top of an already tricky environment.
A two-minute wipe-down is one of the cheapest risk reductions in the entire operation.
Do not treat every solar site as flat land
This is where mapping standards become more useful than marketing copy.
The reference material breaks terrain into four slope classes:
- Flat ground: less than 3°
- Hilly terrain: 3° to less than 10°
- Mountain terrain: 10° to less than 25°
- Steep mountain terrain: 25° and above
That classification sounds academic until you apply it to remote solar projects. Many utility-scale sites are not truly flat. They may have graded access roads, drainage channels, berms, retention zones, perimeter embankments, or undulating land under long panel corridors. A site that feels “mostly level” on foot may still fall into the hilly category operationally.
Why does that matter for a Mavic 4 Pro mission?
Because flight planning, overlap consistency, sensor geometry, and obstacle margin all change with terrain. If you build a mission as if the whole site were under 3° of slope, but sections actually fall into the 3° to 10° range, your image scale can vary more than expected. That affects measurement confidence, defect localization, and reconstruction quality in post-processing.
For solar farm work, I recommend classifying the site first, not the drone mission first.
Before your route is built, ask:
- Is the working area truly under 3° across the entire block?
- Are there drainage cuts or perimeter rises that push parts into 3° to 10°?
- Are there service roads, battery storage pads, or inverter stations on elevated benches?
- Are there fence lines, poles, or comms structures that change safe return routing?
Once you think this way, the Mavic 4 Pro becomes more than a flying camera. It becomes a data collection tool that has to respect ground geometry.
Accuracy targets should drive altitude and mission design
One of the most useful details from the source document is not flashy at all: the positional error standards tied to mapping scale.
For urban, industrial, flat, and hilly areas, the extracted values include:
- At 1:500 scale, point position mean error of ±0.15 m and adjacent feature spacing mean error of ±0.12 m
- At 1:1000 scale, point position mean error of ±0.30 m and adjacent feature spacing mean error of ±0.24 m
- At 1:2000 scale, point position mean error of ±0.60 m and adjacent feature spacing mean error of ±0.48 m
Those numbers are not there to impress surveyors. They tell you how strict your workflow needs to be if your Mavic 4 Pro output is meant to support real asset decisions.
Around solar farms, this becomes practical fast.
If your deliverable is a general visual overview for maintenance planning, a looser tolerance may be acceptable. If your output is being used to identify exact panel-row anomalies, drainage encroachment, fence offsets, cable trench changes, or vegetation spread relative to infrastructure, your tolerance tightens. Suddenly, the difference between around 0.15 m and 0.30 m is not abstract. It affects whether a detected issue is easy to locate on site or requires time-consuming ground verification.
The operational takeaway is this:
Do not launch and then decide what level of mapping quality you wanted. Define the positional expectation first, then set flight altitude, image overlap, route density, and ground control strategy around it.
A Mavic 4 Pro can collect excellent site intelligence, but only if the mission profile matches the intended measurement confidence.
Remote sites often belong in the “difficult area” mindset
The source also distinguishes more challenging environments, including difficult or obscured areas, where tolerated error becomes wider. For example:
- At 1:500 scale in difficult or obscured areas, point position mean error is ±0.23 m and adjacent feature spacing mean error is ±0.18 m
- At 1:1000 scale, those values widen to ±0.45 m and ±0.36 m
- At 1:2000 scale, they extend to ±0.90 m and ±0.72 m
There is also a note allowing planar error in especially difficult regions such as deserts, gobi, marsh, and similar large-area environments to be relaxed by 0.5 times.
This matters more to remote solar work than many pilots realize.
A solar farm may not be in a literal desert, but remote power sites often share the same operational traits: sparse landmarks, airborne dust, repetitive visual texture, heat shimmer, and long distances between setup points. Those conditions can degrade consistency in data capture and make it harder to maintain ideal reference quality.
So while the Mavic 4 Pro may perform well, your planning should borrow the caution used for difficult terrain:
- Build in more battery reserve than your straight-line map suggests
- Reconfirm image quality after the first pass, not after the whole mission
- Watch for reduced contrast during harsh midday glare
- Consider segmenting very large blocks rather than forcing one broad capture pattern
- Verify return and contingency paths away from panel rows, not just over them
This is especially smart when the drone is supporting route assessment before spraying operations or vegetation control tasks around solar infrastructure. The safer and cleaner the data capture, the better your downstream work.
Obstacle avoidance is helpful, but not a substitute for route discipline
The Mavic 4 Pro audience often talks about obstacle avoidance as if it solves site complexity by default. Around solar assets, that is not how I see it.
Yes, advanced sensing is useful. It can help in transitions near fencing, service structures, parked vehicles, and changing terrain edges. But the panel field itself introduces a different kind of challenge. Repetition can affect operator perception. Low-angle light can exaggerate or hide spacing. Reflective surfaces can create visual clutter.
That means obstacle avoidance should be treated as one layer, not the layer.
For remote solar farm operations, I would structure the route so the aircraft is never relying on last-second sensing to rescue a poor line choice. Fly with intention:
- Establish clean corridors for lateral movement
- Avoid unnecessary low-altitude diagonal passes across array rows
- Use predictable turns at row ends
- Keep manual takeover mentally available at all times
- Separate cinematic capture from measurement capture when possible
This is also why I do not encourage using modes like QuickShots or Hyperlapse during technical survey segments. They have a place for stakeholder presentation and progress storytelling, but not when your main goal is repeatable spatial data. If you do use them, make them a separate mission after the work product is already secured.
D-Log can help documentation, but only if you know why you are using it
A lot of Mavic 4 Pro users love D-Log for grading flexibility. Fair enough. But on a solar farm, color workflow should serve clarity, not fashion.
If you are documenting surface conditions, vegetation growth, drainage staining, road erosion, or construction changes, D-Log can preserve tonal information that might otherwise clip in bright, high-contrast scenes. Solar sites are full of those scenes. White service roads, dark panel faces, reflective highlights, and shadowed under-panel zones can all appear in the same frame.
The catch is that flat profile footage only helps if your processing workflow is consistent. If the team reviewing the footage cannot quickly interpret what they are seeing, the extra latitude becomes a burden.
My advice:
Use D-Log when the footage will be reviewed or processed by people who understand color-managed workflow. Use a more direct profile when the output is for immediate maintenance interpretation. The Mavic 4 Pro gives you options, but clarity of purpose should decide the setting.
Subject tracking and ActiveTrack are useful at the edge of the job, not the center of it
There are valid civilian uses for tracking features around solar farms. Following a maintenance vehicle along an access road for progress documentation is one example. Capturing perimeter inspection movement is another. ActiveTrack can support those tasks well when the route is simple and the environment is controlled.
But I would not build a core technical site workflow around tracking automation in dense asset zones.
Why? Because repeatability beats convenience when infrastructure is involved. Manual or planned-path capture gives you cleaner consistency over row spacing, angle, and altitude. Tracking is better used for context footage, progress reports, and training visuals than for the data pass itself.
That distinction matters if you want your Mavic 4 Pro flights to be more than impressive clips.
A practical field checklist for Mavic 4 Pro at remote solar farms
Here is the short version I would hand to a crew lead:
1. Clean first
Wipe camera and sensing surfaces before startup. Remote dust is the silent enemy of obstacle sensing reliability.
2. Classify terrain
Treat under 3° as flat. Treat 3° to under 10° as hilly. Do not assume the whole site belongs in one category.
3. Define accuracy before flying
If the mission needs near 1:500-grade confidence, remember the source standard points to about ±0.15 m point accuracy and ±0.12 m adjacent spacing error in suitable conditions. That should influence every planning decision.
4. Plan for difficult-area behavior
Even if the site is developed, remote conditions can resemble the “difficult area” logic in photogrammetry standards. Build margin into the mission.
5. Separate technical capture from promotional capture
Survey and inspection passes first. QuickShots, Hyperlapse, and visual storytelling after.
6. Review sample output on site
Do not leave a remote facility and discover later that glare, dust, or altitude choices compromised the mission.
If you need a second opinion on configuring a Mavic 4 Pro workflow for large remote energy sites, you can message the field team here.
The real advantage of Mavic 4 Pro is not automation alone
For solar farm work, the aircraft is only part of the equation. The bigger advantage comes from pairing capable flight systems with disciplined survey thinking.
That is where many operators leave performance on the table. They fly a powerful drone with casual assumptions about terrain, cleaning, and tolerances. Then they wonder why the output is merely decent.
The better approach is more deliberate.
Start with clean sensors. Respect slope categories. Match mission design to actual accuracy needs. Treat remote sites as error-prone until proven otherwise. Use automation where it adds safety or efficiency, not where it weakens consistency.
That is how a Mavic 4 Pro stops being just another aircraft in the truck and becomes a dependable tool for solar infrastructure work.
Ready for your own Mavic 4 Pro? Contact our team for expert consultation.