Mavic 4 Pro Guide for Dusty Highway Spraying: Safer Flight
Mavic 4 Pro Guide for Dusty Highway Spraying: Safer Flight, Cleaner Data, Better Coverage
META: Practical Mavic 4 Pro how-to for dusty highway spraying operations, covering obstacle avoidance, ActiveTrack, D-Log, Hyperlapse, and flight tactics for low-visibility roadside work.
Highway spraying is a strange environment for a camera drone. It looks open from a distance, but once you’re on site the air is dirty, the margins are cluttered, and the job is rarely as simple as flying a straight line beside asphalt. Dust hangs in the rotor wash. Sign gantries cut across sightlines. Heat shimmer plays tricks on the eye. Then wildlife appears where it should not.
That last part matters more than most crews expect.
On one roadside vegetation job, a small deer broke from scrub near a drainage edge and crossed into the drone’s forward path just as the aircraft was repositioning along the shoulder. This is the kind of moment where marketing language stops being useful. What matters is whether the aircraft can detect changing geometry in a messy environment and give the pilot enough margin to react. For a Mavic 4 Pro workflow, obstacle avoidance is not just a convenience feature in dusty highway work. It is part of operational risk control.
This guide is built for a civilian spraying support scenario: documenting corridors, checking roadside vegetation, monitoring application zones, and creating visual records before and after work. Not chemical release from the drone itself, but the real support tasks surrounding highway spraying in dust-heavy conditions.
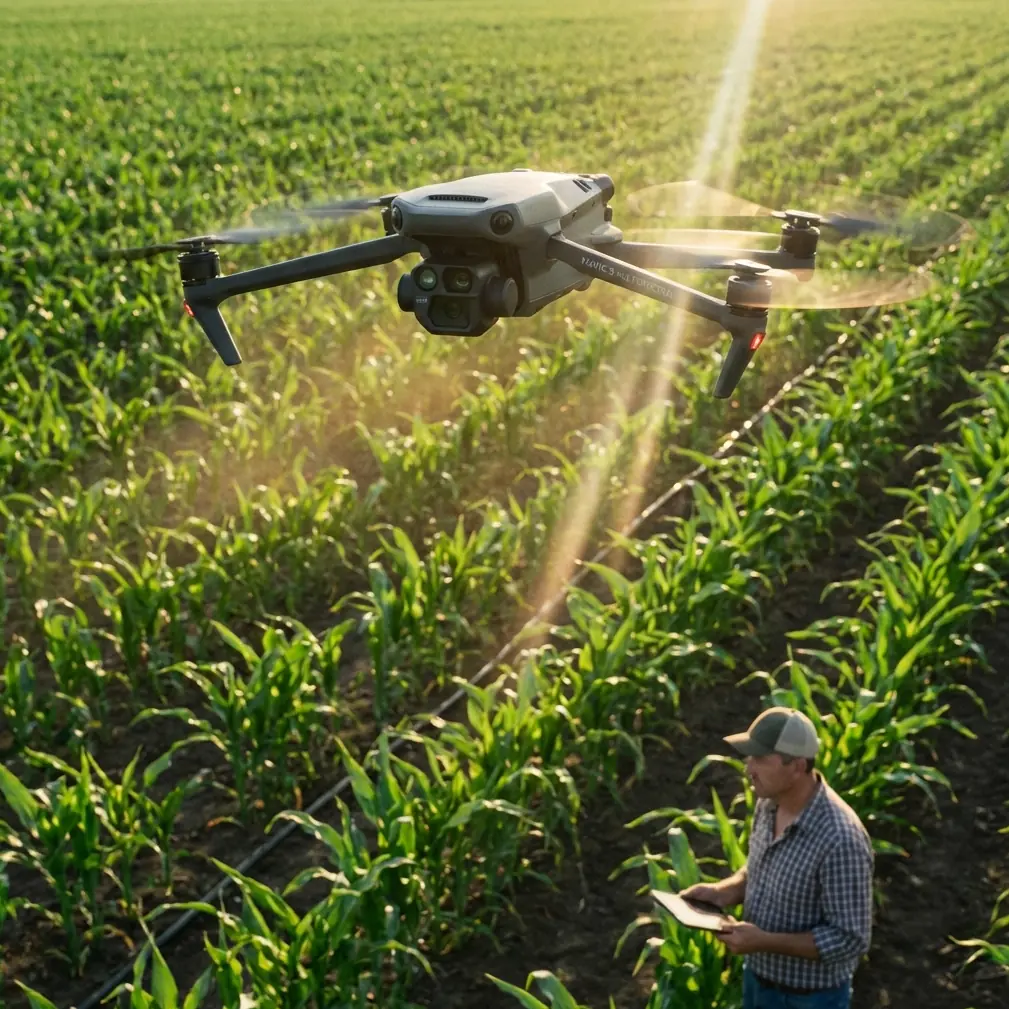
Why the Mavic 4 Pro fits this kind of work
The Mavic line has always made sense for corridor operations because it balances portability with imaging power. For highway spraying support, the Mavic 4 Pro matters less as a spec-sheet trophy and more as a field tool that can be launched quickly, repositioned often, and used by crews who have to think about traffic windows, wind, dust, and changing light all at once.
Several features stand out for this type of mission:
- obstacle avoidance for roadside clutter and sudden movement
- ActiveTrack and subject tracking for following slow-moving work vehicles at controlled standoff distances
- D-Log for preserving highlight and shadow detail in hard midday scenes
- QuickShots and Hyperlapse for progress documentation and stakeholder reporting
Those are familiar terms. The useful part is understanding how they actually change the job.
Step 1: Define the drone’s role before takeoff
The first mistake in dusty highway operations is using the drone for everything. The second is using it for nothing except generic aerial footage.
For spraying projects, the Mavic 4 Pro should usually be assigned one of four jobs before batteries are even unpacked:
Pre-job corridor scan
Check vegetation density, culverts, signage, barriers, and access points before spray crews enter.Live overwatch of roadside activity
Maintain visual awareness of moving vehicles, support crews, and edge hazards on long stretches.Evidence capture for compliance and reporting
Record what the site looked like before treatment and what changed afterward.Post-job review
Identify missed strips, overspray concerns, dust-related visibility problems, or access issues for return work.
When crews are vague about the drone’s purpose, pilots tend to chase pretty shots. In a dusty highway environment, that wastes battery and increases exposure.
Step 2: Build your flight plan around dust, not just distance
Dust is not a side issue on these jobs. It affects lift, visibility, lens cleanliness, obstacle sensing confidence, and pilot judgment. A corridor that looks easy at 80 meters can become unreliable the moment you descend for a closer check of roadside vegetation.
A better planning sequence looks like this:
- launch from a position offset from active dust plumes
- climb first into cleaner air before translating toward the work zone
- avoid low hover holds directly behind moving ground equipment
- treat every turn back toward the shoulder as a higher-risk maneuver
That sounds basic, but it changes outcomes. Highway shoulders are dynamic. Spray support vehicles, passing trucks, and dry verge conditions can produce bursts of particulate that temporarily reduce your visual contrast against poles, wires, and guardrails.
This is where obstacle avoidance becomes operationally significant. In clean air, pilots can often judge closure rate visually. In dusty air, the sensors become a second layer of perception. They do not replace pilot discipline, but they can buy time when a sign support, tree limb, or sudden animal movement emerges from a low-contrast background.
Step 3: Use obstacle avoidance as a corridor management tool
Many pilots think of obstacle avoidance as something to switch on and forget. That’s the wrong mindset for highway work.
On a dusty spraying support mission, obstacle sensing helps most in three specific situations:
1. Repositioning near roadside structures
Bridges, marker posts, lamp poles, noise walls, and overhead sign structures create depth-compression problems, especially when you are panning and moving at the same time. Obstacle avoidance reduces the chance of an accidental drift into infrastructure during sideward transitions.
2. Wildlife encounters at the edge of the corridor
That deer crossing example is not unusual. Birds lift from median grass. Dogs appear near service roads. Kangaroos, livestock, or smaller animals can move unpredictably depending on region. In these moments, the sensors matter because they add another stream of environmental awareness when your attention is split between framing, flight path, and ground activity.
3. Dust-reduced visual confidence
If the shoulder is hazy and the sun angle is flattening contrast, obstacle avoidance is often the difference between a cautious continuation and an unnecessary mission abort. Not because the drone should push harder, but because the pilot has better information about proximity.
The practical takeaway: use sensing to support conservative flying, not to justify aggressive flying.
Step 4: Apply ActiveTrack only when the scene is simple enough
ActiveTrack and subject tracking can be genuinely useful on highway spraying support jobs, especially when you need to follow a slow-moving maintenance vehicle or escort truck to document corridor progress. But highway environments punish lazy automation.
Use tracking only if:
- the target vehicle is clearly separated from unrelated traffic
- the route segment is predictable
- there are no overhead surprises such as sign arms or tree overhangs
- dust is light enough that the subject remains visually distinct
The gain is obvious. Instead of manually managing every micro-adjustment, the pilot can focus on route safety, altitude discipline, and obstacle margin while the aircraft holds the visual lock. For long, repetitive roadside tasks, that reduces workload.
The risk is equally obvious. If the tracked subject merges visually with similar vehicles or moves under complex roadside structures, you can create more workload, not less.
In practice, I advise crews to use ActiveTrack in short segments rather than as an all-day default. Track a clearly identified work truck for a few hundred meters, capture the needed sequence, then reset. This keeps the operation intentional.
Step 5: Shoot in D-Log when the road surface is fighting the sky
Highway spraying work often happens under harsh sun because crews need dry conditions and visibility. The imaging challenge is that asphalt, reflective signage, pale dust, and bright sky all compete in the same frame.
D-Log matters here because it preserves more usable tonal information across those extremes. If you’re documenting spray zones, vegetation condition, or roadside encroachment for later review, you want room to recover detail from both the bright shoulder and darker drainage edges.
The operational significance is not “cinematic footage.” It’s interpretability.
A flat recording profile gives your editor or project lead more latitude to:
- examine roadside vegetation texture without clipped highlights
- differentiate dust haze from actual treatment coverage issues
- match footage captured at different times of day
- create cleaner before-and-after comparisons
Even if your final deliverable is simple, D-Log gives you insurance against ugly midday contrast. For infrastructure-adjacent documentation, that flexibility is worth having.
Step 6: Use QuickShots sparingly, Hyperlapse strategically
QuickShots can be useful for short establishing visuals at the start of a project. One clean automated reveal can show corridor context, adjacent land use, and work-zone layout much faster than a manually flown sequence. But in dusty highway operations, QuickShots should never be the backbone of your mission.
Hyperlapse is more interesting.
For repeated spraying support work along the same section of road, Hyperlapse can compress hours of vehicle movement, dust behavior, and changing site conditions into a single readable asset. That is useful for supervisors, contractors, or asset owners who need to understand progression without reviewing full-length raw footage.
Used well, Hyperlapse can show:
- when dust conditions worsened
- how traffic influenced work rhythm
- whether crews maintained consistent corridor progression
- how shadows changed visibility near vegetation edges
The mistake is treating it like a creative extra. In this context, Hyperlapse is a pattern-recognition tool.
Step 7: Keep your lens and sensors clean on a schedule, not by feel
Dusty jobs create a quiet kind of degradation. Image quality slips. Contrast softens. Obstacle sensing confidence may drop. Pilots often adapt gradually and stop noticing the decline.
Do not clean reactively. Clean predictively.
A workable field rhythm is to inspect after each battery cycle, especially if the aircraft spent time low over gravel shoulder, dry grass, or moving support vehicles. Even a light film can affect the clarity you need for roadside decision-making.
This matters twice over with the Mavic 4 Pro workflow described here. You are relying on both imaging performance and sensing reliability. Dirty optics compromise both.
Step 8: Fly offset, not directly above the problem
Newer pilots often default to putting the drone directly over the work line. For dusty highway spraying support, offset flying is usually smarter.
A lateral offset can improve:
- visibility through the dust plume
- separation from vertical hazards
- framing of shoulder, ditch, and vegetation in one view
- ability to monitor vehicle approach paths
It also makes wildlife movement easier to read. Animals at the edge of a corridor tend to be more legible from an oblique angle than from a straight overhead view. That matters when your goal is not simply filming the site, but anticipating what may cross into it.
Step 9: Build a repeatable evidence package
A strong Mavic 4 Pro highway workflow should produce more than random clips. By the end of the job, you want a simple evidence package:
- corridor overview images
- pre-treatment problem points
- short tracked movement sequences of ground operations
- close checks of difficult edges or obstacles
- post-treatment comparison footage
- one compressed Hyperlapse or short summary sequence for review
This is where disciplined capture beats flashy capture. If your footage helps a supervisor confirm coverage, explain delays, or identify a missed roadside strip, the drone did its job.
Step 10: Know when not to fly
There are dusty conditions that are manageable, and there are dusty conditions that are deceptive. The dangerous middle ground is when the aircraft can technically remain airborne but the pilot can no longer trust visual judgment near roadside clutter.
Stand down if:
- dust repeatedly obscures the route segment
- wildlife activity is high near takeoff or low-altitude work areas
- overhead structures force tight pathing in low contrast
- the job is pushing you toward automation because manual flight has become too demanding
That is not lost productivity. It is good corridor management.
A practical field workflow for Chris Park’s style of operation
If I were laying this out for a creator-operator like Chris Park covering a dusty highway spraying assignment, I’d keep it simple:
First battery: high clean overview passes, identify structures, note wildlife movement, establish before-condition visuals.
Second battery: short ActiveTrack sequences of support vehicles on safer segments, plus oblique checks of shoulder and drainage edges.
Third battery: targeted low-risk detail work, post-activity comparisons, and one Hyperlapse from a stable offset position.
Every battery change: wipe optics, inspect airframe, review hazard notes, relaunch only with a defined next objective.
If the site team needs a fast planning discussion before launch, use this direct field coordination link: message the operations desk.
That kind of discipline is what turns a Mavic 4 Pro from a flying camera into a reliable project tool.
What actually makes the Mavic 4 Pro valuable here
Not hype. Not the badge on the shell.
Its value in dusty highway spraying support comes from how a few core capabilities work together:
- obstacle avoidance helps protect the aircraft in cluttered, low-contrast roadside conditions
- ActiveTrack supports controlled follow sequences of slow-moving ground assets when the scene is clean enough
- D-Log gives more usable detail in punishing sun and reflective surfaces
- Hyperlapse helps compress long, repetitive corridor activity into something decision-makers can quickly understand
Tie those together with conservative route planning and regular cleaning, and you get a drone workflow that improves awareness without complicating the job.
That is the real standard for this kind of operation. The aircraft should reduce uncertainty. It should help a crew see the corridor more clearly, document it more honestly, and react earlier when conditions change.
And sometimes that means noticing the deer at the edge of the scrub before it becomes the center of the mission.
Ready for your own Mavic 4 Pro? Contact our team for expert consultation.