How I’d Scout Mountain Vineyards With the Mavic 4 Pro Withou
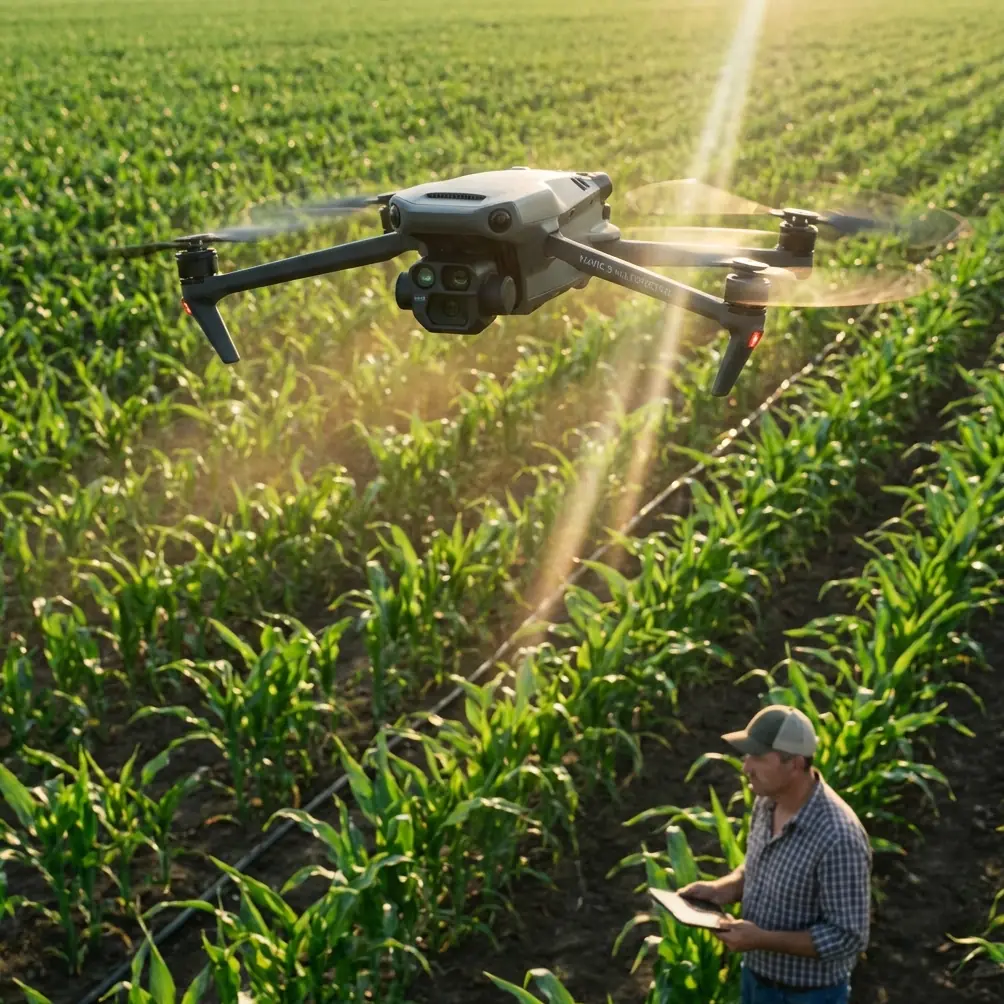
How I’d Scout Mountain Vineyards With the Mavic 4 Pro Without Guessing on Flight Height
META: A practical mountain-vineyard tutorial for Mavic 4 Pro pilots, focused on safe flight altitude, signal-loss planning, GPS contingency logic, and how features like obstacle avoidance, ActiveTrack, D-Log, QuickShots, and Hyperlapse fit real scouting work.
Mountain vineyards punish lazy planning.
Rows bend around slopes. Treelines rise where you do not expect them. Wind changes character every few hundred meters. If I were using the Mavic 4 Pro to scout a vineyard in this kind of terrain, I would not start with camera settings or cinematic moves. I would start with altitude discipline and emergency logic.
That sounds dry until you fly over a ridge and realize a “safe” height chosen on flat-ground instincts is not actually safe at all.
The most useful planning principle here comes from low-altitude aerial photogrammetry practice: your minimum flight height should sit above the highest terrain point along the route by about 80 meters, while still remaining below the planned mission altitude. That number matters in mountain vineyards because terrain is the hidden variable. A route that looks uniform on a map can contain terraces, retaining walls, tree belts, utility poles, and sudden updraft zones that nudge the aircraft downward or sideways. Building in that 80-meter terrain buffer is not just conservative paperwork. It is what keeps a slow, unnoticed descent from becoming an avoidable strike.
For a Mavic 4 Pro operator scouting vineyards, that changes how I would structure the whole mission.
Start with the vineyard’s vertical profile, not the shot list
A lot of pilots arrive thinking in horizontal terms: start at the road, fly toward the upper rows, pan over the block, maybe capture a reveal over the ridge. In mountain agriculture, vertical thinking comes first.
Before launch, I would identify:
- the highest point on the planned route
- the tallest obstacle cluster near the route, such as cypress lines or utility infrastructure
- any slope breaks where downdrafts or mechanical turbulence may appear
- the home point’s actual relation to the terrain, not just its GPS pin
That last point is where many scouting flights go wrong. A return route that seems reasonable from a launch pad near a lower access road may become risky if the aircraft has to come back across rising terrain. If your route crosses the highest section of the vineyard, your minimum-height logic needs to be based on that section, not your takeoff zone.
When people ask me for an “optimal altitude” for vineyard scouting in the mountains, I do not give one fixed number. I give a method.
- Find the highest terrain point on the intended route.
- Add roughly 80 meters as your floor for safe low-altitude mission planning.
- Keep your actual mission altitude above that floor but still aligned with the data you need.
For example, if a ridge-side parcel tops out significantly above the lower vine blocks, flying low just because the lower section looked clear is a bad habit. You want enough margin to absorb gradual altitude drift caused by wind, small control errors, or mechanical anomalies. That is exactly why the 80-meter minimum-height concept exists.
Why this matters even with strong obstacle avoidance
The Mavic 4 Pro conversation often drifts toward obstacle avoidance, and for good reason. In a mountain vineyard, obstacle sensing can help when moving near row edges, service roads, and isolated trees. But obstacle avoidance is not a substitute for altitude planning.
Sensors can react to what is detectable and within their effective conditions. They do not replace route design in sloped terrain. If the aircraft gradually loses effective clearance because the hillside is rising beneath it, you are already managing a bad setup. The smarter approach is to give the aircraft room from the start, then let obstacle avoidance act as a secondary safeguard rather than the first line of defense.
That is especially true if your scouting goal is operational rather than purely cinematic. Maybe you are checking canopy uniformity, row access, erosion scars, irrigation line exposure, or disease-prone pockets where air movement and moisture collect. Those tasks benefit from consistent, predictable geometry. Constantly improvising altitude around terrain produces uneven visual coverage and makes comparison harder.
Build a signal-loss plan before takeoff
The second planning detail I would borrow directly from aerial survey practice is link-loss timing.
For most multirotor missions where the operating radius stays inside the effective control link range, a conservative data-link timeout of 1 to 3 minutes is recommended to strengthen control safety. For mountain vineyard scouting, that range is a very practical benchmark.
Why? Because vineyards in hilly areas can create intermittent shielding. A fold in the slope, a stand of trees, or a ridge shoulder can interrupt clean signal paths even when the aircraft does not seem far away. If the aircraft loses link, you do not want an ambiguous delay. You want a pre-decided response.
On a Mavic 4 Pro, I would think about signal-loss behavior in terms of the terrain around the aircraft, not just my confidence at the controller.
If the route is over open vine blocks with clear sky exposure and few obstructions, a return behavior may make sense. If the route passes near tall tree margins or terrain that rises sharply between the aircraft and home, I would examine whether a hover response for a multirotor is safer in that specific segment. The original guidance behind these contingency options is straightforward: after data-link timeout, the aircraft should perform a predefined action such as return, hover for multirotors, or circling for fixed-wing aircraft.
The operational significance is huge. In vineyard scouting, your contingency is part of your image quality strategy as much as your safety strategy. A clean return path preserves the aircraft and the data. A poor return setting through obstructed terrain can erase both.
GPS loss is where system understanding starts to matter
The third point most pilots ignore until they need it is GPS timeout behavior.
When satellite navigation is lost, the aircraft may rely on an attitude and heading reference system, or AHRS, to maintain orientation information. The useful technical distinction here is that AHRS is not the same thing as an IMU. An IMU only supplies raw sensor data. AHRS adds embedded attitude computation and heading information, allowing the aircraft to derive more reliable orientation for controlled behavior.
That difference is not academic.
In a mountain vineyard, satellite conditions can degrade near steep terrain, dense tree borders, or narrow topographic corridors. If GPS support becomes unstable, the aircraft’s ability to maintain sensible orientation logic matters immediately. In the referenced guidance, exceeding the GPS timeout triggers a predefined operation such as return with AHRS assistance, hover for multirotors, or circling for fixed-wing aircraft.
For a Mavic 4 Pro pilot, the practical takeaway is simple: do not assume “GPS loss” means instant chaos, but also do not treat it casually. Your preflight should include a deliberate check of what the aircraft will do if navigation confidence drops. In mountain scouting, the best emergency action is the one chosen before launch, after you have studied terrain, obstacles, and population proximity.
That is also why I avoid overcomplicated first-pass routes. If I am scouting a new vineyard block, I want the opening flight to be boringly structured. Outbound over the clearest corridor. Conservative altitude. Predictable arcs. Nothing that depends on perfect GPS conditions or aggressive low-level maneuvering.
My practical scouting workflow for mountain vineyards
Here is how I would actually run the mission with a Mavic 4 Pro.
1. First pass: structural overview
I start high enough to establish full terrain context. This is not the beauty pass. It is the operational map in motion.
I want to see:
- row orientation across slope changes
- drainage paths
- access roads
- breaks in canopy density
- tree or rock boundaries that could affect future low passes
If the route crosses the mountain-facing side of the property, I keep the 80-meter-above-highest-terrain concept in mind as a hard planning reference. That gives me time to read the air and spot any sections where the hillside rises faster than it appears from ground level.
2. Second pass: block-by-block inspection
Once I know the terrain, I lower to the altitude that best reveals canopy condition and row consistency while still preserving safe clearance. This is where obstacle avoidance helps most, but I still fly as if I might need to take manual control at any moment.
For scouting work, consistency beats drama. Repeating the same angle over each block makes later review more useful than a sequence of flashy reveals.
3. Tracking moving field activity when needed
If workers, utility vehicles, or transport carts are part of the scouting question, ActiveTrack can help document traffic flow through the vineyard roads. I use it selectively. In mountain terrain, autonomous tracking is most useful on cleaner paths with fewer overhead branches and side obstructions. It is not something I leave unattended near clutter.
4. Time-based observation
Hyperlapse has real value in vineyards when the question is environmental rather than artistic. Watching fog lift, wind move across rows, or service activity change through the morning can reveal patterns a single pass misses. On slopes, though, I keep the route conservative and repetitive. The goal is comparison, not novelty.
5. QuickShots only when they serve context
QuickShots can help create fast visual summaries for owners, agronomists, or managers who need orientation before discussing field conditions. But for serious scouting, they are support material. They should not replace deliberate coverage of the vine blocks.
6. D-Log for review flexibility
If I expect to compare shadowed lower rows against brighter ridge sections, D-Log is useful because mountain vineyards often force wide dynamic range into the same frame. The point is not cinematic grading for its own sake. The point is preserving enough tonal information to inspect details in mixed light.
Population density changes your emergency posture
One overlooked line in low-altitude survey guidance is the warning that flight safety becomes especially critical in more populated areas. Some vineyards are remote. Others sit close to villages, tasting facilities, roads, or worker gathering areas.
That should influence your contingency setup.
If your mountain vineyard includes public roads, staff housing, visitor parking, or concentrated worker zones, your emergency plan should become tighter, not looser. Return paths, timeout actions, and altitude margins should be shaped around likely consequence areas, not just around the easiest route to fly.
That is why I do not treat “return to home” as automatically correct. In some sections, hovering briefly may be the safer multirotor response if the aircraft is in a cleaner pocket than the path home. In others, immediate return is the right answer. The point is to map that logic to the terrain and the people below.
A note on launch discipline
Most scouting mistakes happen in the first minute.
Pilots launch, admire the scene, and drift into the mission before confirming the fundamentals:
- altitude references
- emergency action settings
- link-loss behavior
- GPS health
- wind trend above the launch zone
In mountain vineyards, the launch area can be the least representative part of the flight environment. Calm air by a stone wall near the lower access road tells you very little about rotor behavior over an exposed upper terrace. I prefer a brief stabilization period after takeoff, then a controlled climb while watching for drift and signal behavior before I commit to the route.
If you are planning a new vineyard scouting workflow around the Mavic 4 Pro and want a practical preflight checklist built around terrain and signal contingencies, you can message a UAV specialist here.
The real altitude insight for this scenario
If you remember one thing, make it this:
The best altitude for scouting a mountain vineyard is not the lowest altitude that gives a dramatic image. It is the lowest altitude that still respects the highest terrain on your route, with a meaningful buffer. In the aerial survey framework referenced here, that means using the highest point on the route plus about 80 meters as your minimum-height planning guardrail.
That single decision improves three things at once.
It protects the aircraft from gradual height loss caused by wind or minor fault conditions.
It gives your emergency actions more room to work if link or GPS problems appear.
It produces more consistent coverage across uneven ground.
And once that foundation is right, the Mavic 4 Pro features people love talking about—obstacle avoidance, ActiveTrack, QuickShots, Hyperlapse, D-Log—become genuinely useful instead of cosmetic.
That is how I would scout vineyards in mountain terrain: first as an airspace and terrain problem, then as an imaging problem. The order matters.
Ready for your own Mavic 4 Pro? Contact our team for expert consultation.