How to Scout Vineyards with Mavic 4 Pro in Wind
How to Scout Vineyards with Mavic 4 Pro in Wind
META: Master vineyard scouting in windy conditions with the Mavic 4 Pro. Learn expert techniques for stable flights, crop analysis, and reliable data collection.
TL;DR
- Pre-flight sensor cleaning is critical—dust and debris compromise obstacle avoidance accuracy in vineyard environments
- The Mavic 4 Pro handles winds up to 12 m/s while maintaining stable footage for crop analysis
- D-Log color profile captures subtle vine stress indicators invisible in standard color modes
- ActiveTrack 360° enables automated row-following without constant manual input
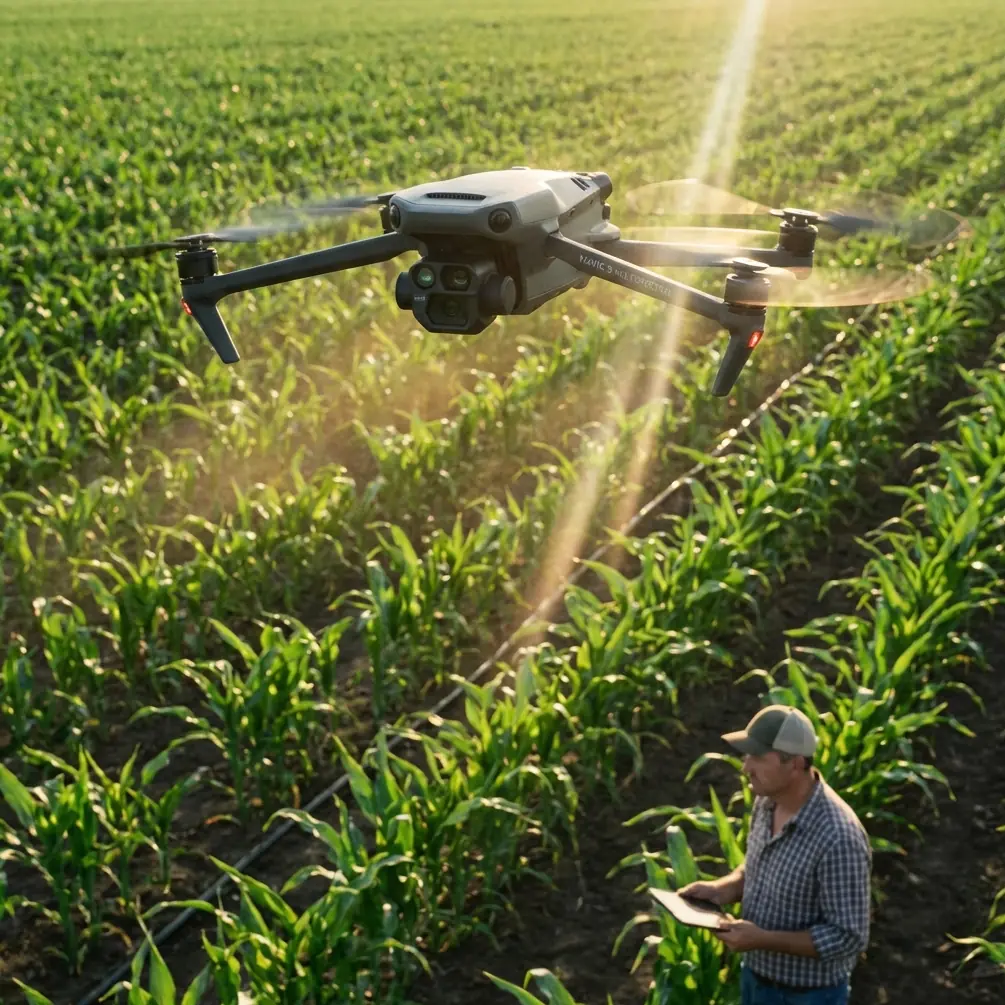
Wind whips through Napa Valley at unpredictable intervals, making vineyard scouting a genuine challenge. The Mavic 4 Pro transforms this challenge into a manageable operation with its advanced stabilization and intelligent flight modes—but only if you prepare properly before launch.
I've spent the past three seasons flying drones over commercial vineyards, and the Mavic 4 Pro has become my primary tool for crop health assessment. This field report covers everything I've learned about maximizing this drone's capabilities in demanding vineyard conditions.
Why Pre-Flight Cleaning Determines Mission Success
Before discussing flight techniques, let's address something most pilots overlook: sensor maintenance directly impacts safety feature performance.
Vineyard environments are brutal on drone sensors. Fine dust, pollen, and agricultural spray residue accumulate on the omnidirectional obstacle sensors faster than you'd expect. During my last scouting session in Sonoma, I noticed my obstacle avoidance triggering false positives—the drone kept stopping mid-flight despite clear airspace.
The culprit? A thin film of sulfur spray residue on the forward-facing sensors.
Essential Pre-Flight Cleaning Protocol
Here's my standard cleaning routine before every vineyard mission:
- Microfiber wipe on all six obstacle sensors—front, rear, left, right, top, and bottom
- Lens cleaning pen for the main camera—fingerprints destroy image clarity
- Compressed air on gimbal assembly—removes particulates that cause micro-vibrations
- Visual inspection of propellers—vineyard debris can cause hairline cracks
- Battery contact cleaning—corrosion from humidity affects power delivery
Pro Tip: Carry a dedicated cleaning kit in your flight bag. I use a small pelican case with microfiber cloths, lens cleaning solution, compressed air, and cotton swabs. This five-minute routine has prevented countless mission failures.
Understanding Wind Dynamics in Vineyard Terrain
Vineyards create unique wind patterns that don't exist in open fields. Rows of vines act as wind channels, accelerating airflow in predictable but sometimes surprising ways.
The Mavic 4 Pro's O4 transmission system maintains connection up to 20 kilometers, but that's irrelevant if turbulence destabilizes your footage. What matters is understanding how the drone handles gusty conditions.
Wind Speed Thresholds for Vineyard Work
| Wind Condition | Speed Range | Mavic 4 Pro Performance | Recommended Action |
|---|---|---|---|
| Calm | 0-3 m/s | Optimal stability, all modes available | Full mission capability |
| Light breeze | 3-6 m/s | Excellent stability, minimal compensation | Standard operations |
| Moderate wind | 6-9 m/s | Good stability, increased battery drain | Reduce flight time by 15% |
| Strong wind | 9-12 m/s | Acceptable stability, noticeable drift | Essential missions only |
| High wind | 12+ m/s | Maximum resistance reached | Abort or postpone |
The drone's tri-propeller design provides noticeably better wind resistance than previous Mavic generations. During a particularly gusty morning in Paso Robles, I recorded stable 4K/120fps footage with sustained winds at 10 m/s—something that would have been impossible with the Mavic 3.
Leveraging Subject Tracking for Row-by-Row Analysis
Manual flying over vineyard rows is exhausting and inefficient. The Mavic 4 Pro's ActiveTrack system changes the game entirely.
Here's how I configure subject tracking for systematic vineyard coverage:
ActiveTrack Configuration for Vineyards
- Set tracking mode to "Trace"—the drone follows behind your designated path
- Adjust following distance to 8-10 meters—provides optimal field of view for row analysis
- Lock altitude at 15-20 meters AGL—captures full vine canopy without excessive detail loss
- Enable obstacle avoidance in "Bypass" mode—allows the drone to navigate around end posts automatically
The system tracks remarkably well, even when vine rows curve or elevation changes. I've completed 40-acre surveys in single battery cycles using this method.
Expert Insight: Don't track the actual vines—track a high-visibility marker you place at the end of each row. This gives ActiveTrack a consistent reference point and prevents the system from losing lock when vine density varies.
Capturing Diagnostic Footage with D-Log
Standard color profiles hide critical information about vine health. D-Log preserves the dynamic range necessary for identifying:
- Early-stage chlorosis (yellowing)
- Water stress indicators
- Pest damage patterns
- Nutrient deficiencies
The Mavic 4 Pro's 1-inch CMOS sensor captures 12.8 stops of dynamic range in D-Log mode. This matters because vine stress often appears as subtle color shifts that get crushed in Rec.709 or HLG profiles.
D-Log Settings for Vineyard Analysis
- ISO: Keep at 100-400 to minimize noise in shadow areas
- Shutter speed: Match to double your frame rate (1/60 for 30fps)
- White balance: Set manually to 5600K—auto white balance shifts unpredictably over green canopy
- Color profile: D-Log M for maximum flexibility in post-processing
Post-processing D-Log footage requires calibrated monitors and proper LUTs, but the diagnostic value is incomparable. I've identified irrigation system failures from aerial footage that ground crews missed during physical inspections.
QuickShots and Hyperlapse for Documentation
Beyond diagnostic work, vineyard owners increasingly want marketing content. The Mavic 4 Pro's automated flight modes produce professional results without complex planning.
Effective QuickShots for Vineyard Content
- Dronie: Classic pull-back reveal showing vineyard scale
- Circle: Orbits around a central point—works beautifully around tasting rooms
- Helix: Ascending spiral that showcases row patterns from above
- Rocket: Straight vertical ascent revealing the full property
Hyperlapse mode creates stunning time-compressed footage of vineyard activity. I've captured harvest operations, fog rolling through valleys, and seasonal color changes using the Free and Circle hyperlapse modes.
The key is selecting appropriate intervals. For fast-moving subjects like harvest crews, use 2-second intervals. For slow phenomena like fog movement, extend to 5-10 seconds between frames.
Common Mistakes to Avoid
After three seasons of vineyard drone work, I've made—and learned from—numerous errors. Here's what to avoid:
Flying too low over mature vines. Canopy height varies more than you expect. Maintain minimum 10 meters AGL to prevent prop strikes on unexpectedly tall growth.
Ignoring magnetic interference from irrigation systems. Metal irrigation infrastructure creates compass errors. Always calibrate compass away from metal structures and monitor heading stability during flight.
Scheduling flights during spray operations. Agricultural chemicals damage drone components and void warranties. Confirm spray schedules with vineyard management before every mission.
Underestimating battery drain in wind. Cold mornings combined with wind resistance can reduce flight time by 30-40%. Bring more batteries than you think you need.
Neglecting to log flight data. Vineyard owners need documentation for insurance and compliance. Record date, time, weather conditions, and coverage area for every mission.
Frequently Asked Questions
What altitude provides the best balance between coverage and detail for vineyard scouting?
15-20 meters AGL offers optimal results for most vineyard analysis. This height captures sufficient detail to identify individual vine health while covering enough area for efficient surveys. For specific pest identification or disease diagnosis, drop to 8-10 meters for targeted inspection of problem areas identified during initial passes.
How does obstacle avoidance perform between tight vineyard rows?
The Mavic 4 Pro's omnidirectional sensing handles vineyard rows well, but with limitations. The system reliably detects end posts, trellis wires, and mature vine canopy. However, thin support wires and newly planted vines may not register consistently. I recommend manual flight mode when navigating between rows and obstacle avoidance enabled only for open-area operations.
Can the Mavic 4 Pro capture useful multispectral data for vineyard analysis?
The standard Mavic 4 Pro captures RGB imagery only—not true multispectral data. However, D-Log footage processed with NDVI extraction software provides useful vegetation index approximations. For professional-grade multispectral analysis, you'll need dedicated agricultural imaging systems. The Mavic 4 Pro excels at visual scouting and documentation rather than scientific-grade spectral analysis.
Vineyard scouting demands reliability, precision, and adaptability. The Mavic 4 Pro delivers on all three when you understand its capabilities and prepare properly for challenging conditions.
Ready for your own Mavic 4 Pro? Contact our team for expert consultation.