How I’d Scout Windy Power-Line Corridors With the Mavic 4
How I’d Scout Windy Power-Line Corridors With the Mavic 4 Pro
META: A field-focused guide to using Mavic 4 Pro for windy power-line scouting, with practical workflow advice tied to photogrammetry standards, orthomosaic quality, obstacle avoidance, and image handling.
Power-line scouting is where glossy drone marketing usually falls apart.
A drone can look brilliant on a calm shoreline at sunset and still become frustrating the moment it’s asked to fly a narrow utility corridor in shifting wind, near poles, conductors, vegetation, and terrain changes. That is exactly why the Mavic 4 Pro deserves to be judged less by headline features and more by whether it helps produce usable inspection and mapping outputs when conditions are imperfect.
If I were planning a civilian utility scouting mission with the Mavic 4 Pro, I would not start with cinematic modes. I would start with data discipline.
That may sound old-school, but the reference standard here points in the right direction. The low-altitude digital aerial photogrammetry specification CH/Z 3003-2010 lays out a production mindset that still matters today: define the operating method, control image handling, and pay close attention to the downstream creation of digital orthophotos and related processing steps such as correction, tonal balancing, mosaicking, and finishing. Even in a modern compact drone workflow, those ideas are not academic. They determine whether a windy line patrol produces dependable location intelligence or just a folder full of attractive but inconsistent frames.
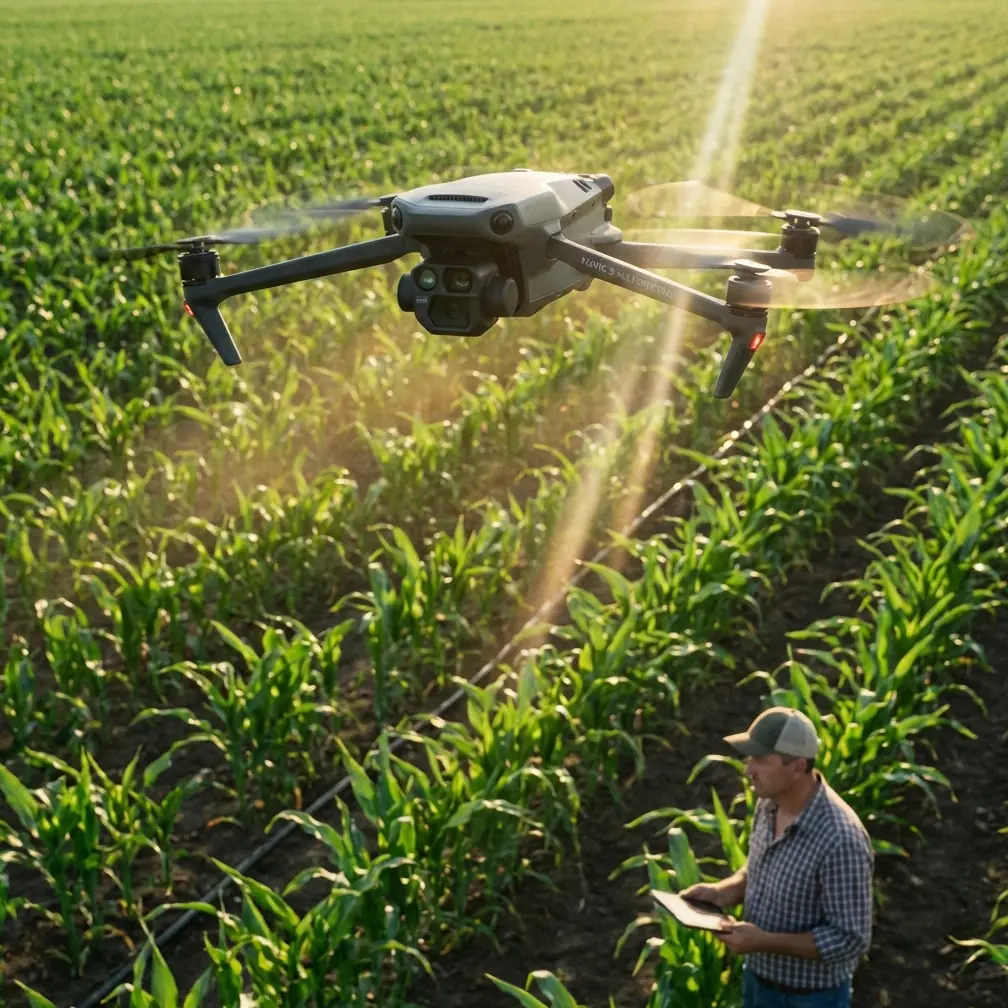
Why the Mavic 4 Pro makes sense for corridor scouting
For power-line reconnaissance, the drone has to do three things well at the same time:
- Stay predictable in the air when wind pushes it off line.
- Maintain visual awareness around poles, crossarms, guy wires, and trees.
- Capture footage and stills that remain useful after correction and stitching.
The Mavic 4 Pro is compelling because it sits in a narrow sweet spot. Bigger enterprise aircraft can carry more specialized payloads, but they also ask for more setup, more transport burden, and often a larger operational footprint. Smaller consumer models may be easy to launch, but they can become limiting once corridor geometry and gust loading complicate the flight.
What makes this aircraft stand out in that middle ground is how the core systems work together. Obstacle avoidance is not just a convenience here; in a windy utility corridor it is part of risk management. Subject tracking and ActiveTrack are also not just creative tools. Used intelligently, they help maintain framing consistency when following a linear asset path or recording a structure from a moving offset position. Even D-Log has practical value beyond aesthetics because it preserves more grading flexibility when inspection footage is shot under changing clouds, glare, and shadow bands common along transmission and distribution routes.
Compared with many drones in its class, the Mavic line has long excelled at keeping advanced autonomy accessible without forcing the pilot into a heavy enterprise workflow. That matters for scouting missions where teams need to move fast between access points.
First principle: fly for the deliverable, not the flight
The biggest mistake I see in corridor scouting is treating every mission like an exploration flight. A pilot launches, improvises around the line, records a mix of angles, and assumes the office will sort it out later.
That approach breaks down fast in wind.
The better method is to reverse-engineer the final output. Are you trying to:
- verify vegetation encroachment,
- document pole condition,
- check access-road usability,
- create a corridor orthomosaic,
- or simply scout the route before a larger inspection team arrives?
The reference material is useful because it reminds us that aerial imaging is a production chain. In Section 11, the standard explicitly addresses digital orthophoto production, including image correction, color equalization, mosaicking, and image processing. Operationally, that means your capture discipline with the Mavic 4 Pro should aim for consistency. In a windy power-line corridor, consistency beats drama every time.
If your goal is a map-ready corridor overview, you should care less about sweeping reveal shots and more about overlap, angle stability, altitude control, and repeatable track spacing. If your goal is structure scouting, your shot plan should prioritize readable components and exact relative position to conductors and hardware, not social-media-friendly movement.
My field workflow for windy line scouting
Here is the workflow I would use.
1. Define the corridor segments before arrival
Do not treat a long utility route as one mission. Break it into short, manageable segments based on terrain, access, obstacles, and likely wind exposure. Ridge lines, open agricultural fields, and river crossings often behave differently. A compact drone like the Mavic 4 Pro performs best when the pilot thinks in modular mission blocks.
This also supports quality control later. The reference standard includes an inspection mindset in later sections, including checking and acceptance. In practice, segmented flights make it much easier to verify whether a particular section meets your coverage standard before you leave site.
2. Choose flight direction based on wind, not convenience
Pilots often launch from the easiest parking spot and head out. I’d rather spend five extra minutes walking to a better launch point if it means flying the first leg into the wind and returning with it, or at least reducing sideways correction during the most obstacle-dense portion of the route.
Crosswind is what makes corridor scouting messy. It forces constant lateral compensation and increases the chance of inconsistent framing. With Mavic 4 Pro, the advantage is that you can rely on responsive stabilization and avoidance systems while still maintaining a relatively lean setup. But no drone’s automation should be asked to solve a poor directional plan.
3. Use obstacle avoidance as a buffer, not a crutch
Power lines are deceptive. Poles and nearby trees are visible and obvious. Smaller wires, branch tips, and changing elevation are less forgiving. Obstacle avoidance helps the Mavic 4 Pro stand apart from weaker models that can feel nervous or blind in cluttered corridors. That said, scouting near electrical infrastructure still requires conservative standoff.
My rule is simple: if avoidance activates frequently, the route is too aggressive.
The real benefit of strong sensing is not that it lets you fly closer. It lets you maintain a safer offset with more confidence when gusts nudge the aircraft or when your attention has to split between screen interpretation and line alignment.
4. Capture two layers of data: overview and detail
For scouting, I rarely rely on a single-pass flight.
I’d run one broader corridor pass to establish route context and identify anomalies, then a second targeted pass for structures, vegetation pinch points, road washouts, or slope instability. The Mavic 4 Pro’s imaging flexibility matters here. You want footage that can serve both operational review and post-flight reporting.
This is where the standard’s mention of 图廓裁切, effectively map or frame trimming/cropping, becomes more relevant than it sounds. In office workflows, your end users do not need every frame edge. They need clean, interpretable output. If your field capture creates disciplined, redundant coverage, you can crop and compile with confidence instead of trying to rescue gaps.
5. Use D-Log when lighting is unstable
Windy days often come with fast cloud movement. Utility corridors also create harsh contrast: bright sky above, dark tree lines below, reflective hardware on structures. Shooting in D-Log gives you more latitude to normalize those variations later.
That directly supports the standard’s emphasis on correction and uniform color handling in orthophoto production. Uneven exposure and shifting color cast can complicate mosaicking and visual interpretation. Even when you are not building a formal orthomosaic, normalized imagery makes office review much faster. Crews can compare spans and structures without visual inconsistency getting in the way.
6. Reserve tracking modes for repeatable context shots
I like ActiveTrack and related tracking tools, but I use them selectively around utility assets. Their value in a scouting workflow is not flashy automation. It is repeatability.
For example, if a ground vehicle is moving along the access road beneath the line and you want context footage showing road condition, vegetation pressure, and structure spacing, tracking can produce a stable reference sequence. It is also useful for documenting the right-of-way from an offset perspective without manually overcorrecting every gust.
Against competitors, this is one of the reasons the Mavic platform remains so effective. Some drones offer tracking that is either too consumer-oriented to trust around complex infrastructure or too cumbersome to deploy quickly in the field. The Mavic 4 Pro strikes a better balance for agile commercial use.
Building map-quality outputs from a scouting mission
Not every line patrol becomes a survey product, but many should be flown as though they might.
That is where Appendix A in the reference stands out. It mentions grid size estimation for digital elevation model feature-point matching. That sounds technical, and it is, but the operational significance is simple: terrain representation and image matching depend on how well your data is structured. In power-line corridors, especially hilly or cut-and-fill terrain, poor overlap or inconsistent perspective can undermine reconstruction quality.
So if I were using the Mavic 4 Pro on a windy route and wanted the option to derive corridor mapping products later, I would:
- keep overlap generous,
- avoid abrupt altitude changes unless terrain forces them,
- maintain a consistent camera angle during each mapping pass,
- and separate “pretty” shots from reconstruction-focused capture.
That preserves your ability to support DEM or orthophoto generation later, even if the original mission was framed as scouting.
QuickShots and Hyperlapse: useful, but only in the right slot
A lot of pilots dismiss QuickShots and Hyperlapse in utility work. I think that is too simplistic.
They should not be used for core inspection evidence, and they should never substitute for disciplined corridor capture. But they can serve supporting functions. A controlled Hyperlapse sequence, for example, can help communicate corridor length, terrain exposure, or vegetation pattern to non-technical stakeholders. QuickShots can help create clear orientation visuals for briefings, site induction, or project updates.
The point is to keep those modes in their lane. On the Mavic 4 Pro, these are support tools for communication, not primary tools for asset assessment.
What to watch after landing
The standard’s quality mindset matters just as much after the flight.
Before leaving site, review a sample from each segment and ask:
- Are the pole tops and hardware readable?
- Are shadows hiding the areas that matter?
- Is the overlap sufficient for later processing?
- Did wind push the aircraft into inconsistent lateral spacing?
- Are there enough clean frames for a corrected corridor visual?
This echoes the specification’s inclusion of inspection and acceptance procedures. In real field terms, do not wait until you are back in the office to discover that one gusty section is unusable.
If your team needs a fast operational discussion while still on location, I’d rather send a clipped sample and route note immediately than promise a full report later. For teams coordinating multiple corridor sections, even a quick field handoff can save time; if you need that kind of direct coordination, a simple message through our field support channel is often faster than a long email chain.
Where the Mavic 4 Pro really pulls ahead
The reason I would choose the Mavic 4 Pro for this scenario is not that it is the biggest or most specialized option. It is that it supports a disciplined scouting workflow without overcomplicating deployment.
It gives the pilot strong assistance features such as obstacle avoidance and tracking, but still allows a manual, data-first approach. It can produce footage suitable for operational review, and—with the right capture habits—imagery that aligns with the production logic behind standards like CH/Z 3003-2010. That includes the practical realities of orthophoto creation, image correction, and consistent output quality.
And in windy power-line work, that balance matters more than brochure specs.
The aircraft that wins in this job is the one that helps you come home with usable, coherent, reviewable data. Not the one that looks most impressive on a feature list.
The Mavic 4 Pro, when flown with a photogrammetry mindset instead of a hobby mindset, is unusually well suited to that task.
Ready for your own Mavic 4 Pro? Contact our team for expert consultation.