How to Scout Power Lines in Low Light With the Mavic 4 Pro
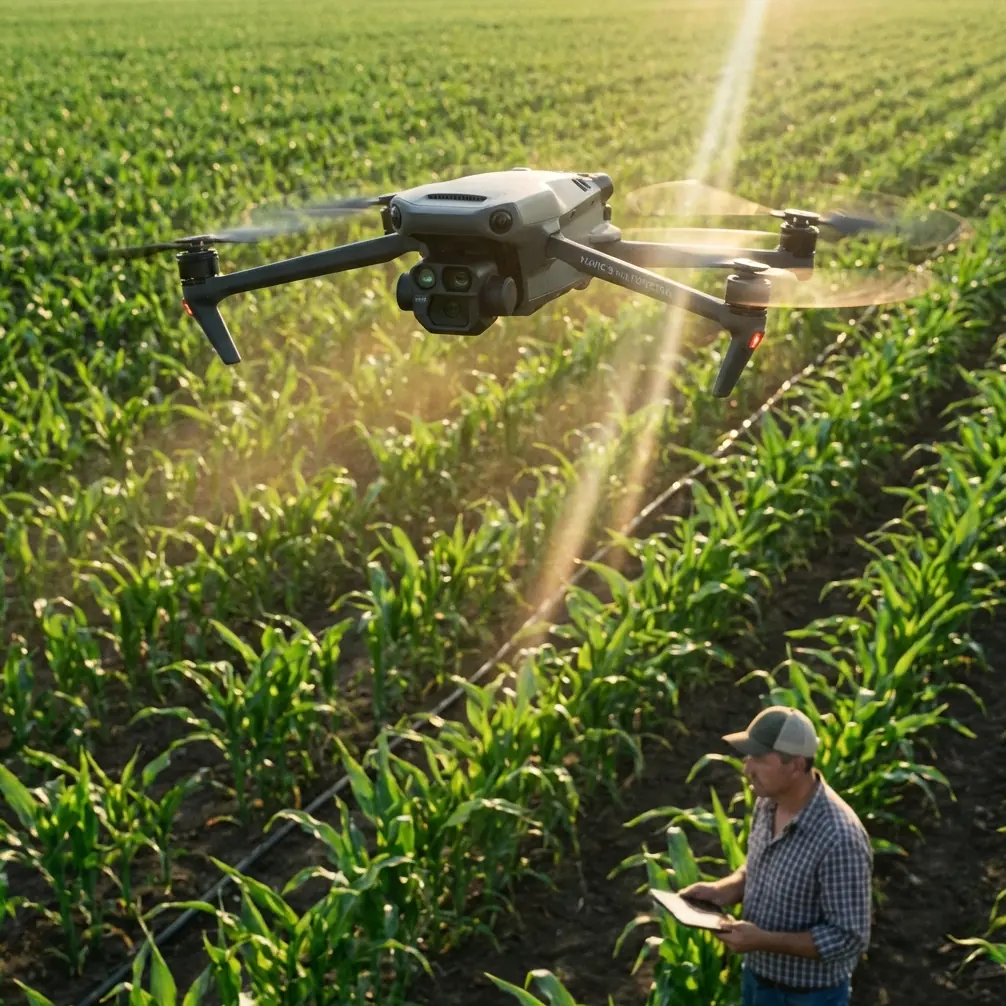
How to Scout Power Lines in Low Light With the Mavic 4 Pro
META: A practical, field-tested guide to using the Mavic 4 Pro for low-light power line scouting, with workflow tips on obstacle avoidance, ActiveTrack, D-Log, Hyperlapse, and safer inspection planning.
A few years ago, low-light power line scouting usually meant compromise.
You either launched early and accepted noisy footage, weak situational awareness, and more cautious stand-off distances, or you waited for full daylight and lost the narrow inspection window that utilities and contractors often care about most. Dawn and dusk can reveal line visibility, right-of-way encroachment, access conditions, and tower silhouette changes in ways noon light simply cannot. But those same hours also punish weak sensors, hesitant obstacle sensing, and unstable tracking.
That is exactly where the Mavic 4 Pro changes the work.
This is not about dramatic marketing claims. It is about whether a pilot can safely gather usable visual data around poles, towers, conductors, tree lines, and service roads when the light is fading or just coming up. If your task is scouting rather than close-contact technical inspection, the Mavic 4 Pro fits a very specific gap: fast deployment, better-than-basic low-light capture, intelligent obstacle awareness, and tracking tools that reduce workload while you focus on spacing, terrain, and route logic.
Here is how I would use it for low-light power line scouting, and why this model makes the job easier than older small folding drones.
Start with the real mission, not the aircraft
Power line scouting in low light is rarely about getting cinematic footage. The mission is usually one of five things:
- checking right-of-way access before a crew rolls in
- spotting vegetation encroachment along a corridor
- identifying visible structure issues from a safe offset
- reviewing terrain, washouts, or access-road damage
- building a visual reference for a later detailed inspection
That matters because it changes how you fly the Mavic 4 Pro.
You are not trying to hug the lines. You are trying to create a safe, readable visual record from controlled standoff positions. In low light, that discipline becomes non-negotiable. Even with advanced obstacle avoidance, thin conductors remain one of the hardest things for any drone vision system to interpret consistently, especially against dark backgrounds or cluttered horizons. The smart move is to use the aircraft’s sensing and subject tools to support your workflow, not to replace judgment.
Why low light used to be the weak point
The old problem was simple: once light drops, small drone operations become less forgiving.
Tree lines blend into terrain. Tower crossarms flatten into silhouettes. Service roads disappear into shadow. A pilot who is already managing wind, spacing, and route geometry now has to fight image noise and reduced visual separation. If you have ever tried to scout a corridor at dusk with a drone that struggles in darker scenes, you know the feeling. Every movement becomes slower, not because the job is complex, but because confidence disappears.
The Mavic 4 Pro helps because it combines the kind of imaging flexibility and flight intelligence that reduce those friction points. For corridor scouting, the practical advantage is not one single feature. It is the stack: obstacle avoidance, subject tracking, stabilized image capture, pro color profiles like D-Log, and automated tools such as Hyperlapse and QuickShots when you need broad contextual visuals.
Used properly, that stack lets you document more in one sortie and spend less mental energy wrestling the aircraft.
Build a safer low-light scouting plan
Before launch, define the corridor segment you want to cover and break it into simple passes.
For example:
- Context pass: wide-angle overview of the structure, surrounding vegetation, and access path.
- Offset line pass: parallel movement at safe distance to understand continuity along the route.
- Structure pass: slower orbit or lateral reveal around poles or towers, staying clear of conductors.
- Access pass: lower-altitude review of road condition, gates, washouts, or staging areas.
The Mavic 4 Pro is strong when you let it do structured visual collection. This is where QuickShots and Hyperlapse become more than creative features. A short automated orbit or pull-away can quickly establish how a structure sits within the terrain. A Hyperlapse sequence at dawn can show crew access visibility, fog movement, or changing shadow lines across a corridor. That is operationally useful when supervisors need to decide when a team can enter safely.
In other words, automation is not just for pretty footage. It can compress repeatable context-gathering into a short, efficient flight.
Set your image workflow for information, not drama
For low-light utility scouting, I prefer a conservative image setup.
If the goal is fast reporting, shoot in a profile that is easy to review immediately. If the goal is a broader project record or edited deliverable, D-Log is a better fit because it preserves more flexibility in the highlights and shadows. That matters in dawn and dusk scenes where the sky can stay bright while the corridor falls into darkness. With D-Log, you have more room in post to pull useful detail out of poles, vegetation edges, and terrain transitions without crushing the image.
This is one of those features that sounds abstract until you really need it. In low light, a standard profile can make a shadowed access road look like a black strip with no surface texture. A log workflow gives you a better chance of separating mud, gravel, standing water, and rutting in post-processing.
For scouts that feed maintenance planning, that difference is not cosmetic. It changes how well a remote reviewer can judge site conditions.
Use obstacle avoidance as a buffer, not a license
Obstacle avoidance is one of the most meaningful tools on a drone like the Mavic 4 Pro, especially in low-light environments where depth cues fade fast. But power line work is where pilots can get overconfident.
The aircraft’s obstacle sensing can help with trees, terrain edges, poles, and larger structures. It can also reduce stress when backing out of a shot or sliding laterally along a corridor edge. That is a genuine safety advantage. In practice, it means fewer moments where you are relying purely on the downlink image to understand what is creeping into frame from the side or rear.
Still, conductors are thin, visually inconsistent targets. In dim conditions, they may not present enough contrast for any small drone’s sensing system to guarantee detection every time. So the right operational mindset is this: obstacle avoidance should help you maintain margins, not shrink them.
When scouting power lines in low light, fly offset, keep the line geometry obvious in your frame, and avoid placing the drone in a position where a single sensing miss matters.
Where ActiveTrack actually helps
ActiveTrack gets mentioned a lot, often without context. For power line scouting, it is not there to track the line itself. It is useful when you need the aircraft to maintain a clean relationship to a moving ground subject, such as a slowly advancing utility vehicle on an access road, or when you are documenting a crew approach path from a safe separation.
That reduces stick workload. Instead of constantly correcting framing while also managing terrain awareness, you can let the Mavic 4 Pro handle part of the visual lock and focus on altitude, spacing, and route hazards. In low light, that matters because pilot workload is already higher. Anything that removes repetitive micro-corrections helps preserve attention for safety-critical decisions.
I would not use ActiveTrack near conductors in a tight environment. I would use it on the approach, the service road, or open right-of-way segments where the benefit is smoother, more consistent documentation with less manual drift.
A practical field sequence that works
Here is a simple low-light workflow I have used in similar corridor scouting tasks.
1. Arrive before the light window
Be on site early enough to assess wind, fog, terrain contrast, and likely signal obstructions. Dawn and dusk change minute by minute. A 10-minute delay can turn a workable scene into a flat, murky one.
2. Establish a safe launch point
Pick a position with clear vertical separation from trees and away from the line itself. Avoid launching under the visual clutter of the corridor if a nearby open area is available.
3. Fly the overview first
Use a wide establishing pass while there is still enough ambient light to separate structures from the background. If needed, use a short QuickShot pattern to create a spatial reference around a pole or tower.
4. Move into offset scouting
Fly parallel to the route at a conservative stand-off distance. Keep the conductors and structure line in view rather than crossing blindly between visual layers.
5. Capture access conditions
Drop lower only when clear of line hazards and document roads, gates, washouts, and staging areas. This is where the Mavic 4 Pro’s stabilized image and low-light capability save time. You can gather enough detail in one pass instead of hovering repeatedly to confirm what you saw.
6. Use D-Log when post-review matters
If the footage is headed to engineering, maintenance planning, or a project archive, D-Log gives you more grading headroom. It is worth the extra post step.
7. End with a context clip
If changing light is part of the story, shoot a Hyperlapse from a safe, open vantage point. That sequence can reveal visibility trends and corridor readability far better than a single still frame.
The past challenge this solves
What used to slow me down most was not flight time. It was uncertainty.
On older compact drones, low-light corridor scouting often produced footage that was technically acceptable but operationally weak. You could see the line. You could see the pole. But you could not always read the surrounding conditions with confidence. Was that roadside shoulder washed out, or just shadowed? Was that vegetation crowding the right-of-way, or just a compressed dark mass? Was the structure silhouette clean, or did the image just smear when the aircraft moved?
The Mavic 4 Pro makes those calls easier because the whole system is more supportive. Better imaging options, smarter obstacle awareness, and steadier automated capture mean less second-guessing. That does not eliminate field discipline. It gives disciplined pilots better information.
That is the real upgrade.
What to send back to the client or team
For a useful scouting package, I would deliver:
- a short overview clip of the corridor segment
- stills or frame grabs of any visible vegetation, access, or structure concerns
- one or two annotated screenshots showing location context
- a separate low-light color-corrected export if D-Log was used
- a time-based sequence, such as Hyperlapse, if visibility change is relevant
If you are building a repeatable workflow for utilities or contractors, consistency matters more than volume. The Mavic 4 Pro helps because it can produce polished, readable material quickly enough that standardization becomes realistic.
And if you are refining your own corridor scouting routine or need a second opinion on setup, flight spacing, or capture profiles, you can message Chris directly here.
Final field advice for Mavic 4 Pro pilots
Three rules make the biggest difference.
First, keep your mission definition narrow. Scouting is not close inspection. The Mavic 4 Pro is excellent for visual assessment from safe positions, especially when light is limited, but that does not mean every structure should be approached aggressively.
Second, use the smart features selectively. Obstacle avoidance, ActiveTrack, QuickShots, and Hyperlapse are valuable when they reduce workload or improve documentation. They are not there to make a complex corridor feel casual.
Third, grade your footage with purpose. If you shot D-Log, do not just normalize it and move on. Pull detail from the shadows where access routes, vegetation edges, and terrain condition actually live.
For low-light power line scouting, the Mavic 4 Pro earns its place by making a difficult window more usable. That is what matters in the field. Not hype. Not specs on paper. The simple fact that a dawn or dusk sortie can now return with clearer, more dependable information than compact drones used to offer.
Ready for your own Mavic 4 Pro? Contact our team for expert consultation.