Scouting Remote Construction Sites with Mavic 4 Pro
Scouting Remote Construction Sites with Mavic 4 Pro: Practical Tips from the Field
META: A field-tested tutorial on using Mavic 4 Pro to scout remote construction sites more efficiently, with workflow tips for obstacle avoidance, ActiveTrack, D-Log, Hyperlapse, and lightweight deployment.
Remote site scouting always sounds straightforward on paper. Drive out, launch, get your imagery, head back, write the report.
Reality is messier.
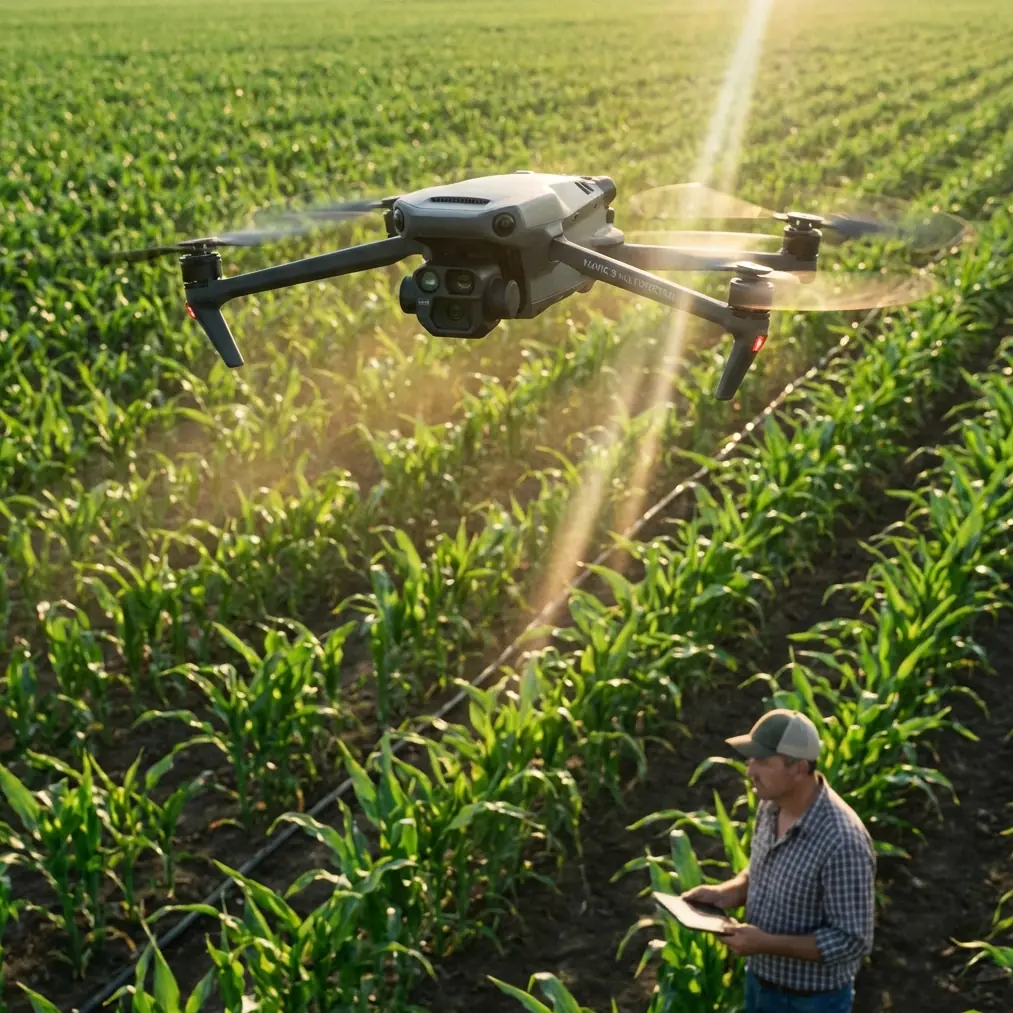
You arrive at a half-cut access road after rain. The foreman wants a quick visual on drainage, stockpile placement, and whether temporary routes are usable for the next equipment delivery. There’s no appetite for a bulky kit, a long setup, or repeated flights just because the first pass missed something important. In that kind of environment, the appeal of a compact aircraft like the Mavic 4 Pro is not just convenience. It changes how much useful information you can collect before the weather shifts or the light goes flat.
That matters more than many crews realize.
I was reminded of this by an odd parallel from outside drones entirely: a recent piece about Canon’s RF 50mm F1.8 STM lens. On first glance, people dismissed it as “cheap” or entry-level. But the article made a sharper point. Mount that 50mm on an APS-C body like the R50 or R10, and the effective field of view lands around 80mm. Same lens, different operational result. One setup suddenly covers more than one job. The deeper lesson had nothing to do with brand loyalty or spec-sheet theater. It was about choosing tools that solve real working conditions without forcing you to carry redundant gear.
That logic applies cleanly to remote construction scouting with Mavic 4 Pro.
The same source also highlighted another concrete detail: the lens weighs just 160 grams, and paired with an R8 the whole package stays under 700 grams. Again, the point was not weight in isolation. It was that a smaller, lighter system gets used more often, in more places, with less friction. That is exactly how site teams should think about an aerial platform. A drone that is easy to deploy is a drone that actually gets flown when a superintendent needs answers now, not after someone goes back to fetch a larger case and rebuilds the setup from scratch.
So rather than treating the Mavic 4 Pro as a generic camera drone, I want to frame it as a remote-site decision tool. This tutorial is built around that idea: get in fast, collect what matters, and avoid creating extra work for yourself back at the trailer.
Why compact deployment matters more on remote construction sites
On a controlled media shoot, you can afford to fuss over equipment. On a remote build, every extra step has a cost.
You may be walking uneven ground, working from the edge of an active laydown area, or launching near temporary barriers, equipment, and utility materials that were not there the previous week. The practical advantage of a compact aircraft is not abstract portability. It is reduced hesitation.
That lens article nailed something many professionals miss: users do not want to carry two tools when one adaptable setup handles both scenarios. In the same way, a site-scouting drone should let you capture overview imagery, tighter progress checks, tracking movement along access routes, and presentation-ready visuals from one field kit.
When that barrier drops, scouting becomes habitual instead of occasional.
Start with a simple site-scouting flight plan
Before takeoff, decide what decisions the flight needs to support. Construction teams often say they need “a site overview,” but that is too vague to be useful. Break the mission into four deliverables:
Access and logistics check
Can vehicles safely enter and turn? Are temporary roads holding shape? Is there standing water or edge breakdown?Earthworks and material distribution
Are stockpiles where they should be? Is spoil encroaching on planned traffic paths? Are cut and fill zones visually consistent with the current phase?Structure or utility progress
What changed since the last visit? Are crews sequenced efficiently? Are there visible clashes in staging?Stakeholder communication
Can you create clean visuals for project managers, clients, or off-site engineers without another dedicated media flight?
If you know these four goals in advance, the Mavic 4 Pro’s intelligent tools become practical, not decorative.
Step 1: Use obstacle avoidance as a planning tool, not just a safety net
Most pilots talk about obstacle avoidance after they get nervous. For construction scouting, use it earlier than that.
Remote sites are full of temporary geometry: crane components on the ground, partial steel, survey poles, concrete pumps, stacked drainage pipe, and vehicles parked in places that were open last week. This is where obstacle avoidance earns its keep operationally. It lets you hold attention on the mission objective rather than constantly flying as if every line of sight is static and guaranteed.
That does not mean you should rely on automation blindly. It means you can fly tighter inspection-style overview passes around evolving site conditions with more confidence, especially when the point is to understand layout and sequence rather than merely collect a postcard aerial.
My rule is simple: use obstacle avoidance to reduce mental load, then spend that saved attention on composition and coverage. On remote jobs, cognitive bandwidth is a real resource.
Step 2: Build your first pass around context, not detail
The first flight should answer one question: what is the site trying to tell you from above?
Climb to a moderate altitude and capture a broad orbit or segmented perimeter pass. This is where QuickShots can be useful if you need a fast visual summary for stakeholders, but I would not let automated moves drive the whole workflow. Start by manually collecting the framework of the site: access roads, drainage paths, storage zones, active work fronts, and untouched areas awaiting mobilization.
If you are scouting in terrain where roads disappear into scrub, cut slopes, or temporary haul paths, this initial pass often reveals the true story. The issue is rarely the building pad alone. It is how the site breathes around it.
A compact, field-ready platform makes this easier in the same way that the Canon example made a small lens more practical than people expected. A tool that can move quickly between “general overview” and “more selective framing” saves time because you are not rebuilding your workflow every few minutes.
Step 3: Use ActiveTrack and subject tracking for moving-site documentation
Construction sites are dynamic. Trucks enter. Excavators reposition. Crews shift work zones. If you want a clean record of how vehicles or equipment move through a constrained access path, ActiveTrack or subject tracking can be surprisingly useful.
This is not about making cinematic footage for its own sake.
It is about documenting real movement patterns. If a temporary route is too narrow, if deliveries are backing awkwardly near stored materials, or if a haul path is degrading, a well-managed tracked sequence can show the problem much better than a still image. It also gives project managers a visual basis for adjusting traffic flow or staging.
The key is restraint. Track movement that supports a site decision. Do not chase every machine just because the feature exists.
I usually recommend one short tracked clip for each major logistics question:
- one for inbound route conditions,
- one for material drop-off behavior,
- and one for circulation around any pinch point.
That alone can save multiple follow-up calls later.
Step 4: Shoot D-Log when the site has mixed light and reflective surfaces
Remote construction environments can be visually brutal. Pale aggregate, wet soil, concrete, metal roofing, reflective water, and harsh midday sun can all appear in one frame. That is where D-Log becomes useful.
If the goal is stakeholder clarity, not just immediate social-ready footage, D-Log gives you more room in post to recover highlights and preserve texture in darker areas. This matters when the visual evidence itself supports a project conversation. You may need to show the boundary between stable and washed-out ground, distinguish material types, or make a drainage path legible in difficult light.
I would not use D-Log for every casual flight if your team needs instant turnaround and no grading. But for recurring remote-site documentation, especially where conditions vary week to week, it creates a more consistent archive.
Consistency is underrated. A good site record is not just sharp footage. It is footage that can be compared over time without the image falling apart whenever the light changes.
Step 5: Use Hyperlapse to show change, not just motion
Hyperlapse gets filed under “creative mode” far too often.
On construction work, it can be genuinely informative when used with discipline. If you are scouting a remote site with a long access road, a shifting staging yard, or a broad earthworks area, a Hyperlapse sequence can compress movement across the site into a format that makes patterns obvious. Vehicle circulation, crew concentration, and evolving work fronts all become easier to interpret.
It is especially effective when site managers struggle to visualize scale from stills alone. A short Hyperlapse pass over a haul route or perimeter can reveal the relationship between terrain, work zones, and temporary infrastructure in a way static overhead frames cannot.
Again, think utility first. The output should answer a field question.
Step 6: Create a repeatable checklist for every visit
A drone earns long-term value when the workflow becomes repeatable. Here is a practical sequence I use for remote scouting jobs:
Pre-launch
- Confirm your takeoff area is clear of dust, debris, and moving equipment
- Review the exact questions the site team needs answered
- Check wind, visibility, and lighting direction
- Decide whether the output is immediate review footage or D-Log for later grading
First flight: overall site read
- Capture a wide establishing pass
- Identify access issues, drainage concerns, and stockpile placement
- Mark any areas needing a lower second look
Second flight: operational focus
- Use obstacle avoidance-enabled routes around temporary structures
- Capture tracked sequences with ActiveTrack where traffic flow or equipment movement matters
- Record tighter clips of staging, pad preparation, or utility trenches
Third flight: communication assets
- Gather clean visuals for managers or clients
- Use QuickShots selectively if a fast overview clip helps explain site condition
- Add a Hyperlapse if the site scale or movement pattern needs stronger context
This structure keeps the drone from becoming a flying camera with no reporting discipline behind it.
The real productivity gain: less friction between question and answer
What changed my own view on compact drone workflows was not one spectacular flight. It was a string of ordinary days where carrying less and setting up faster meant I actually captured the information on time.
That returns us to the Canon reference. The clever part was not the prestige of the lens. It was the practical conversion of one simple tool into multiple working roles. On an APS-C body, that 50mm effectively behaves around 80mm. A modest piece of gear becomes more versatile because the whole system was considered. And at 160 grams, it gets brought along instead of left behind. The same logic explains why compact aerial platforms work so well on remote construction jobs. The best field tool is often the one that removes excuses.
If you are still treating site scouting as a special event requiring maximum kit, you are likely slowing down your own reporting.
A better approach is to make the Mavic 4 Pro the aircraft you can launch quickly, trust around evolving obstacles, and use to build a clean visual record in one visit.
A final field note for remote teams
On remote projects, the drone is often the fastest way to connect office decisions to ground truth. The more your workflow supports rapid deployment, clear framing, and repeatable capture, the more valuable each flight becomes.
That is why features like obstacle avoidance, ActiveTrack, QuickShots, Hyperlapse, and D-Log matter only when tied to actual site questions. They are not there to fill a brochure. They reduce friction between seeing the problem and explaining it well.
If your team is trying to refine a remote-site scouting workflow or compare setup options for regular construction documentation, you can message our UAV specialists here and discuss a practical deployment scenario.
Use the aircraft to gather evidence, not just footage. That shift alone makes the Mavic 4 Pro far more useful on remote construction work than many pilots expect.
Ready for your own Mavic 4 Pro? Contact our team for expert consultation.