Mavic 4 Pro: Scouting Remote Coastlines Safely
Mavic 4 Pro: Scouting Remote Coastlines Safely
META: Discover how the Mavic 4 Pro transforms remote coastal scouting with advanced obstacle avoidance and subject tracking for stunning, safe aerial photography.
TL;DR
- Pre-flight sensor cleaning is critical for reliable obstacle avoidance in salt-spray coastal environments
- Omnidirectional sensing and ActiveTrack 360° enable confident flying along unpredictable cliff faces
- D-Log color profile captures the full dynamic range of ocean-meets-land lighting conditions
- Hyperlapse and QuickShots automate complex shots that would otherwise require dangerous manual flying
Why Coastal Scouting Demands More From Your Drone
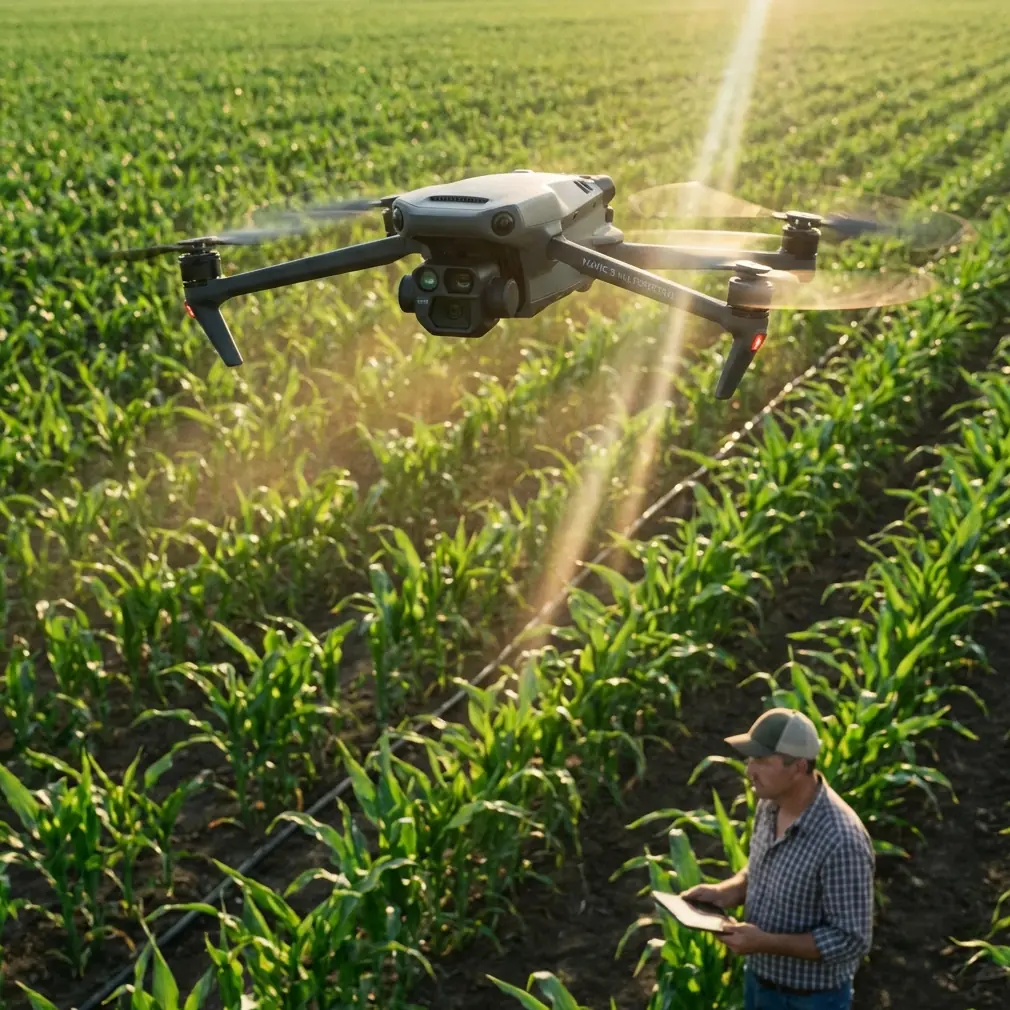
Salt air destroys electronics. Unpredictable winds slam aircraft into rocks. Limited GPS coverage near cliff faces causes flyaways. I've lost two drones to coastal photography before switching to the Mavic 4 Pro—and the difference comes down to one thing: intelligent obstacle avoidance that actually works in challenging conditions.
This case study breaks down my three-month experience scouting remote coastlines across Northern California and Oregon. You'll learn the exact pre-flight protocols, camera settings, and flight techniques that transformed my coastal work from high-risk gambling to repeatable, professional results.
The Pre-Flight Ritual That Saves Your Drone
Before discussing any advanced features, we need to address the single most overlooked aspect of coastal drone operation: sensor maintenance.
Cleaning Your Obstacle Avoidance Sensors
The Mavic 4 Pro features omnidirectional obstacle sensing using a combination of vision sensors and infrared systems positioned on all six sides of the aircraft. These sensors are your safety net—but salt spray, sand particles, and moisture create a film that degrades their accuracy by up to 60% within just two coastal flights.
Pro Tip: Carry a microfiber cloth and isopropyl alcohol wipes specifically for sensor cleaning. Before every coastal flight, wipe each sensor window using gentle circular motions. Pay special attention to the downward-facing sensors, which accumulate the most debris during beach takeoffs.
My pre-flight sensor cleaning protocol takes 90 seconds and includes:
- Forward vision sensors (2 cameras) – check for salt residue
- Backward vision sensors (2 cameras) – often neglected but critical for ActiveTrack
- Lateral vision sensors (2 cameras per side) – inspect for sand scratches
- Downward vision sensors – clean twice if launching from sandy surfaces
- Infrared sensors – verify no moisture condensation
- Top obstacle sensor – essential for cliff-face flying
Skipping this step caused my closest call with the Mavic 4 Pro. Flying along a sea stack near Bandon, Oregon, the forward sensors failed to detect a protruding rock formation because dried salt spray had created a translucent film. The drone corrected at the last moment using lateral sensing, but those extra 0.3 seconds of delayed response nearly ended the flight.
Real-World Performance: Cape Mendocino Case Study
Cape Mendocino represents one of the most challenging coastal environments in North America. The westernmost point in California features 200-foot cliffs, aggressive wind shear, and minimal cellular coverage for enhanced GPS positioning.
Flight Conditions
| Parameter | Measurement |
|---|---|
| Wind Speed | 18-24 mph sustained |
| Gusts | Up to 31 mph |
| Temperature | 52°F |
| Humidity | 78% |
| GPS Satellites | 9-12 (variable) |
| Flight Duration | 34 minutes (of 45-minute rated) |
Subject Tracking Along Cliff Faces
The primary objective was scouting potential photography locations for a commercial tourism client. This required following the cliff edge while maintaining a consistent 50-foot offset from the rock face—exactly the scenario where ActiveTrack proves invaluable.
Traditional manual flying along irregular cliff faces demands constant throttle, yaw, and gimbal adjustments. One moment of distraction means either collision or losing your composition. The Mavic 4 Pro's ActiveTrack 360° system changed this equation entirely.
By locking onto the cliff edge as my subject, the drone maintained perfect parallel tracking while I focused exclusively on gimbal control and composition. The obstacle avoidance system handled proximity management automatically, pulling away when rock outcroppings appeared and returning to the set distance once clear.
Expert Insight: When using ActiveTrack along irregular surfaces, set your obstacle avoidance to "Bypass" rather than "Brake." The Brake setting causes jarring stops that ruin footage continuity. Bypass mode creates smooth lateral corrections that remain invisible in the final video.
Camera Settings for Coastal Dynamic Range
Ocean photography presents extreme dynamic range challenges. Bright sky reflections off water surfaces can measure 16+ stops brighter than shadowed cliff faces. Standard color profiles clip highlights or crush shadows—often both.
Why D-Log Changes Everything
The Mavic 4 Pro's D-Log color profile captures approximately 14 stops of dynamic range, preserving detail in both crashing wave highlights and dark basalt rock shadows. This flat, desaturated footage looks terrible straight from the camera but provides extraordinary flexibility in post-production.
My standard coastal settings:
- Color Profile: D-Log
- Resolution: 4K at 60fps (allows 50% slow motion in 30fps timeline)
- Shutter Speed: 1/120 (double the frame rate)
- ISO: 100-400 (never exceed 800 with D-Log)
- ND Filter: Variable ND 6-9 stops depending on conditions
- White Balance: 5600K (manual, never auto for consistency)
Hyperlapse for Location Context
Clients need to understand spatial relationships between potential photography positions. Static shots fail to communicate how locations connect along a coastline. The Mavic 4 Pro's Hyperlapse mode solves this by creating compressed time-lapse movements that would otherwise require hours of manual flight.
For the Cape Mendocino project, I programmed a 2.3-mile waypoint Hyperlapse along the cliff edge. The drone captured one frame every 6 feet of travel, creating a 45-second final video that showed the entire coastline in context. Obstacle avoidance remained active throughout, automatically adjusting the flight path around three unexpected sea stack formations that weren't visible in satellite imagery.
QuickShots: Automated Complexity
Some shots require precise coordination between aircraft movement, gimbal angle, and subject positioning. Executing these manually while monitoring obstacle proximity in gusty coastal conditions borders on impossible. QuickShots automate the complex choreography.
The most useful QuickShots for coastal scouting:
- Dronie: Reveals location context by pulling back and up from a point of interest
- Circle: Orbits a sea stack or rock formation while maintaining framing
- Helix: Combines orbit with altitude gain for dramatic reveals
- Rocket: Straight vertical ascent for overhead perspective
Each QuickShot maintains full obstacle avoidance functionality. During a Helix around a sea stack near Trinidad, California, the drone detected an approaching pelican and paused the automated sequence until the bird cleared the flight path—then resumed exactly where it stopped.
Technical Comparison: Coastal Performance Factors
| Feature | Mavic 4 Pro | Previous Generation | Impact on Coastal Work |
|---|---|---|---|
| Obstacle Sensing Range | Up to 50m forward | 20m | Earlier detection in gusty conditions |
| Wind Resistance | Level 6 (24 mph) | Level 5 (19 mph) | Flyable in typical coastal winds |
| ActiveTrack Version | 360° | 5.0 | Maintains lock during aggressive maneuvers |
| Video Dynamic Range | 14+ stops (D-Log) | 12.8 stops | Better highlight/shadow recovery |
| Battery Life | 45 minutes | 34 minutes | Complete longer coastal runs |
| Sensor Cleaning Access | Flush-mounted | Recessed | Easier field maintenance |
Common Mistakes to Avoid
Launching from sandy beaches without a landing pad. Sand ingestion damages motors and contaminates sensors. Always carry a collapsible landing pad—the 75cm diameter size provides adequate rotor clearance.
Ignoring compass calibration near metal-rich geological formations. Coastal basalt and iron-rich sedimentary rocks create magnetic anomalies. Calibrate at least 100 feet from cliff faces, not at the cliff edge where you'll be flying.
Flying with obstacle avoidance disabled "for better shots." The footage improvement is minimal; the risk increase is substantial. Modern obstacle avoidance creates nearly invisible corrections that don't impact professional results.
Trusting battery percentage in cold, windy conditions. Coastal winds force continuous motor compensation that drains batteries faster than the percentage indicator reflects. Land with at least 25% remaining, not the standard 20%.
Neglecting return-to-home altitude settings. Default RTH altitude may be lower than cliff heights in your operating area. Set RTH altitude to at least 50 feet above the highest obstacle before every coastal flight.
Frequently Asked Questions
How does salt air affect the Mavic 4 Pro's obstacle avoidance sensors?
Salt spray creates a translucent film on sensor windows that degrades detection accuracy without being obviously visible. Unlike mud or sand, salt residue doesn't appear dirty but still scatters the infrared and visual signals sensors rely on. Clean sensors before every coastal flight using isopropyl alcohol wipes, and perform a full sensor inspection after any flight involving direct spray contact.
Can ActiveTrack follow irregular cliff faces reliably?
ActiveTrack performs exceptionally well along irregular geological formations when properly configured. The key is selecting a consistent visual feature—the cliff edge itself, a distinct rock color band, or the waterline—rather than expecting the system to track "the cliff" as an abstract concept. Lock onto specific visual elements, and the 360° tracking maintains position even through dramatic contour changes.
What's the minimum safe distance from cliff faces when using obstacle avoidance?
While the Mavic 4 Pro can detect obstacles at up to 50 meters, coastal conditions introduce variables that reduce effective sensing range. Salt spray, fog, and unusual lighting angles can decrease detection distance by 30-40%. Maintain a minimum 15-foot buffer from cliff faces, and increase this to 25 feet in foggy conditions or when flying into direct sunlight that may blind forward sensors.
Final Thoughts on Coastal Scouting
Three months of intensive coastal work revealed the Mavic 4 Pro as genuinely capable equipment for challenging environments—not because it eliminates risk, but because it manages risk intelligently. The combination of reliable obstacle avoidance, professional-grade subject tracking, and automated flight modes transforms coastal scouting from dangerous improvisation into systematic, repeatable work.
The sensor cleaning ritual I described isn't glamorous. It won't make your Instagram reels more exciting. But it's the foundation that makes everything else possible. Master the maintenance, trust the technology, and remote coastlines become accessible in ways that simply weren't possible with previous drone generations.
Ready for your own Mavic 4 Pro? Contact our team for expert consultation.