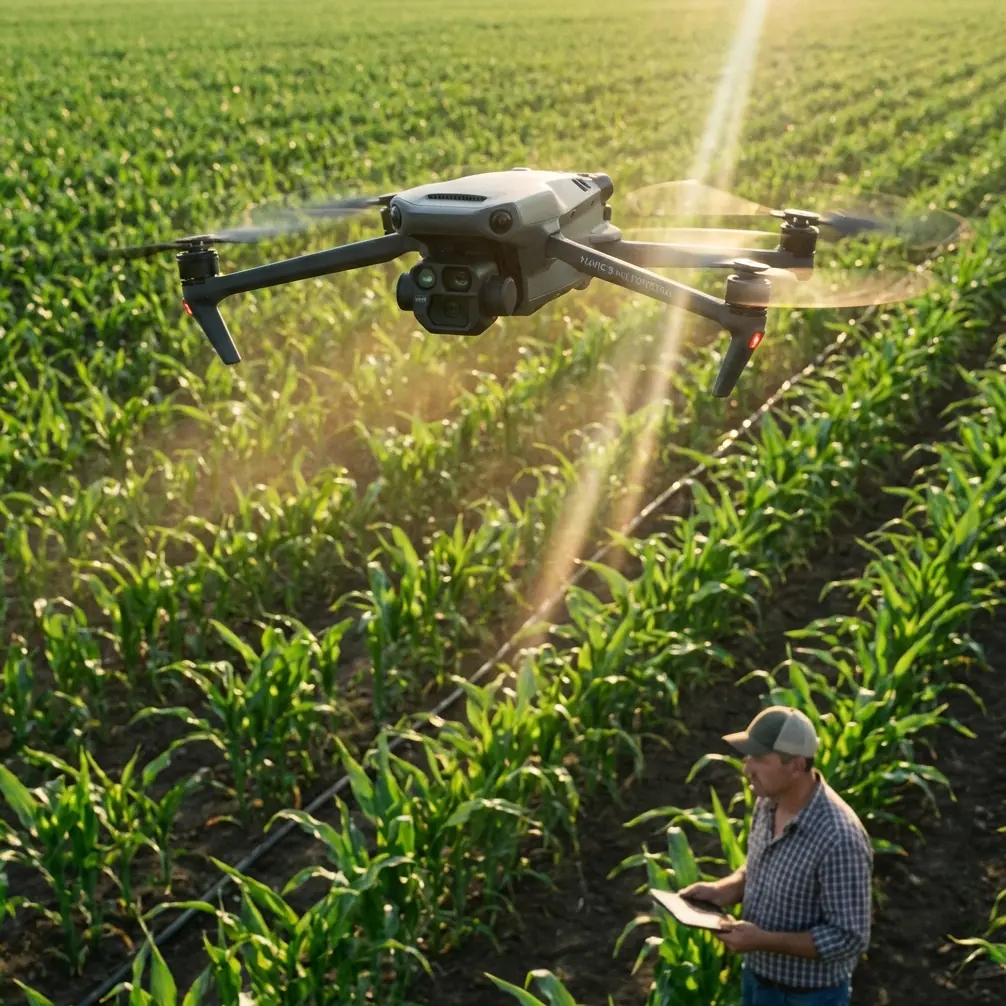
Monitoring Mountain Venues With the Mavic 4 Pro
Monitoring Mountain Venues With the Mavic 4 Pro: Practical Field Tips That Actually Hold Up
META: A practical Mavic 4 Pro tutorial for monitoring mountain venues, with field-tested tips on obstacle avoidance, ActiveTrack, D-Log, Hyperlapse, QuickShots, and battery management in steep terrain.
Mountain venues look spectacular in a planning deck. In the field, they are a different beast.
You are dealing with wind that shifts by the minute, shadows that swallow detail long before sunset, uneven terrain that plays tricks on obstacle sensors, and battery behavior that feels less forgiving than it does at sea level. If your goal is to monitor a venue in the mountains with the Mavic 4 Pro, you need more than a list of features. You need a method that respects terrain, light, and the small mistakes that become big problems when your takeoff point sits above a ravine.
I approach this as a photographer first, but mountain venue work is never just about images. It is about awareness. Can you confirm guest flow routes before setup begins? Can you inspect parking overflow areas without hiking every corner? Can you watch how weather and light change the site over a two-hour setup window? That is where the Mavic 4 Pro becomes useful, provided you fly it with discipline.
This tutorial walks through how I would use the Mavic 4 Pro for venue monitoring in mountain environments, with an emphasis on obstacle avoidance, subject tracking, QuickShots, Hyperlapse, D-Log capture, and one battery management habit that has saved me more than once.
Start by defining what “monitoring” actually means
A lot of pilots launch too early and improvise the mission in the air. That burns battery and attention. For a mountain venue, monitoring usually falls into four jobs:
- Confirming site readiness from above
- Tracking people, vehicles, or setup movement through access routes
- Capturing reference footage for planners and operators
- Re-checking changing conditions such as shadows, fog drift, or crowd density
Those are not the same task, so do not fly them the same way.
If I am documenting layout accuracy, I want deliberate, repeatable passes. If I am observing staff movement between a staging area and the main venue, I want ActiveTrack or controlled manual flight that keeps a subject readable without getting seduced by cinematic moves. If I am helping the organizer understand how the venue changes through the afternoon, Hyperlapse becomes useful because it compresses light, weather, and traffic patterns into something operationally obvious.
The Mavic 4 Pro matters here not because it is simply “better,” but because this class of aircraft gives you a combination mountain work demands: strong obstacle awareness, dependable automated subject handling, pro-grade recording options like D-Log, and enough intelligent flight modes to gather visual information efficiently without turning every sortie into a freestyle session.
The first mountain mistake: trusting altitude readouts too casually
A mountain venue can fool even experienced pilots because relative height is not intuitive on sloped ground. You may be 60 meters above your takeoff point and still far too close to a rising ridgeline or tree line. That is why obstacle avoidance is not just a comfort feature in this scenario. It is a planning tool.
On the Mavic 4 Pro, I treat obstacle sensing as backup, not permission. In steep terrain, sensors can be challenged by thin branches, uneven rock faces, and contrast-poor surfaces in low light. What matters operationally is how you combine that sensing with route design.
My rule is simple: never build your monitoring path around the lowest safe clearance from your launch spot. Build it around the highest terrain or structure your route might encounter. If the venue sits on a shelf with a road climbing behind it, I assume the aircraft will need extra vertical margin on the uphill side even when the image feed makes the scene look open.
This is especially relevant when checking mountain venues in early morning or late afternoon. Long shadows flatten depth perception on-screen. A line of dark pines may look comfortably distant until the drone closes the gap much faster than expected. Obstacle avoidance helps, but your real protection is conservative routing and using the map view before every lateral push across the slope.
Use ActiveTrack carefully, because mountain subjects do not move like city subjects
ActiveTrack is one of the most useful tools for venue monitoring, but only when you understand its limits. In urban or open-field environments, subject movement is often predictable. In the mountains, a shuttle van may disappear behind a stand of trees, event staff may cut under canopies, and hikers or crew members may move from bright sun into deep shade within seconds.
That matters because subject tracking is only as reliable as subject visibility and scene separation.
If I am monitoring a vehicle path into a mountain lodge or outdoor wedding venue, I use ActiveTrack for short segments, not the entire route. Let the drone follow through the open section, then take manual control before the route narrows near trees, stone walls, utility lines, or decorative structures. This reduces the odds of the aircraft making awkward autonomous positioning choices when the terrain becomes more complex.
A practical example: if a venue team wants overhead confirmation that supply vehicles are arriving through a single-lane mountain access road, do not just lock onto the first van and hope for the best. Use ActiveTrack to document the clean, visible stretch, then pause and reposition for the choke point. That gives you clearer evidence of arrival flow while keeping the aircraft in easier airspace.
Operationally, that is the difference between using automation as an assistant and outsourcing judgment to it.
QuickShots are useful here, but not for the reason most people think
QuickShots get treated like social content tools. For mountain venue monitoring, they are better understood as fast orientation builders.
A short orbit, reveal, or pull-back can show planners how the venue sits in relation to parking, nearby slopes, tree cover, water features, and backup access routes. That is actionable information. A single automated move can explain the site layout faster than ten static frames.
The key is restraint. If your venue manager needs confirmation that a ceremony platform has adequate perimeter spacing from a drop-off or a tree cluster, use one clean QuickShot to establish context. Then stop. Do not stack automated moves just because they are available.
I have found that a brief pull-away from the center of a venue is especially helpful when teams are trying to assess whether service zones are too visually exposed from guest areas. From above, small mistakes in layout become obvious. A catering tent that felt hidden from ground level may be clearly visible from the main photo angle. A generator placement may be farther from the venue than planned, creating cable routing concerns. A QuickShot can reveal all of that in under a minute.
Hyperlapse is the underrated monitoring tool for mountain venues
If you only use Hyperlapse for scenic content, you are leaving a lot on the table.
Mountain venues are dynamic systems. Fog creeps in. Sunlight rotates off key gathering areas. Traffic bottlenecks form and dissolve. Wind pushes tent fabric and changes how secure a setup feels over time. Hyperlapse lets you compress those changes into a format that venue operators can actually study.
This is where the Mavic 4 Pro becomes more than a camera drone. It becomes a timing tool.
For example, if you launch 90 minutes before a major outdoor event segment, a Hyperlapse from a stable, elevated position can reveal exactly when the main seating zone falls into heavy shade. That affects guest comfort, lighting strategy, and photographer positioning. The same sequence can show when the mountain road begins to back up or when foot traffic starts clustering near one narrow path.
One concrete habit I recommend: do one Hyperlapse from the same vantage point at two different times of day during site prep. Even if the framing is simple, the comparison becomes useful reference material for future scheduling. The value is not cinematic polish. The value is pattern recognition.
Shoot D-Log when the mountain light turns difficult
Mountain light is rarely gentle. You get bright sky, reflective rock, dark forests, and venue structures sitting somewhere in between. That contrast can break footage quickly if you only aim for a punchy straight-out-of-camera look.
D-Log is the smarter choice when you need latitude.
Why does this matter for monitoring rather than pure filmmaking? Because venue review footage often needs to preserve detail in both the highlights and the shadows. If the event team is checking whether a lower walkway is clear, or whether a dark staging area remains visible under tree cover, crushed shadows make the footage less useful. If the sky clips hard, the overall scene can become harder to read and less trustworthy as a reference.
I generally prefer D-Log when filming wide establishing passes in mixed mountain light, especially around midday or late afternoon. It gives you more room to balance the image later so the footage remains informative, not just attractive. If you know the footage will be reviewed by non-editors, create a corrected version for them after the flight. Flat footage has value, but only if someone can interpret it properly.
Operational significance matters here: retaining detail in a shadowed service road or under a tent edge can directly affect site decisions. D-Log is not just a creative setting. In mountain monitoring, it can preserve the evidence you actually need.
My battery management rule in the mountains
Here is the field habit I trust most: in mountain terrain, I mentally subtract a chunk of my battery from the beginning of the mission and pretend it never existed.
For me, that means I do not plan a mountain venue sortie around the full nominal battery percentage. If I launch at 100 percent, I treat the pack as though the useful working mission is substantially smaller than what the number suggests. The exact reserve depends on wind, temperature, climb profile, and distance from a safe recovery point, but the principle stays fixed.
Why? Because mountain flights hide return costs.
You may descend quickly and comfortably along one side of a venue, then discover the return leg requires a headwind climb back toward your launch ridge. That can eat far more battery than the outbound segment implied. Cold air can tighten the margin further. So can repeated altitude changes while checking upper and lower venue zones.
The specific tip is this: do your farthest or highest inspection first, while the battery is strongest, then work back toward your landing area with shorter, lower-risk tasks. Do not save the long uphill reposition for the end of the flight. I see pilots do this all the time because the nearby shots feel easier to knock out first. In the mountains, that order is backwards.
A second battery habit: if you land after a demanding climb-and-hover sequence, give the pack time to normalize before sending it right back up for another full mission. Fast turnarounds are tempting during event prep, but warm batteries, gusts, and rushed relaunch decisions are a bad combination on a slope.
A simple mission sequence that works
If I were monitoring a mountain venue with the Mavic 4 Pro for practical decision-making, I would usually structure the flight like this:
First, one high establishing pass to understand the full relationship between venue, access road, parking, and terrain edges. This is where obstacle awareness and terrain reading matter most.
Second, a short QuickShot or controlled reveal to show the organizer how the site sits within the mountain landscape. That becomes an orientation reference for the team.
Third, one or two targeted ActiveTrack segments for moving vehicles or staff flow, but only through the open, readable portions of the route.
Fourth, a hover-based or slow-moving D-Log capture of problem zones: shaded service areas, edges near trees, steep access sections, and any place where staff movement or safety spacing needs a closer look.
Fifth, if timing matters, a Hyperlapse from a stable viewpoint to document crowd build, weather drift, or shifting light.
That sequence keeps the flight purposeful. It also reduces the temptation to waste battery on indecision while the aircraft is already in the air.
One last judgment call that separates good footage from useful footage
At mountain venues, the prettiest angle is often not the most informative one.
Pilots naturally want the dramatic ridgeline in the background, the low sun, the sweeping reveal. Those are good shots. But venue monitoring usually benefits more from higher, flatter, less glamorous perspectives that show true spacing and movement. If the purpose of the flight is operational clarity, choose the angle that answers the question, not the angle that flatters the landscape.
That can mean hovering in an unexciting position above a service lane to confirm delivery timing. It can mean holding a static shot over a shadowed lower deck to evaluate visibility. It can mean repeating the same frame later in the day so the organizer can compare conditions. Those decisions are not flashy. They are professional.
If you are building a workflow around the Mavic 4 Pro for mountain venue oversight, that is the mindset to keep: obstacle avoidance as insurance, ActiveTrack as a selective assistant, QuickShots as orientation tools, Hyperlapse as a pattern detector, and D-Log as a way to preserve usable information when the light turns difficult.
And if you want to compare flight plans for a mountain site, I sometimes share setup notes and route ideas through this quick WhatsApp thread: message me here.
The Mavic 4 Pro is powerful in this environment, but mountain work punishes overconfidence. Fly conservative routes. Keep more battery in reserve than you think you need. Get the critical inspection done early. Then let the creative shots happen only after the venue has been properly understood.
Ready for your own Mavic 4 Pro? Contact our team for expert consultation.