Monitoring Coastal Venues with M4P | Tips
Monitoring Coastal Venues with M4P | Tips
META: Learn how to monitor coastal venues with the Mavic 4 Pro. Expert tutorial covering battery tips, obstacle avoidance, ActiveTrack, and D-Log settings.
By Jessica Brown, Aerial Photographer & Coastal Venue Specialist
TL;DR
- The Mavic 4 Pro excels at coastal venue monitoring thanks to its omnidirectional obstacle avoidance, extended flight time, and ActiveTrack capabilities built for dynamic environments.
- Battery management in salt-air conditions requires a deliberate pre-warming and rotation strategy that can extend your total shoot time by up to 35%.
- D-Log color profile paired with Hyperlapse modes captures coastal light transitions that standard profiles simply cannot reproduce.
- This tutorial walks you through a complete coastal monitoring workflow, from pre-flight checks to post-processing delivery.
Why Coastal Venue Monitoring Demands a Specialized Approach
Coastal venues—amphitheaters on bluffs, beachfront wedding sites, oceanside festival grounds—present a unique cocktail of challenges that will punish sloppy drone work. You're dealing with unpredictable wind gusts, salt-laden air corroding electronics, rapidly shifting light conditions from water reflections, and crowds of people moving in patterns that confuse lesser tracking systems.
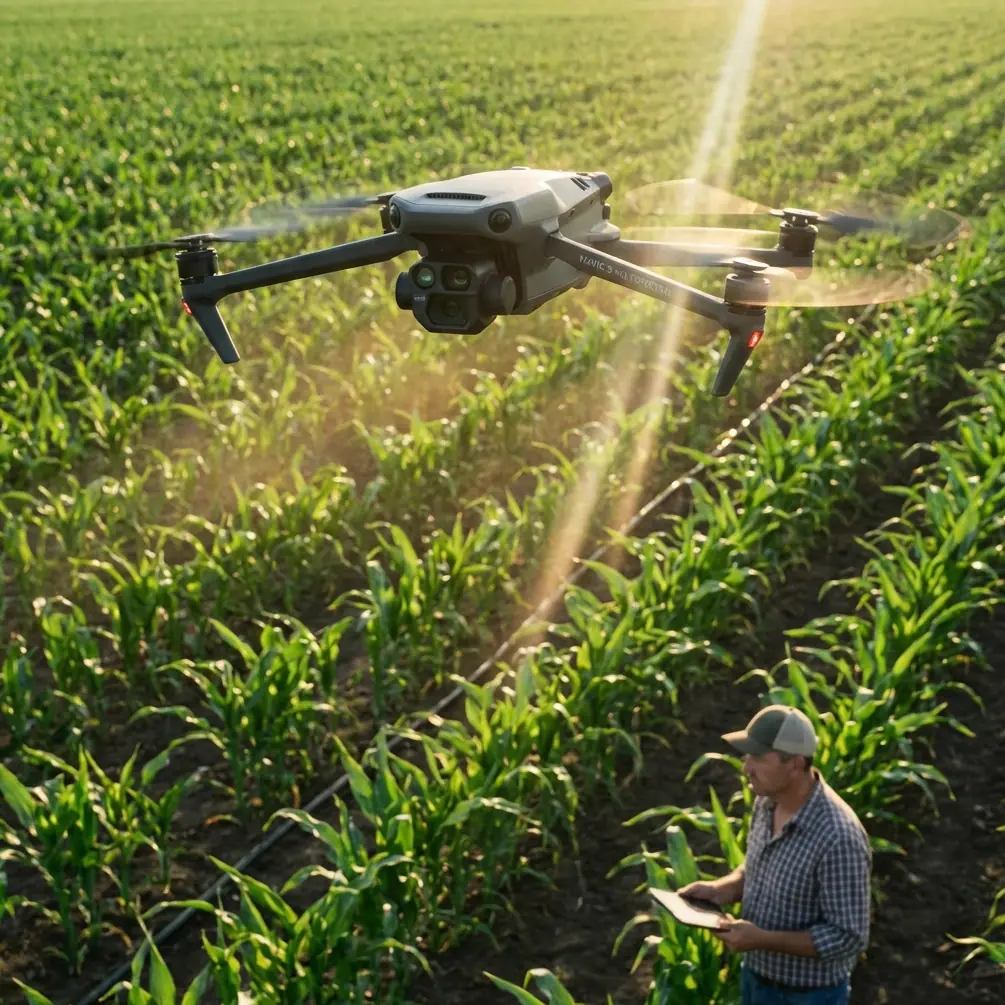
The Mavic 4 Pro was built to handle exactly this kind of complexity. Its omnidirectional obstacle avoidance system uses a sensor array that detects hazards from every angle, which is non-negotiable when you're flying near temporary structures like stage rigging, tent poles, and lighting towers.
This tutorial breaks down my complete coastal venue monitoring workflow, refined over 200+ hours of flight time along the Atlantic and Gulf coasts.
The Battery Management Lesson That Changed Everything
Here's the field experience that reshaped my entire approach: During a three-day music festival shoot in Galveston, Texas, I burned through my battery rotation faster than planned on day one. The culprit wasn't flight time—it was temperature differential.
I'd stored my batteries in an air-conditioned vehicle at 68°F and launched into 94°F coastal heat with 85% humidity. The rapid temperature swing triggered the Mavic 4 Pro's thermal protection protocols, throttling performance and cutting effective flight time by nearly 20% per battery.
The fix was simple but counterintuitive: I now leave my batteries in a ventilated, shaded case outside the vehicle for 15-20 minutes before flight. This gradual acclimatization lets the cells reach ambient temperature naturally, preserving the full rated flight time of up to 46 minutes.
Expert Insight: Rotate batteries using a numbered labeling system. Fly Battery 1 while Battery 2 acclimatizes and Battery 3 charges. This staggered approach keeps you airborne with virtually zero downtime. In coastal conditions specifically, wipe each battery's contact points with a dry microfiber cloth between flights to prevent salt-residue buildup from degrading connections.
Pre-Flight Setup for Coastal Venue Monitoring
Step 1: Environmental Assessment
Before you power on the Mavic 4 Pro, spend 10 minutes reading the environment:
- Wind speed and direction: Use an anemometer, not your phone's weather app. Coastal gusts can exceed reported averages by 15-25% near structures.
- Tide schedule: This dictates your available flight zones if the venue borders the waterline.
- Sun position: Plan your Hyperlapse paths so the sun works with you, not against your sensor.
- Electromagnetic interference: Festival venues with large speaker arrays, LED walls, and generator clusters create signal noise. Map dead zones before your shoot.
- Bird activity: Coastal birds, particularly gulls and terns, are aggressive around drones. Identify nesting areas and avoid them entirely.
Step 2: Mavic 4 Pro Configuration for Coastal Conditions
Dial in these settings before takeoff:
- Return-to-Home altitude: Set this 15 meters above the tallest structure on-site. For coastal venues with stage rigging, that typically means 40-50 meters.
- Obstacle avoidance mode: Set to Bypass rather than Brake. In a venue monitoring context, you need the drone to navigate around obstacles autonomously rather than stopping mid-flight and ruining a tracking shot.
- Max flight altitude: Comply with local regulations, but 120 meters is typically your ceiling and more than adequate for venue coverage.
- Signal lost action: Set to Return-to-Home, never to Hover or Land. Coastal wind will carry a hovering drone out to sea.
Step 3: Camera Settings for Coastal Light
Coastal light is both a gift and a curse. The interplay of water reflections, open sky, and shaded venue structures creates a dynamic range nightmare for auto settings.
Switch to D-Log color profile immediately. D-Log captures up to 14 stops of dynamic range on the Mavic 4 Pro's Hasselblad camera system, preserving detail in bright ocean highlights and dark stage shadows simultaneously. You'll color grade in post, but the latitude D-Log gives you is irreplaceable.
| Setting | Standard Profile | D-Log Profile | Recommended for Coastal |
|---|---|---|---|
| Dynamic Range | 10 stops | 14 stops | D-Log |
| Color Saturation | High (baked in) | Flat (flexible) | D-Log |
| Shadow Detail | Limited | Extensive | D-Log |
| Post-Processing Required | Minimal | Moderate-Heavy | D-Log |
| Highlight Recovery | Poor | Excellent | D-Log |
| Best Use Case | Quick social posts | Professional delivery | D-Log |
Active Monitoring: Flight Patterns and Tracking Techniques
Perimeter Sweeps with QuickShots
For initial venue assessment, the Mavic 4 Pro's QuickShots modes give you repeatable, cinematic perimeter sweeps without manual stick input. Use Orbit mode centered on the venue's main stage or focal point, setting the radius to encompass the full venue boundary.
This accomplishes two things: it documents the complete venue perimeter for your client, and it gives you a bird's-eye understanding of crowd flow patterns, structural bottlenecks, and potential safety concerns.
Crowd and Activity Monitoring with ActiveTrack
ActiveTrack on the Mavic 4 Pro represents a generational leap in subject tracking. The system uses machine learning to distinguish between individual subjects and groups, maintaining lock even through brief occlusions like people walking under canopies or behind pillars.
For venue monitoring, I use ActiveTrack in two primary ways:
- VIP tracking: Lock onto event coordinators or security personnel as they move through the venue. This footage helps clients analyze staff movement efficiency.
- Crowd flow analysis: Track the leading edge of crowd movement during entry and exit. The overhead perspective reveals bottleneck points invisible from ground level.
ActiveTrack works in tandem with the obstacle avoidance system. As the drone follows a moving subject through a cluttered venue environment, the omnidirectional sensors continuously recalculate safe flight paths. I've flown complex tracking shots through venues with hanging banners, overhead string lights, and pop-up tent clusters without a single collision alert forcing a shot abort.
Pro Tip: When using ActiveTrack in coastal wind, set your tracking speed to 70-80% of maximum. This gives the flight controller headroom to compensate for gusts without jerky corrections that ruin your footage. The resulting shots are noticeably smoother, and your battery drain decreases because the motors aren't constantly fighting micro-adjustments.
Time-Compressed Documentation with Hyperlapse
Hyperlapse mode is your most powerful tool for venue monitoring deliverables. Clients need to see how their space transforms over time—from empty grounds to full capacity and back.
Set up a Waypoint Hyperlapse at the beginning of the event with 3-second intervals between frames. The Mavic 4 Pro will fly the exact same path repeatedly, capturing frames that compress hours into seconds. For a typical 8-hour coastal event, this produces a 90-second time-compressed overview that shows setup, crowd arrival, peak capacity, and teardown.
The key technical detail: lock your white balance manually before starting a Hyperlapse sequence. Coastal light shifts from warm golden tones to cool blue as the day progresses, and auto white balance will create jarring color jumps between frames that even aggressive post-processing can't fully smooth out.
Common Mistakes to Avoid
Flying directly over water without a recovery plan. Coastal venue monitoring inevitably tempts you to grab that dramatic over-ocean angle. If the Mavic 4 Pro goes down over water, it's gone. Keep at least 80% of your flight path over recoverable terrain.
Ignoring salt air maintenance. After every coastal session, wipe down the entire aircraft with a slightly damp cloth, paying special attention to gimbal joints and sensor lenses. Salt crystallization is invisible until it grinds your gimbal to a halt mid-shoot.
Using Subject Tracking in Spotlight mode near obstacles. Spotlight keeps the camera locked on a subject while you fly manually. Near venue structures, this splits your attention fatally. Use ActiveTrack's full autonomous mode and let the obstacle avoidance system handle navigation.
Neglecting ND filters in coastal conditions. Water reflections blow out highlights even in D-Log. Carry ND8, ND16, and ND32 filters and swap based on sun position. An overexposed ocean surface in your venue monitoring footage looks unprofessional and wastes D-Log's dynamic range advantage.
Launching from sand. Fine coastal sand infiltrates motor bearings and cooling vents. Always use a landing pad of at least 75 cm diameter, and launch from the most sheltered position available.
Frequently Asked Questions
How does the Mavic 4 Pro handle strong coastal winds during extended monitoring flights?
The Mavic 4 Pro is rated for wind resistance up to Level 6 on the Beaufort scale, which translates to sustained winds of 39-49 km/h. In practice, coastal gusts can spike above this during otherwise calm conditions. The drone's flight controller compensates dynamically, but you'll notice reduced flight time—typically 8-12 minutes less than the rated maximum—when fighting consistent headwinds. Monitor your battery percentage more aggressively in windy conditions and set your low-battery return threshold to 30% instead of the default 20%.
Can I use ActiveTrack and obstacle avoidance simultaneously in cluttered venue environments?
Yes—this is one of the Mavic 4 Pro's core design strengths. ActiveTrack and the omnidirectional obstacle avoidance system operate as an integrated unit. The tracking algorithm plans the drone's path while the obstacle sensors provide real-time override capability. If the tracking path would lead the drone into a structure, the avoidance system reroutes automatically while maintaining subject lock. The only exception is high-speed tracking in very tight spaces, where the system may temporarily release subject lock to prioritize collision avoidance.
What's the best way to deliver coastal venue monitoring footage to clients?
Export your D-Log footage through a color grading workflow first—delivering flat, unsaturated D-Log files to non-technical clients creates confusion and undermines perceived quality. I apply a standardized coastal LUT that I've developed specifically for the Mavic 4 Pro's Hasselblad color science, then make per-shot adjustments. Deliver Hyperlapse sequences as standalone files alongside a narrated overview video. Include a top-down annotated map screenshot identifying key monitoring observations like crowd density zones, access bottleneck points, and recommended structural changes for future events.
Ready for your own Mavic 4 Pro? Contact our team for expert consultation.