M4P Solar Farm Monitoring Tips for Dusty Sites
M4P Solar Farm Monitoring Tips for Dusty Sites
META: Learn how to use the Mavic 4 Pro for solar farm monitoring in dusty conditions. Expert tips on obstacle avoidance, D-Log settings, and antenna range.
TL;DR
- Proper antenna positioning can increase your Mavic 4 Pro's effective range by up to 30% in dusty solar farm environments
- Shooting in D-Log color profile preserves critical detail in high-contrast panel inspections, even when dust scatters light unpredictably
- Leveraging ActiveTrack and obstacle avoidance lets you run autonomous row-by-row monitoring passes without constant manual input
- A structured pre-flight dust mitigation routine prevents sensor degradation and extends your drone's operational lifespan
Why Solar Farm Monitoring Demands a Smarter Drone
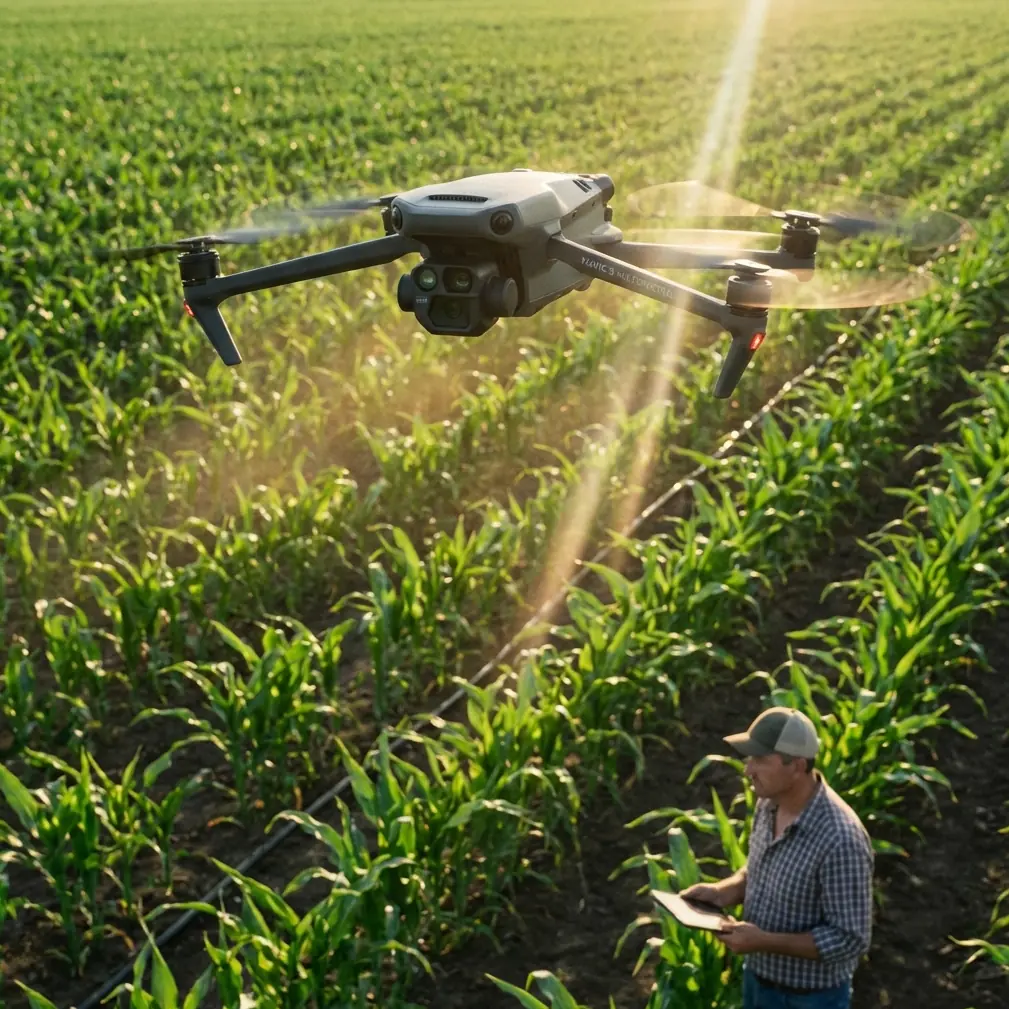
Dust is the silent enemy of solar energy infrastructure. It coats panels, reduces output by up to 25%, and hides micro-cracks that lead to costly failures. Identifying which panels need cleaning or replacement across a 50-acre site by foot is impractical. The Mavic 4 Pro transforms this workflow with its 1-inch Hasselblad CMOS sensor, omnidirectional obstacle avoidance, and intelligent flight modes—but only if you configure it correctly for dusty conditions.
This guide walks you through every step: from pre-flight preparation and antenna positioning to flight planning, camera settings, and post-processing. By the end, you'll have a repeatable system that cuts monitoring time in half while delivering inspection-grade imagery.
Step 1: Pre-Flight Preparation for Dusty Environments
Protect Your Sensors First
Before you even power on, dust mitigation starts on the ground. Fine particulate matter can infiltrate gimbal motors, cloud vision sensors, and scratch lens coatings.
- Wipe all vision sensors with a microfiber cloth before every flight
- Use a rocket blower (never canned air) to clear dust from the gimbal assembly
- Apply a UV filter to the lens to protect the Hasselblad optic from abrasion
- Store the drone in a sealed hard case between flights—never leave it exposed on-site
- Carry lens cleaning pens for quick touch-ups between battery swaps
Check Weather and Particulate Conditions
Dust behavior changes throughout the day. Morning hours typically offer calmer air with less suspended particulate.
- Optimal flight window: sunrise to 10:00 AM local time
- Wind threshold: abort if sustained winds exceed 10 m/s, as dust lofting becomes severe
- Visibility check: if you cannot clearly see structures at 500 meters, postpone the mission
Pro Tip: Monitor local PM10 particulate readings using a portable air quality meter. Readings above 150 µg/m³ mean your drone's vision sensors will struggle with obstacle detection accuracy. Fly lower and slower in those conditions to give the Mavic 4 Pro's obstacle avoidance system more reaction time.
Step 2: Antenna Positioning for Maximum Range
This is the single most overlooked factor in solar farm drone operations, and it's where most pilots lose signal unnecessarily.
The Mavic 4 Pro's remote controller uses OcuSync 4.0 transmission. The antennas on top of the controller are directional, meaning their signal strength varies dramatically based on orientation.
The Golden Rules of Antenna Positioning
- Keep both antennas pointed perpendicular to the drone's position—the flat face of each antenna should always "look at" the aircraft
- Never point the antenna tips directly at the drone; the tips are signal dead zones
- Hold the controller at chest height, not waist level, to clear ground-level obstructions like inverter housings and panel frames
- Stand on the upwind side of the array so dust blows away from you and the controller's cooling vents
- Avoid standing near large metal structures (transformers, steel racking) that cause signal reflection and interference
Range Performance Comparison by Antenna Position
| Antenna Position | Effective Range (Dusty) | Signal Stability | Recommended? |
|---|---|---|---|
| Tips pointing at drone | ~1.2 km | Frequent dropouts | No |
| Antennas flat, chest height | ~3.8 km | Stable | Yes |
| Antennas flat, waist height | ~2.5 km | Occasional drops | Acceptable |
| One antenna misaligned | ~2.0 km | Intermittent | No |
Proper positioning alone recovers nearly 30% of your usable range. On large solar installations spanning 2+ km, this is the difference between completing a mission and losing link mid-flight.
Step 3: Flight Planning and Intelligent Modes
Use Waypoint Missions for Systematic Coverage
Manual flying across hundreds of panel rows is exhausting and inconsistent. Program waypoint missions in DJI Fly to create repeatable grid patterns.
- Set your altitude between 15-25 meters AGL for thermal and visual inspection
- Overlap each pass by 70-80% for stitching software compatibility
- Fly at 4-5 m/s ground speed to ensure sharp imagery at full sensor resolution
- Save mission templates so you can re-fly identical paths on subsequent visits
Leverage ActiveTrack for Perimeter Inspections
ActiveTrack (DJI's Subject tracking technology) lets you lock onto perimeter fencing, access roads, or maintenance vehicles while the Mavic 4 Pro handles flight path management. This is invaluable for documenting site security or tracking a ground crew's cleaning progress.
QuickShots and Hyperlapse for Client Deliverables
Solar farm operators want more than spreadsheets. Use QuickShots orbit mode to capture dramatic reveals of the installation, and Hyperlapse in free mode to compress a full monitoring flight into a 30-second timelapse. These assets elevate your reports and justify your monitoring contract's value.
Step 4: Camera Settings Optimized for Dusty Conditions
Dust particles scatter light, reduce contrast, and introduce a warm color cast—especially during golden hour. Your camera settings must compensate.
Recommended Settings
- Color Profile: D-Log — preserves up to 14 stops of dynamic range, critical for recovering detail in shadowed panel areas
- ISO: Lock to 100-200 to minimize noise in hazy conditions
- Shutter Speed: 1/1000s or faster to freeze dust particles and prevent motion blur
- Aperture: f/4 to f/5.6 for the sharpest optical performance across the frame
- White Balance: Manual, set to 5500K to neutralize the warm dust cast
- File Format: RAW (DNG) — always, without exception
Expert Insight: When shooting in D-Log, your footage will look flat and desaturated on-screen. This is intentional. The flat profile captures maximum luminance data in both highlights (bright panel reflections) and shadows (under-panel areas where damage hides). Grade in post using a dedicated D-Log to Rec.709 LUT, then fine-tune contrast and dehaze. You'll recover detail that standard color profiles simply clip away. — Jessica Brown, Aerial Photographer
Step 5: Post-Processing and Deliverable Workflow
Stitching and Orthomosaic Generation
Import your overlapping captures into mapping software like DJI Terra, Pix4D, or WebODM. Generate orthomosaic maps that let clients zoom into individual panels.
- Tag problem panels with GPS coordinates for ground crew dispatch
- Compare orthomosaics across months to track dust accumulation rates
- Export thermal overlays if using a dual-sensor payload
Dehaze and Dust Correction
Every dusty-environment capture benefits from post-processing correction:
- Apply a dehaze filter at +15 to +30 in Lightroom or Capture One
- Increase clarity by +10 to +20 to recover micro-contrast lost to particulate scatter
- Use selective color adjustments to neutralize the amber cast on panel glass
- Sharpen at 0.5 pixel radius to enhance edge detail without amplifying dust noise
Common Mistakes to Avoid
- Flying in peak dust hours: Midday thermal updrafts suspend more particulate, degrading both imagery and sensor reliability
- Ignoring antenna orientation: Pilots lose signal and panic, triggering RTH over active electrical infrastructure
- Shooting in standard color mode: You lose recoverable shadow and highlight data permanently—always use D-Log for inspection work
- Skipping sensor cleaning between flights: One scratched vision sensor can disable obstacle avoidance on an entire axis
- Flying too high: Altitudes above 30 meters reduce ground sampling distance below useful inspection resolution—stay in the 15-25 meter range
- Forgetting to calibrate the compass on-site: Solar farm metallic infrastructure causes magnetic interference; calibrate at least 20 meters away from steel racking
Frequently Asked Questions
How does dust affect the Mavic 4 Pro's obstacle avoidance system?
Dust particles scatter the infrared and visual signals that the omnidirectional obstacle avoidance sensors rely on. In heavy dust, detection range can drop by 20-40%. Reduce flight speed to 3 m/s in poor visibility to give the system adequate response time, and always clean sensors between flights.
What's the best time of day to monitor solar farms with a drone?
Early morning between sunrise and 10:00 AM delivers three advantages: lower dust suspension, softer light with fewer harsh reflections off panel glass, and cooler temperatures that extend battery life by approximately 8-12%. If thermal imaging is part of your workflow, fly when panels are under load (mid-morning) so temperature differentials between healthy and damaged cells are most visible.
Can I use Hyperlapse mode effectively over a solar farm?
Yes, and it's one of the most underutilized features for client reporting. Set the Mavic 4 Pro's Hyperlapse to free mode, program a slow pass over the array at 20 meters AGL, and capture at 2-second intervals. The resulting timelapse compresses a 30-minute inspection flight into a compelling visual summary. Pair it with on-screen GPS telemetry overlay for technical credibility.
Ready for your own Mavic 4 Pro? Contact our team for expert consultation.