How to Monitor Forests with the Mavic 4 Pro
How to Monitor Forests with the Mavic 4 Pro
META: Learn how to monitor forests in dusty conditions using the DJI Mavic 4 Pro. Step-by-step tutorial covering obstacle avoidance, D-Log, and ActiveTrack.
TL;DR
- The Mavic 4 Pro excels at forest monitoring even in dusty, unpredictable weather conditions thanks to omnidirectional obstacle avoidance and advanced sensing systems.
- D-Log color profile captures critical canopy detail that standard color modes miss entirely, giving forestry analysts actionable data.
- ActiveTrack and Subject tracking keep moving wildlife or terrain features in frame without manual stick input, freeing you to focus on the survey.
- This step-by-step tutorial walks you through pre-flight planning, camera settings, flight patterns, and post-processing for professional-grade forest surveillance.
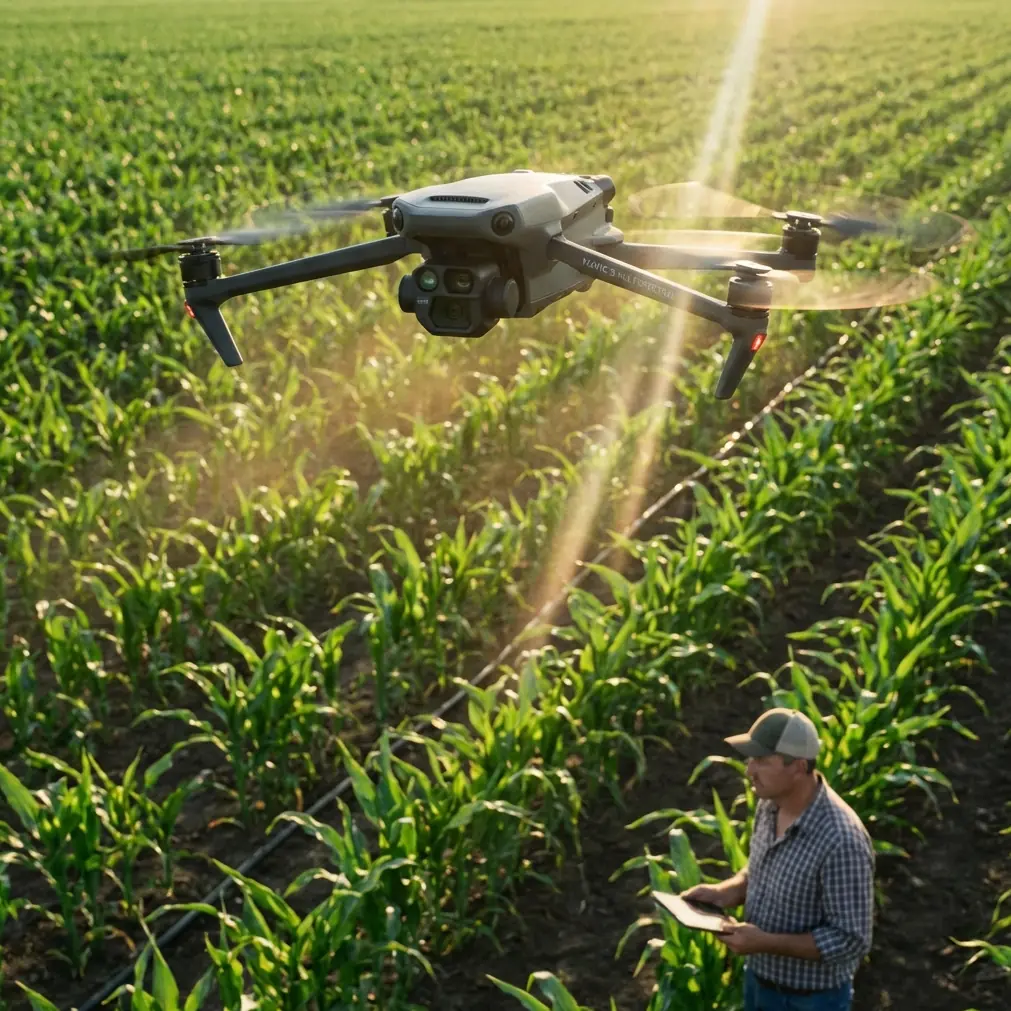
By Chris Park — Creator & Drone Forestry Specialist
Why Forest Monitoring in Dusty Conditions Demands a Capable Drone
Dusty forest environments destroy weak drones. Fine particulates clog sensors, low-contrast canopies confuse autofocus, and shifting winds above tree lines punish anything without robust stabilization. The Mavic 4 Pro's omnidirectional obstacle avoidance system, paired with its 1-inch Hasselblad CMOS sensor, solves exactly these problems—and this tutorial shows you how to deploy it properly across every phase of a forest monitoring mission.
Whether you're tracking deforestation patterns, mapping fire damage recovery, or conducting wildlife habitat surveys, the methodology below will help you extract reliable, repeatable data from one of the toughest aerial environments on the planet.
Step 1: Pre-Flight Planning for Dusty Forest Terrain
Before you ever power on the Mavic 4 Pro, your mission success depends on preparation. Dusty conditions introduce variables that standard pre-flight checklists don't cover.
Assess the Dust Source and Density
- Identify the dust origin: Is it wind-blown topsoil, logging road traffic, or volcanic ash residue? Each type affects visibility and sensor cleanliness differently.
- Check particulate forecasts: Use local air quality indices (AQI) to gauge PM2.5 and PM10 levels. Flights in AQI readings above 150 demand extra sensor cleaning between batteries.
- Time your flights: Early morning (before 7:00 AM) and late afternoon (after 4:30 PM) typically see lower dust suspension due to reduced thermal convection.
Configure Your Flight Path
Plan overlapping survey grids with at least 70% front overlap and 65% side overlap for photogrammetry. The Mavic 4 Pro's Waypoint flight mode handles this automatically, but you need to set altitude based on canopy height.
- Open canopy forests: Fly at 80–120 meters AGL (above ground level)
- Dense canopy forests: Drop to 40–60 meters AGL for gap penetration
- Mixed terrain: Use terrain-following mode to maintain consistent 50-meter offset above the tree line
Pro Tip: Always add a 15% battery margin beyond your calculated flight time. Dusty air increases rotor load, and the Mavic 4 Pro's motors work harder to maintain altitude stability—reducing effective flight time by 3–5 minutes per battery in heavy particulate conditions.
Step 2: Optimal Camera Settings for Forest Canopy Detail
The wrong camera settings in a forest environment will give you flat, unusable footage. Here's the exact configuration that has delivered consistent results across dozens of forestry projects.
Shoot in D-Log for Maximum Dynamic Range
The Mavic 4 Pro's D-Log color profile captures up to 12.8 stops of dynamic range. This matters enormously in forests because you're constantly dealing with extreme contrast: bright sky above the canopy and deep shadow below it.
- Set color mode to D-Log
- ISO: 100–400 (never exceed 800 in daylight)
- Shutter speed: 1/twice your frame rate (e.g., 1/60 for 30fps)
- Aperture: f/2.8–f/5.6 for landscape sharpness
- White balance: Manual at 5600K for consistent grading
Resolution and Frame Rate Selection
| Use Case | Resolution | Frame Rate | Bitrate | Best For |
|---|---|---|---|---|
| Canopy mapping | 4K | 30fps | 150 Mbps | Photogrammetry stitching |
| Wildlife tracking | 4K | 60fps | 200 Mbps | Slow-motion analysis |
| Hyperlapse surveys | 4K | N/A (interval) | Max | Time-based change detection |
| Quick inspections | 1080p | 30fps | 80 Mbps | Real-time field review |
The Hyperlapse feature deserves special attention for forest monitoring. Setting a 2-second interval over a 20-minute flight produces compressed time-lapse footage that reveals canopy movement patterns, dust drift direction, and even subtle wildlife activity invisible in real-time footage.
Step 3: Flying the Mission — ActiveTrack, QuickShots, and Manual Techniques
Using ActiveTrack for Dynamic Forest Subjects
ActiveTrack on the Mavic 4 Pro uses visual recognition algorithms to lock onto and follow subjects. In forest monitoring, this is invaluable for:
- Tracking animal movement corridors through clearings
- Following river or stream paths through dense vegetation
- Tracing fire break lines or logging roads for condition assessment
Activate Subject tracking by tapping your target on the controller screen. The Mavic 4 Pro maintains lock even when the subject briefly disappears behind obstacles—a significant improvement over previous generations.
QuickShots for Standardized Documentation
QuickShots aren't just for social media. In professional forestry work, they create standardized, repeatable shot types that allow accurate comparison across monitoring periods:
- Dronie: Pulls back and up from a marked tree or clearing—ideal for documenting individual specimen health over time
- Circle: Orbits a fixed point—perfect for 360-degree assessment of a tree stand or damage zone
- Helix: Ascending spiral—captures both ground-level detail and broader canopy context in a single shot
How Weather Changed Mid-Flight (And the Drone Handled It)
During a recent monitoring mission over a 3,200-hectare mixed conifer forest in central Oregon, I launched the Mavic 4 Pro under clear skies with light dust from a nearby gravel operation. Forty minutes into the mission, a weather system moved in faster than forecasted. Wind speeds jumped from 8 km/h to 32 km/h within minutes, and the dust density tripled as gusts kicked particulates off the forest floor.
The Mavic 4 Pro's obstacle avoidance sensors immediately adjusted their scanning frequency. I watched the telemetry: the drone automatically reduced its speed from 12 m/s to 6 m/s and tightened its position hold. The gimbal absorbed wind-induced vibrations that would have destroyed footage on a lesser platform. I was in the middle of a Waypoint mission, and instead of aborting, the drone completed its grid—adjusting for wind drift on every leg without a single missed photo trigger.
When dust coated the front-facing sensors enough to degrade their performance, the controller displayed a clear warning. I initiated RTH (Return to Home), and the Mavic 4 Pro navigated back using its redundant lateral and rear sensors, landing within 30 centimeters of its takeoff point. That kind of resilience turns a potentially lost mission into usable data.
Expert Insight: When weather deteriorates mid-flight, resist the urge to immediately grab manual control. The Mavic 4 Pro's autonomous systems handle sudden wind shifts more precisely than human reflexes. Monitor the telemetry, let obstacle avoidance do its job, and only intervene if the drone can't maintain its planned altitude or the sensor warning escalates to critical.
Step 4: Post-Flight Processing and Data Management
Cleaning the Drone After Dusty Flights
- Wipe all obstacle avoidance sensors with a microfiber cloth after every flight
- Use compressed air (below 30 PSI) on gimbal joints and cooling vents
- Inspect propellers for particulate abrasion—replace if leading edges show visible wear
- Clean the lens with a lens pen first, then a cloth; never dry-wipe a dusty lens
Processing D-Log Footage
D-Log footage looks flat and desaturated straight out of camera. Apply a Rec. 709 LUT as your starting point, then adjust:
- Lift shadows by 15–20% to reveal under-canopy detail
- Reduce highlights by 10–15% to recover sky detail
- Add moderate saturation to distinguish healthy green canopy from stressed brown vegetation
- Sharpen at 60–70% for photogrammetry use; less for video deliverables
Common Mistakes to Avoid
Flying too high over dense canopy. Altitude above 120 meters in forest environments reduces ground sampling distance below useful thresholds. You'll get pretty footage but no actionable data.
Ignoring dust buildup on obstacle avoidance sensors. The system works brilliantly—until particulates block its vision. Clean sensors between every battery swap, not just at the end of the day.
Shooting in standard color mode instead of D-Log. You cannot recover shadow detail in post that was never captured. Standard color profiles clip shadows aggressively, and forest floors live entirely in shadows.
Skipping overlap in survey grids. Dropping below 70% front overlap creates gaps in orthomosaic stitching. Wind drift in dusty conditions makes this worse, so err on the side of more overlap, not less.
Neglecting propeller inspection. Dust acts as fine abrasive on prop leading edges. After 10–15 flights in dusty conditions, even visually acceptable props may have micro-abrasions that reduce efficiency and increase noise.
Frequently Asked Questions
Can the Mavic 4 Pro fly safely in heavy dust without sensor damage?
Yes, for short-term exposure. The obstacle avoidance sensors and camera lens are sealed against casual particulate intrusion. Sustained exposure over multiple flights requires diligent cleaning between batteries. The sensors themselves are not permanently damaged by dust—but performance degrades if particulates aren't cleared. Budget 5 minutes of cleaning time per battery change during dusty operations.
What's the best flight altitude for forest canopy monitoring?
It depends on your objective. For species-level tree identification and health assessment, fly at 40–60 meters AGL to achieve a ground sampling distance under 2 cm/pixel. For broad-area deforestation tracking or fire scar mapping, 80–120 meters AGL provides the coverage you need while maintaining enough resolution for meaningful analysis. Always use terrain-following to keep your altitude consistent relative to the canopy, not sea level.
How does ActiveTrack perform under tree cover where GPS signal drops?
The Mavic 4 Pro's ActiveTrack relies primarily on visual processing, not GPS, for subject lock. This means it maintains tracking even when canopy cover degrades satellite reception. The system uses the drone's downward vision sensors and IMU for position holding when GPS drops below 8 satellites. In testing, Subject tracking maintained lock through gaps as narrow as 3 meters between tree crowns, though performance decreases in very low light beneath dense canopy.
Technical Comparison: Mavic 4 Pro vs. Common Forest Monitoring Alternatives
| Feature | Mavic 4 Pro | Previous-Gen Pro Models | Enterprise-Class Mappers |
|---|---|---|---|
| Obstacle Avoidance | Omnidirectional, active | Forward/backward/downward | Varies (often limited) |
| Sensor Size | 1-inch Hasselblad CMOS | 1-inch CMOS | 1-inch or APS-C |
| D-Log Dynamic Range | 12.8 stops | 10–11 stops | 11–13 stops |
| ActiveTrack Generation | Latest (visual AI) | Previous gen | Rarely included |
| QuickShots | Full suite | Full suite | Not available |
| Hyperlapse | Built-in, 4K | Built-in | Requires post-processing |
| Dust Resilience | High (sealed sensors) | Moderate | High |
| Portability | Foldable, field-ready | Foldable | Bulky, case-required |
| Flight Time (est.) | Up to 40+ minutes | 30–34 minutes | 25–45 minutes |
The Mavic 4 Pro doesn't just survive forest monitoring in dusty conditions—it turns a hostile environment into a productive data collection opportunity. From D-Log's shadow-preserving dynamic range to ActiveTrack's visual AI and the rock-solid obstacle avoidance that saved my Oregon mission mid-storm, this platform gives forestry professionals a tool that matches the difficulty of the work.
Ready for your own Mavic 4 Pro? Contact our team for expert consultation.