Mavic 4 Pro Coastline Monitoring Tips for High
Mavic 4 Pro Coastline Monitoring Tips for High-Altitude Flights
META: Practical Mavic 4 Pro tutorial for high-altitude coastline monitoring, covering obstacle avoidance, ActiveTrack, D-Log workflow, wildlife-safe flying, and mission planning.
Coastline work looks simple from a distance. Wide open water. Long, readable edges. Plenty of room to fly. Then you get on site and the reality shows up fast: wind shear above the cliffs, seabirds changing direction without warning, salt haze flattening contrast, and terrain that fools depth perception even when the horizon looks clean.
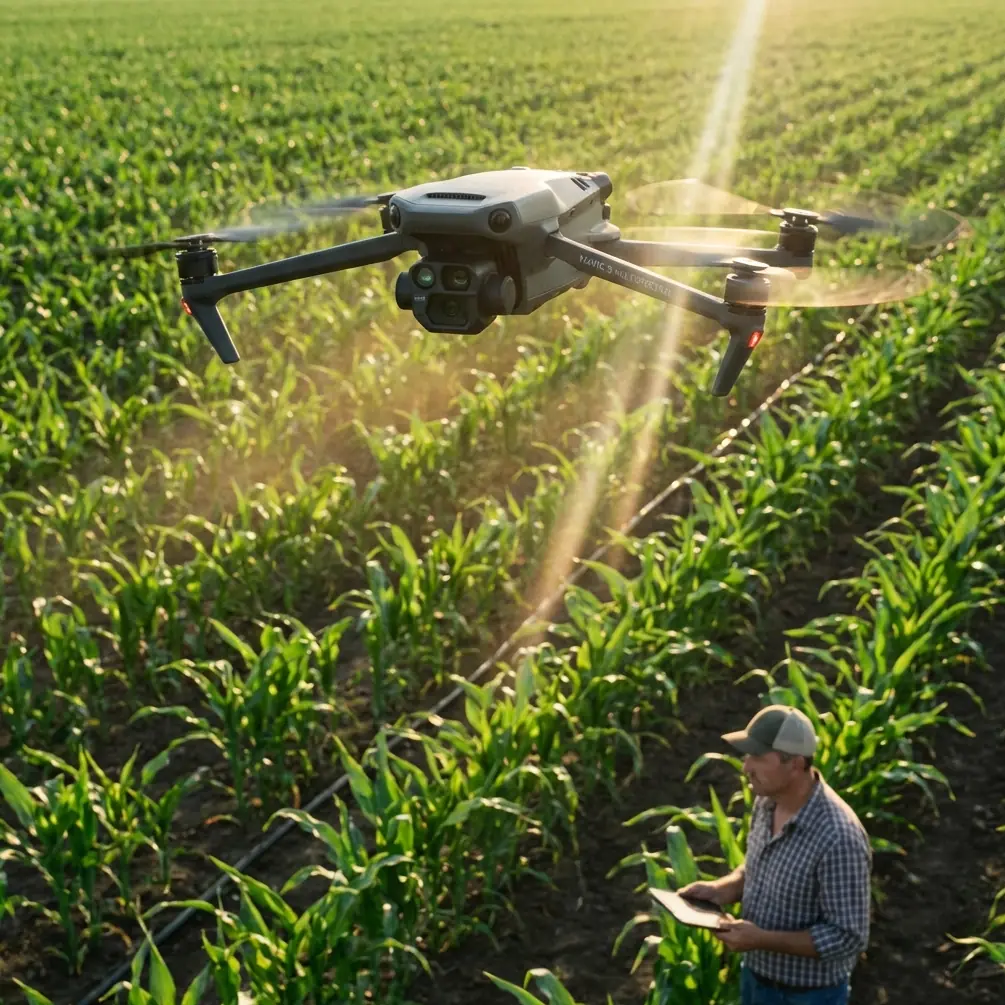
That is exactly where a well-set-up Mavic 4 Pro becomes useful. Not because it makes the mission effortless, but because it gives you enough sensing, camera flexibility, and automation to gather repeatable footage without turning every pass into a manual wrestling match. If your job is monitoring coastlines from higher altitude—erosion checks, access route review, habitat observation, storm impact documentation, or visual record keeping—the aircraft needs to do three things well: stay predictable in shifting air, see hazards before you do, and capture footage that still holds analytical value after the flight.
This tutorial is built around that use case.
Why the Mavic 4 Pro Fits Coastal Monitoring Better Than a Casual Flying Setup
High-altitude shoreline flights expose a drone to a strange combination of empty space and sudden complexity. Over water, pilots often become overconfident because the scene looks open. Along cliffs, sea stacks, towers, and ridgelines, that confidence can become expensive in a few seconds. The operational value of obstacle avoidance here is not abstract. It matters when the aircraft transitions from open air to a rock face with gulls crossing the line of travel and the low-angle sun washing detail out of the scene.
On a recent wildlife observation pass along a cliff-backed cove, a gull broke across the planned track just as the aircraft was moving laterally to maintain framing on the shoreline edge. The drone’s sensing system checked the movement early enough to prevent an aggressive pilot correction. That matters in real coastal work because abrupt stick inputs at altitude can create a chain reaction: horizon tilt, missed survey alignment, and unnecessary proximity to terrain. Good sensing does not replace judgment, but it buys time, and time is usually the difference between a clean adjustment and a bad decision.
The second major advantage is tracking consistency. Features like ActiveTrack and subject tracking are often discussed as creative tools, but along a coastline they can also reduce pilot workload when following a moving vessel, a patrol vehicle on a shoreline road, or even a drifting point of interest such as a foam line marking current movement. Used properly, tracking lets you preserve composition while keeping more attention on separation, wind behavior, and route discipline.
Then there is image integrity. Coastal monitoring often needs footage that is useful beyond social media. D-Log recording matters because shoreline scenes are notoriously contrast-heavy. Bright sky, reflective water, dark rock, white surf—standard profiles can clip one end of the range quickly. A flatter profile preserves more recoverable detail for later review, especially when you need to compare rock texture, sediment wash, or vegetation boundaries across multiple missions.
Step 1: Build the Flight Around Wind Layers, Not Just Ground Conditions
A lot of shoreline mistakes begin before takeoff. Pilots check the wind where they are standing, decide it is manageable, and launch into a completely different air mass 200 or 300 feet higher. Coastal cliffs and bluffs create uneven airflow. What feels moderate on the ground can turn turbulent once the drone crosses a ridge line or slips out over water.
For Mavic 4 Pro coastline work, I recommend planning each mission in layers:
- Launch and hover assessment near takeoff altitude
- Mid-climb stability check
- Planned working altitude check
- Return route check with headwind assumptions
Do not rush this sequence. A one-minute hover at working altitude tells you more than a dozen optimistic guesses. Watch the aircraft’s small corrections. If it is constantly making visible attitude adjustments, that is a signal to widen standoff distance from cliffs and keep your route simpler than originally planned.
Operationally, this is where obstacle avoidance becomes more valuable than many pilots realize. In unstable coastal air, even experienced operators can drift closer to terrain than intended while they are focused on framing. Sensing gives you a second layer of protection when gusts push the aircraft laterally near rock faces, light poles, or lookout structures.
Step 2: Choose Altitude for Data Quality, Not Just Safety Margin
Flying higher is not always safer. Yes, altitude can keep you clear of immediate obstacles, but every extra foot also changes how much usable shoreline detail you retain. For monitoring work, the right altitude is the one that still lets you interpret the landscape.
If your objective is broad coastline mapping, a higher position is helpful because it reveals the relationship between bluff lines, beach width, tidal patterns, and access points. If your objective is erosion review, storm cut assessment, or wildlife disturbance monitoring, too much altitude can flatten the scene and reduce the visibility of subtle edge changes.
The Mavic 4 Pro is strongest when you treat altitude as a deliberate variable rather than a default. Run one overview pass high enough to establish the big picture, then a second controlled pass lower and farther inland or offshore depending on terrain. That two-pass method gives you context first, detail second. It also keeps you from trying to solve every documentation need in a single flight line.
Step 3: Use D-Log When Contrast Is Fighting You
Coastlines are harsh on exposure. White surf and sunlit water can force the camera to protect highlights, while cliffs, vegetation, and access paths fall into shadow. If you are monitoring for visual change over time, that mismatch can hide useful detail.
This is where D-Log earns its place in the workflow. The practical significance is simple: it preserves more tonal flexibility for post-flight review. That means better chances of seeing texture in wet rock, differences in sediment spread, or the boundary between shadowed vegetation and darker soil. For recurring missions, keeping a consistent profile also helps when comparing footage from different days.
A few practical notes:
- Expose carefully to preserve the brightest water reflections.
- Keep white balance consistent through the mission.
- Avoid switching profiles mid-flight unless conditions change sharply.
- Log your time, tide, and sky condition with each sortie.
The last point is often overlooked. The camera profile is only one part of repeatability. If you want footage to support shoreline comparison, the context around the footage matters almost as much as the recording itself.
Step 4: Let ActiveTrack Help, But Never Hand It the Whole Mission
ActiveTrack is useful over coastlines, especially when following moving boats, inspection teams on a beach trail, or a wildlife-safe standoff path around a non-threatening moving subject. But high-altitude coastal environments are messy for automation. Birds, wave texture, reflected light, and broken terrain edges can all interfere with clean tracking logic.
Use ActiveTrack as a support tool, not as your operating philosophy.
A smart approach is to engage tracking only after you establish:
- Safe lateral separation from cliffs or structures
- Clear airspace without concentrated bird activity
- Predictable movement from the subject
- A direct manual override mindset
This matters because automation can keep a shot smooth while your situational awareness quietly shrinks. If the aircraft is following a vehicle along a coastal road and that road curves near a bluff, you need to be mentally ahead of the route rather than admiring the framing.
Subject tracking is most effective when it reduces repetitive control inputs, not when it encourages passive flying.
Step 5: Use QuickShots and Hyperlapse Sparingly for Monitoring Work
QuickShots and Hyperlapse can produce visually strong footage, but for technical shoreline monitoring they are secondary tools. Their best use is to add orientation context to a mission package. A short automated reveal can show how a narrow inlet relates to the larger headland. A controlled Hyperlapse can illustrate tidal movement, cloud shadow progression, or visitor traffic patterns along a coastal access zone.
The mistake is letting those modes dominate the sortie. Monitoring requires disciplined, repeatable camera movement more than dramatic motion. If you do use QuickShots, capture them after your primary documentation passes are complete. Think of them as supporting visuals rather than the backbone of the flight.
Hyperlapse is a little different. It can be genuinely useful for observing movement over time, especially where wave action or shoreline use patterns matter. Just be realistic about battery planning, wind drift, and changing light. Long sequence work over the coast can become inefficient if you have not already secured your essential footage.
Step 6: Respect Wildlife as a Flight Variable, Not an Afterthought
Coastline missions often intersect with nesting birds, seals, and transient marine wildlife. This is not a minor compliance issue. It directly affects route design, altitude choice, and whether the flight should happen at all.
The earlier gull encounter is a good example of why sensors matter, but it also illustrates a larger point: avoidance should happen at the mission design stage first. The aircraft’s obstacle system can help navigate an unexpected crossing, but the right move is to minimize those situations in the first place.
For wildlife-sensitive flights:
- Launch farther from nesting or resting zones than feels convenient.
- Use a slower approach to the work area.
- Watch for behavior changes before the drone gets close.
- Abort early if birds begin circling, diving, or vocalizing toward the aircraft.
If you routinely monitor habitats or sensitive shoreline sections, coordinate procedures in advance. If you need a direct line for field planning, airspace review, or a tailored coastal operations checklist, you can reach out here via our flight coordination chat.
The point is not to get closer. The point is to collect usable information while leaving the environment as undisturbed as possible.
Step 7: Build a Repeatable Shot List
The best coastline operators are rarely the most improvisational. They are the most consistent. If you want Mavic 4 Pro footage to support real monitoring, use a repeatable shot list for each site.
A solid baseline includes:
- A high establishing pass parallel to the shore
- A reverse-angle return pass for shadow and texture contrast
- A static hover facing the priority feature
- A slow lateral move for edge interpretation
- A contextual top-down or steep oblique pass if terrain allows
- A final environmental shot showing conditions at the time of flight
This structure helps in two ways. First, it reduces forgotten coverage when conditions become distracting. Second, it creates a consistent archive for comparing change over time. A shoreline flown in a disciplined pattern is easier to analyze than a shoreline captured through improvised cinematic wandering.
Step 8: Keep Your Return Margin Larger Than You Think You Need
Coastal flights invite range errors because the scene is visually deceptive. Open water and long linear beaches make distances feel shorter than they are. Add a headwind on the return leg and a comfortable outbound run can become a stressed recovery.
With the Mavic 4 Pro, the smarter habit is to treat battery margin as a mission constraint rather than a negotiable buffer. Turn back earlier than inland instincts suggest. That is especially true in high-altitude monitoring where descent, repositioning, and gust compensation all increase workload near the end of the flight.
A conservative return strategy protects more than the aircraft. It preserves decision quality. Pilots who know they have margin make better framing choices, smoother route corrections, and safer approaches near uneven coastal terrain.
A Practical Mavic 4 Pro Mindset for Coastal Missions
The real value of the Mavic 4 Pro in this environment is not any single feature. It is the way the platform combines sensing, tracking, and image control into a workflow that can be repeated under difficult conditions. Obstacle avoidance matters because coastlines are full of deceptive approaches and surprise movement. ActiveTrack matters because it can reduce manual workload when used with discipline. D-Log matters because coastline contrast punishes weak exposure choices and limits future analysis.
That combination is what turns a drone from a flying camera into a field tool.
If you are monitoring coastlines from higher altitude, think less about cinematic tricks and more about stability, repeatability, and environmental awareness. Fly wide first. Read the wind at working altitude. Use automation selectively. Respect wildlife before the drone forces the issue. Capture footage that still means something after the salt haze, sunlight, and adrenaline have faded from memory.
The shoreline changes whether you document it well or not. The job is to come back with material that makes those changes visible, usable, and trustworthy.
Ready for your own Mavic 4 Pro? Contact our team for expert consultation.