Mavic 4 Pro: Coastal Monitoring in High Winds
Mavic 4 Pro: Coastal Monitoring in High Winds
META: Discover how the Mavic 4 Pro handles windy coastal monitoring with obstacle avoidance, ActiveTrack, and D-Log color science for professional results.
TL;DR
- The Mavic 4 Pro maintains stable flight in winds up to 24 mph, making it a reliable tool for demanding coastal monitoring missions.
- Omnidirectional obstacle avoidance sensors automatically navigate around sea cliffs, rock formations, and unexpected wildlife encounters.
- D-Log color profile and Hyperlapse modes capture cinematic coastline footage with maximum dynamic range for post-production flexibility.
- ActiveTrack 6.0 and Subject tracking let you follow moving shorelines, tidal patterns, and marine life without manual stick input.
The Coastline Problem Every Photographer Knows
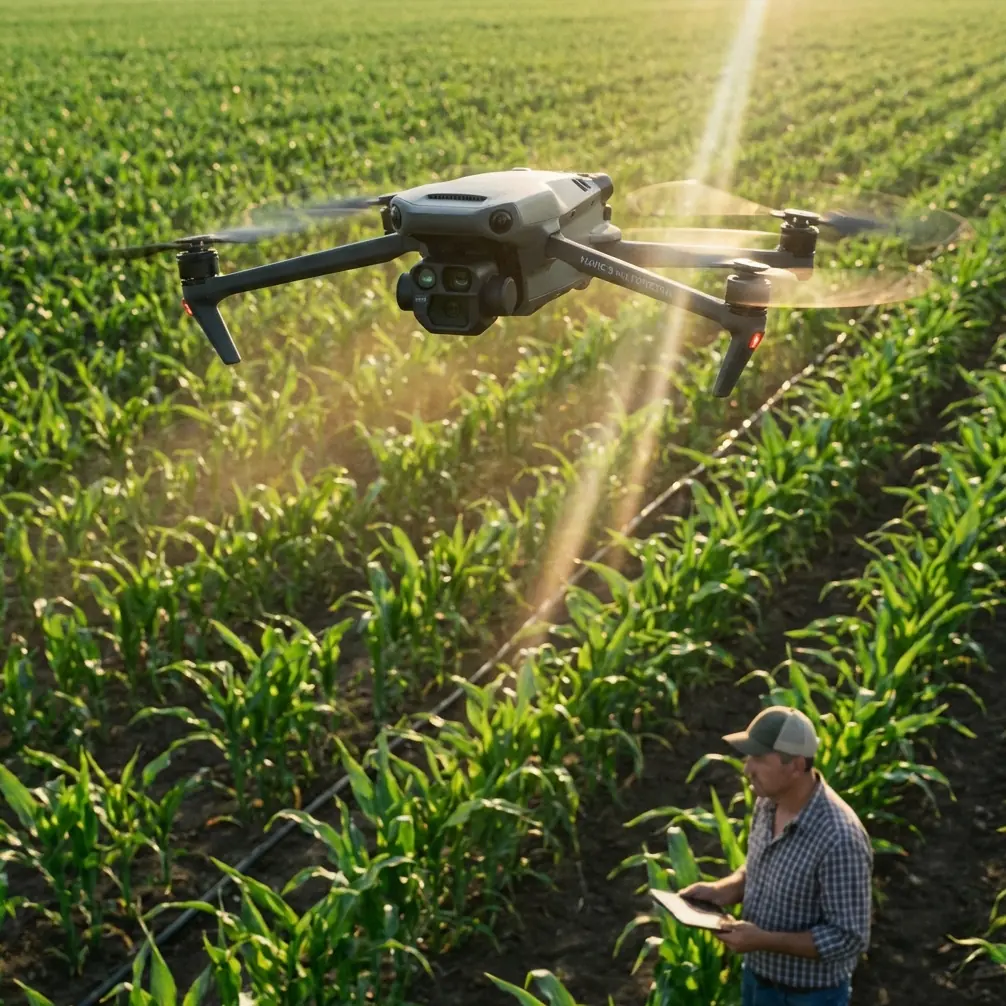
Coastal monitoring is brutal on drones. Salt-laden gusts shift direction without warning, thermals ricochet off cliff faces, and wildlife appears in your flight path at the worst possible moment. Traditional monitoring setups—fixed cameras, manned aircraft, even older consumer drones—fail to deliver consistent, high-resolution data when conditions turn hostile. The Mavic 4 Pro solves these problems with a sensor suite and flight platform purpose-built for exactly this kind of environmental punishment.
This article breaks down the specific features, workflows, and settings that make the Mavic 4 Pro the strongest option for coastal monitoring in wind-heavy environments. Whether you're tracking erosion patterns, documenting wildlife corridors, or building long-term visual datasets of shoreline change, every recommendation here comes from real fieldwork along exposed Atlantic and Pacific coastlines.
Why Coastal Wind Makes or Breaks Your Monitoring Data
Wind is the single largest variable that degrades aerial monitoring quality. A drone fighting a 20 mph crosswind burns battery faster, drifts off programmed waypoints, and introduces motion blur into otherwise sharp captures. For professional coastline work, you need footage that's repeatable, stable, and color-accurate across sessions spanning months or even years.
The Three Wind Challenges on Coastlines
- Unpredictable gusts: Coastal topography creates turbulence pockets near headlands, sea stacks, and cliff edges where wind speed can spike 30-50% above ambient readings.
- Salt corrosion risk: Extended exposure to marine aerosol accelerates wear on gimbal motors and sensor housings, demanding a drone that minimizes flight time waste.
- Thermal updrafts: Sun-heated rock faces generate vertical air columns that push lightweight drones off altitude holds, corrupting elevation-consistent datasets.
The Mavic 4 Pro addresses each of these with its reinforced airframe design, Level 5 wind resistance (up to 24 mph sustained), and advanced IMU stabilization that keeps the 3-axis mechanical gimbal locked on target even when the aircraft body is pitching to compensate for gusts.
How the Mavic 4 Pro Solves Coastal Monitoring Challenges
Obstacle Avoidance That Handles Wildlife Surprises
During a recent erosion survey along the Oregon coast, a juvenile brown pelican dove across my planned flight corridor at approximately 15 feet AGL. The Mavic 4 Pro's omnidirectional obstacle avoidance system—powered by wide-angle vision sensors on all six sides plus an upward-facing infrared sensor—detected the bird at 30 meters out and initiated a smooth lateral avoidance maneuver. The drone resumed its original waypoint path within 4 seconds, and the footage showed zero gimbal disruption.
This kind of real-world reliability matters enormously. Coastal environments are full of seabirds, and a single collision doesn't just destroy your equipment—it creates a wildlife harm incident that can trigger regulatory consequences.
Key obstacle avoidance specs:
- 360° sensing range up to 40 meters in optimal conditions
- APAS 6.0 (Advanced Pilot Assistance System) for automatic path planning around detected obstacles
- Adjustable avoidance behavior: Bypass, Brake, or Off depending on mission requirements
- Near-zero latency between detection and response in ActiveTrack mode
Expert Insight: When flying near nesting colonies, set obstacle avoidance to Brake mode rather than Bypass. Bypass causes unpredictable lateral movements that can spook birds further. Brake holds position and lets you manually choose a safe reroute.
Subject Tracking for Moving Coastlines
Tidal monitoring requires the drone to follow a moving waterline—something that sounds simple until you try to do it manually in a 20 mph headwind while also managing camera angle, exposure, and altitude. ActiveTrack 6.0 on the Mavic 4 Pro uses machine-learning-based Subject tracking to lock onto visual contrast boundaries like the foam edge of a tide line.
Combined with QuickShots modes like Dronie and Circle, you can automate repeatable reveal shots of specific beach sections that serve both scientific documentation and compelling visual storytelling for stakeholder reports.
D-Log and Hyperlapse for Professional-Grade Deliverables
Raw coastal light is harsh. Midday sun on white sand creates 14+ stops of dynamic range between highlight and shadow areas. The Mavic 4 Pro's Hasselblad camera system with a 1-inch CMOS sensor captures 20 MP stills and 5.1K video at 50fps, but the real power for monitoring work lives in the D-Log color profile.
D-Log preserves maximum tonal information in both the bright sky and dark cliff shadow zones, giving you flexibility in post to create consistent color grades across monitoring sessions shot in wildly different lighting conditions.
For long-term erosion studies, the Hyperlapse feature—specifically the Waypoint Hyperlapse mode—lets you program identical flight paths and capture time-compressed sequences that visualize months of shoreline change in seconds.
Technical Comparison: Mavic 4 Pro vs. Common Coastal Monitoring Alternatives
| Feature | Mavic 4 Pro | Competitor A (Mid-Range) | Competitor B (Enterprise) |
|---|---|---|---|
| Max Wind Resistance | 24 mph (Level 5) | 19 mph (Level 4) | 27 mph (Level 5+) |
| Sensor Size | 1-inch CMOS | 1/1.3-inch | 4/3-inch |
| Obstacle Avoidance | Omnidirectional (6-way) | Forward/Backward/Downward | Omnidirectional |
| Max Flight Time | Up to 46 minutes | 34 minutes | 40 minutes |
| Video Resolution | 5.1K/50fps | 4K/60fps | 5.1K/30fps |
| Color Profiles | D-Log, HLG, Normal | D-Log, Normal | D-Log, D-Log M |
| Weight | Under 900g | 895g | 1,450g |
| ActiveTrack Version | 6.0 | 5.0 | 5.0 |
| Hyperlapse Modes | 4 (Free, Circle, Course, Waypoint) | 3 | 2 |
| QuickShots | 6 modes | 5 modes | None |
The Mavic 4 Pro occupies a unique position: it delivers near-enterprise performance in a sub-900g airframe that falls under relaxed regulatory weight classes in many jurisdictions. For independent photographers and small environmental consultancies, this weight advantage translates directly into fewer permit requirements and faster deployment.
My Recommended Settings for Windy Coastal Flights
Camera Settings
- Video: 5.1K at 30fps for monitoring data; 50fps for cinematic B-roll
- Color Profile: D-Log for all serious work; Normal only for quick social media grabs
- Shutter Speed: 1/60s minimum (double your frame rate) to eliminate motion blur from wind-induced micro-vibrations
- ISO: Keep at 100-400 to minimize noise in shadow recovery during grading
- White Balance: Manual, set to 5600K for consistent coastal daylight matching across sessions
Flight Settings
- Sport Mode: Avoid for monitoring work—it disables obstacle avoidance
- Tripod Mode: Use for tight cliff-face passes where precision matters more than speed
- Return-to-Home Altitude: Set at least 20 meters above the highest obstacle in your survey zone
- Max Altitude: Comply with local regulations, typically 120 meters AGL
- Gimbal Mode: FPV mode off; standard follow mode provides the smoothest pans in crosswinds
Pro Tip: Before every coastal session, perform a compass calibration at least 50 meters away from any metal structures like railings, vehicles, or navigation markers. Coastal sites are littered with ferrous metal that causes IMU drift, and a bad compass calibration in wind is the fastest way to trigger a flyaway event.
Common Mistakes to Avoid
1. Ignoring wind gradient near cliff edges. Ground-level wind readings from your phone's weather app don't reflect conditions 50 meters up and 30 meters out from a headland. Use the Mavic 4 Pro's real-time wind speed telemetry on the controller screen and set a personal limit of 18 mph sustained as your abort threshold—even though the drone can handle 24 mph.
2. Flying in D-Log without understanding your post-production pipeline. D-Log footage looks flat and desaturated straight out of camera. If you deliver ungraded D-Log files to a client expecting vibrant coastal imagery, you'll lose credibility. Always apply a LUT or manual grade before export.
3. Neglecting ND filters in bright coastal conditions. Without an ND filter, you'll be forced into shutter speeds of 1/2000s or faster to avoid overexposure. This eliminates natural motion blur and makes video look jittery and hyper-sharp. Use an ND16 or ND32 filter for daytime coastal flights.
4. Running batteries below 30% in wind. The Mavic 4 Pro's 46-minute max flight time is measured in ideal, zero-wind conditions. Coastal headwinds can cut that by 25-35%. Land at 30% battery minimum to ensure you have enough power for a safe return against a sustained gust.
5. Forgetting to clean the obstacle avoidance sensors after each session. Salt spray deposits a fine crystalline film on the vision sensors. Even a light haze degrades detection range significantly. Wipe all sensor windows with a microfiber cloth and distilled water after every coastal flight.
Frequently Asked Questions
Can the Mavic 4 Pro handle salt air exposure over multiple coastal sessions?
The Mavic 4 Pro is not IP-rated for saltwater immersion, but its sealed motor housings and coated electronics tolerate moderate salt aerosol exposure. The critical maintenance step is post-flight cleaning: wipe down the entire airframe, gimbal, and sensors with a lightly dampened microfiber cloth after every session. Photographers who fly coastal missions weekly report no corrosion issues when following this routine consistently over 12+ months.
What is the best ActiveTrack mode for following a moving shoreline?
Use Trace mode within ActiveTrack 6.0. Draw a selection box around the contrast line where wet sand meets foam, and the Mavic 4 Pro will follow that boundary laterally along the beach. Keep your altitude between 15-25 meters for the most reliable Subject tracking lock. At higher altitudes, the tidal contrast line becomes too thin for the algorithm to track consistently.
How does Hyperlapse work for long-term erosion monitoring?
Waypoint Hyperlapse lets you save exact GPS coordinates, altitudes, camera angles, and gimbal positions for a programmed flight path. On return visits—whether weekly or monthly—you load the saved mission and the drone replicates the exact path. The resulting time-lapse sequences compress weeks of shoreline change into a few seconds of video, making erosion rates visually obvious for reports, grant applications, or public presentations. Pair this with D-Log to ensure color consistency across sessions shot under different sky conditions.
Ready for your own Mavic 4 Pro? Contact our team for expert consultation.