How to Map Wildlife With Mavic 4 Pro Terrain Tools
How to Map Wildlife With Mavic 4 Pro Terrain Tools
META: Learn wildlife mapping techniques using Mavic 4 Pro's obstacle avoidance and terrain tools. Expert guide covers ActiveTrack, flight planning, and D-Log capture methods.
TL;DR
- Pre-flight sensor cleaning directly impacts obstacle avoidance reliability in dusty wildlife environments
- ActiveTrack 6.0 maintains subject tracking on moving animals while navigating complex terrain automatically
- D-Log color profile preserves 14+ stops of dynamic range for accurate habitat documentation
- Hyperlapse modes compress hours of animal behavior into compelling visual data sequences
Why Wildlife Mapping Demands Superior Drone Technology
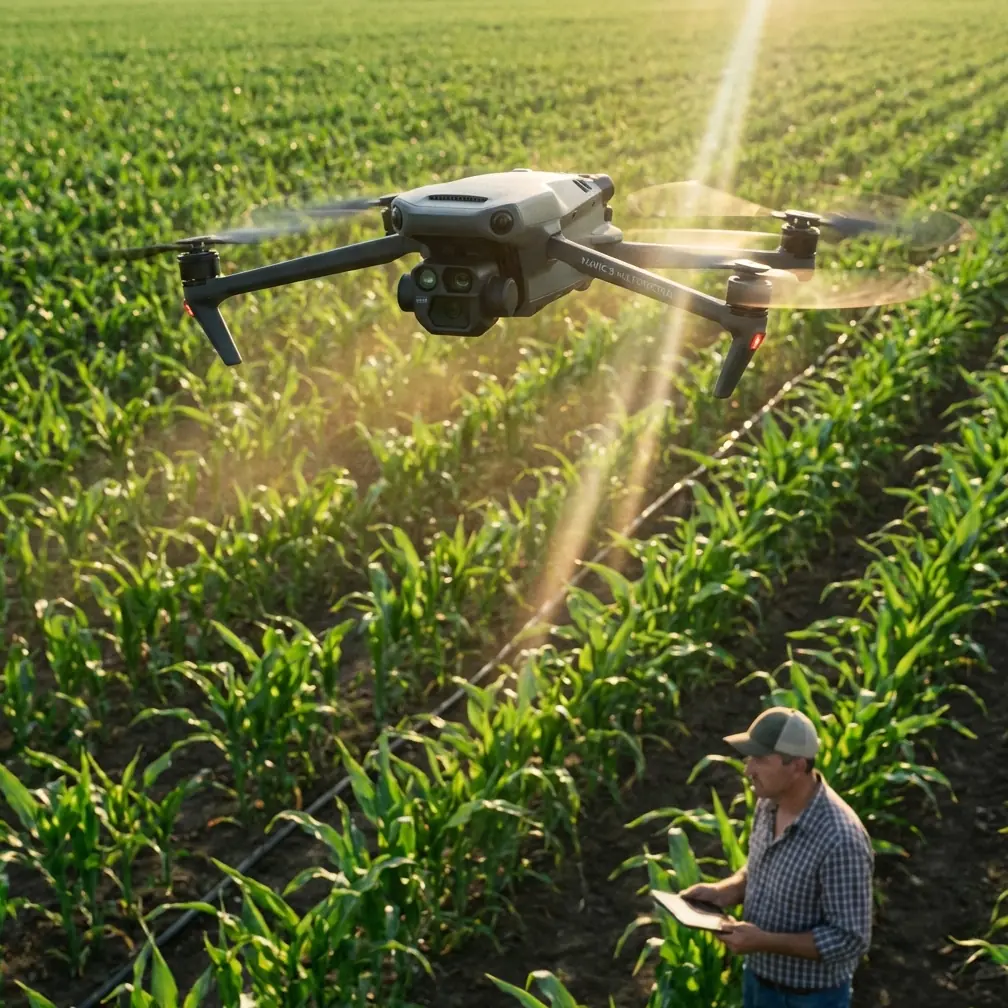
Wildlife mapping in complex terrain presents unique challenges that consumer drones simply cannot handle. The Mavic 4 Pro addresses these demands with omnidirectional obstacle sensing, extended flight endurance, and professional-grade imaging capabilities that researchers and conservation photographers require.
This guide walks you through the complete workflow for mapping wildlife habitats—from critical pre-flight preparation to post-processing techniques that maximize your data quality.
Whether you're documenting migration corridors, tracking endangered species, or creating habitat assessments, these methods will transform your aerial wildlife documentation.
Pre-Flight Preparation: The Overlooked Safety Step
Before discussing flight techniques, let's address a preparation step that most operators neglect: sensor cleaning for obstacle avoidance systems.
The Mavic 4 Pro features omnidirectional obstacle sensing using multiple vision sensors and infrared systems positioned around the aircraft body. In wildlife environments—dusty savannas, humid rainforests, coastal regions—these sensors accumulate debris rapidly.
Cleaning Protocol for Optimal Obstacle Avoidance
Follow this sequence before every wildlife mapping session:
- Inspect all sensor windows using a bright LED light at multiple angles
- Remove particulate matter with a rocket blower, never compressed air cans
- Clean optical surfaces using microfiber cloths designed for camera lenses
- Check gimbal glass for smudges that affect subject tracking accuracy
- Verify sensor calibration in the DJI Fly app after cleaning
Expert Insight: A single fingerprint on the forward vision sensors can reduce obstacle detection range by 30-40% in low-contrast environments like fog or overcast conditions common in wildlife habitats.
This maintenance directly impacts ActiveTrack performance. The system relies on clean sensors to distinguish animals from surrounding vegetation and terrain features.
Configuring Subject Tracking for Wildlife
ActiveTrack technology has evolved significantly, but wildlife presents challenges that require specific configuration adjustments.
ActiveTrack Settings for Animal Subjects
The Mavic 4 Pro's subject tracking system works differently with wildlife compared to human subjects. Animals move unpredictably, change direction instantly, and often blend with their environments.
Configure these settings before launch:
- Tracking sensitivity: Set to High for fast-moving animals like predators or birds
- Obstacle avoidance priority: Enable Bypass mode rather than Brake mode
- Subject size threshold: Adjust minimum detection size for your target species
- Prediction algorithm: Enable for animals with erratic movement patterns
Practical Tracking Scenarios
Large mammals (elephants, giraffes, buffalo): Use Spotlight mode at 60-80 meter distances to minimize disturbance while maintaining tracking lock.
Medium wildlife (antelope, wolves, big cats): ActiveTrack Trace mode works effectively at 40-60 meters, following behind or beside moving subjects.
Birds and fast movers: Requires manual tracking assistance with ActiveTrack providing stabilization support rather than autonomous following.
| Wildlife Category | Recommended Mode | Optimal Distance | Tracking Difficulty |
|---|---|---|---|
| Large mammals | Spotlight | 60-80m | Low |
| Medium mammals | Trace | 40-60m | Medium |
| Small mammals | POI + Manual | 30-50m | High |
| Birds in flight | Manual + Stabilization | 20-40m | Very High |
| Reptiles | Tripod + Zoom | 15-30m | Low |
Terrain Navigation in Complex Environments
Wildlife habitats rarely feature flat, obstacle-free terrain. Forests, canyons, wetlands, and mountainous regions demand sophisticated navigation approaches.
Obstacle Avoidance Configuration
The Mavic 4 Pro's obstacle avoidance system offers multiple behavioral modes. For wildlife mapping, configure based on terrain type:
Dense forest canopy: Enable APAS 6.0 with vertical avoidance priority. The drone will climb over obstacles rather than attempting horizontal bypass maneuvers that might lose sight of subjects.
Canyon and cliff environments: Set horizontal avoidance as primary with minimum approach distances of 8-10 meters from vertical surfaces.
Wetland and water features: Disable downward obstacle response for water surfaces, which can confuse infrared sensors with reflections.
Pro Tip: Create and save multiple obstacle avoidance profiles in the DJI Fly app. Switch between "Forest," "Open Terrain," and "Mixed" presets rather than reconfiguring mid-mission.
Altitude Management for Terrain Following
Effective wildlife mapping requires consistent altitude above ground level (AGL), not above sea level (ASL). The Mavic 4 Pro's terrain following capabilities help maintain proper survey altitude.
For habitat mapping, maintain these AGL standards:
- Vegetation surveys: 40-60 meters AGL for canopy structure documentation
- Animal population counts: 80-120 meters AGL for wide coverage with identification capability
- Behavioral observation: 30-50 meters AGL balancing detail with minimal disturbance
- Thermal surveys: 60-80 meters AGL for optimal thermal signature detection
Capturing Professional Wildlife Footage
Image quality determines the scientific and commercial value of wildlife mapping data. The Mavic 4 Pro's Hasselblad camera system delivers professional results when configured correctly.
D-Log Configuration for Maximum Flexibility
D-Log color profile captures the widest dynamic range, essential for wildlife environments with extreme contrast—bright skies against shadowed forest floors, reflective water surfaces adjacent to dark vegetation.
Configure D-Log with these parameters:
- Color profile: D-Log M for 14+ stops of dynamic range
- Resolution: 4K/60fps minimum for behavioral documentation
- Shutter speed: Double your frame rate (1/120 for 60fps)
- ISO: Keep below 800 for cleanest shadow recovery
- White balance: Set manually based on lighting conditions, never auto
QuickShots for Standardized Documentation
QuickShots modes provide repeatable flight patterns essential for scientific documentation. Use these for consistent data collection:
- Dronie: Establishes location context, pulling back from subject to reveal habitat
- Circle: Documents 360-degree habitat surrounding animal locations
- Helix: Combines elevation change with orbital movement for topographic context
- Rocket: Rapid vertical ascent for emergency wildlife disturbance assessment
Hyperlapse for Behavioral Documentation
Hyperlapse modes compress extended observation periods into analyzable sequences. For wildlife behavior documentation:
Free mode: Manually control flight path while camera captures at 2-5 second intervals
Circle mode: Document territorial behavior around fixed locations like watering holes or nesting sites
Course Lock: Maintain consistent heading while moving through habitat corridors
Set Hyperlapse capture intervals based on subject activity:
| Behavior Type | Interval | Duration | Final Length |
|---|---|---|---|
| Feeding | 3 seconds | 30 minutes | ~20 seconds |
| Migration movement | 5 seconds | 2 hours | ~48 seconds |
| Territorial display | 2 seconds | 15 minutes | ~15 seconds |
| Nesting activity | 10 seconds | 4 hours | ~48 seconds |
Flight Planning for Systematic Coverage
Random exploration wastes battery and misses critical areas. Systematic flight planning ensures complete habitat documentation.
Grid Pattern Mapping
For comprehensive habitat surveys, program grid patterns with these specifications:
- Overlap: 75% front, 65% side for photogrammetry compatibility
- Speed: 8-12 m/s maximum for sharp image capture
- Altitude consistency: Within ±2 meters throughout survey area
- Gimbal angle: -90 degrees (nadir) for mapping, -45 degrees for oblique habitat views
Waypoint Mission Design
Create reusable waypoint missions for repeated monitoring of the same locations:
- Mark key observation points as waypoints with specific gimbal angles
- Set hover durations at each point based on documentation needs
- Include safe return corridors avoiding sensitive wildlife areas
- Program altitude variations to capture different perspective data
Common Mistakes to Avoid
Approaching too quickly: Wildlife startles at rapid drone approach. Maintain slow, predictable movements under 5 m/s when within 100 meters of animals.
Ignoring wind patterns: Approach wildlife from downwind when possible. Many animals detect drone motor sounds carried on wind currents.
Neglecting battery reserves: Wildlife mapping in complex terrain requires 40% battery reserve minimum for safe return navigation around obstacles.
Using automatic exposure: Auto exposure shifts constantly in wildlife environments, creating inconsistent data. Lock exposure manually before each flight segment.
Skipping sensor cleaning: As discussed earlier, dirty sensors compromise both safety and tracking performance. Clean before every session, not just when visible debris appears.
Flying during peak activity: Many wildlife species are most active at dawn and dusk—also the most challenging lighting conditions. Plan flights for mid-morning or mid-afternoon when possible.
Frequently Asked Questions
How close can I safely fly to wildlife without causing disturbance?
Minimum approach distances vary by species and legal jurisdiction. General guidelines suggest 50 meters for large mammals, 100 meters for birds, and 150+ meters for nesting sites. Research specific regulations for your target species and location. The Mavic 4 Pro's zoom capabilities allow detailed documentation from these safer distances.
Does obstacle avoidance work effectively in dense vegetation?
The omnidirectional sensing system performs well with solid obstacles but struggles with thin branches and leaves. In dense forest environments, reduce maximum speed to 3-5 m/s and maintain manual override readiness. The system works best when you fly above canopy level and descend only in clearings.
What's the best way to track fast-moving animals like running predators?
For subjects moving faster than 30 km/h, pure autonomous tracking becomes unreliable. Use ActiveTrack in Spotlight mode combined with manual flight control. The system maintains gimbal tracking on the subject while you control aircraft position and speed. This hybrid approach handles speeds up to 50+ km/h effectively.
Maximizing Your Wildlife Mapping Results
Successful wildlife mapping with the Mavic 4 Pro combines technical configuration with field craft. The obstacle avoidance systems, subject tracking capabilities, and professional imaging tools provide the foundation—but proper preparation and technique determine final results.
Start each session with thorough sensor cleaning. Configure tracking and avoidance settings for your specific environment. Capture in D-Log for maximum post-processing flexibility. Plan systematic coverage patterns rather than random exploration.
These methods have documented everything from elephant migration corridors to raptor nesting behaviors across diverse terrain types. The Mavic 4 Pro's capabilities make professional wildlife mapping accessible to researchers, conservationists, and documentary creators working in challenging field conditions.
Ready for your own Mavic 4 Pro? Contact our team for expert consultation.