Mavic 4 Pro Guide for Mapping Construction Sites in Windy Co
Mavic 4 Pro Guide for Mapping Construction Sites in Windy Conditions
META: A practical Mavic 4 Pro workflow for windy construction-site mapping, with lessons drawn from Esri drone solution concepts including oblique photogrammetry, 3D model output, and GIS-ready site documentation.
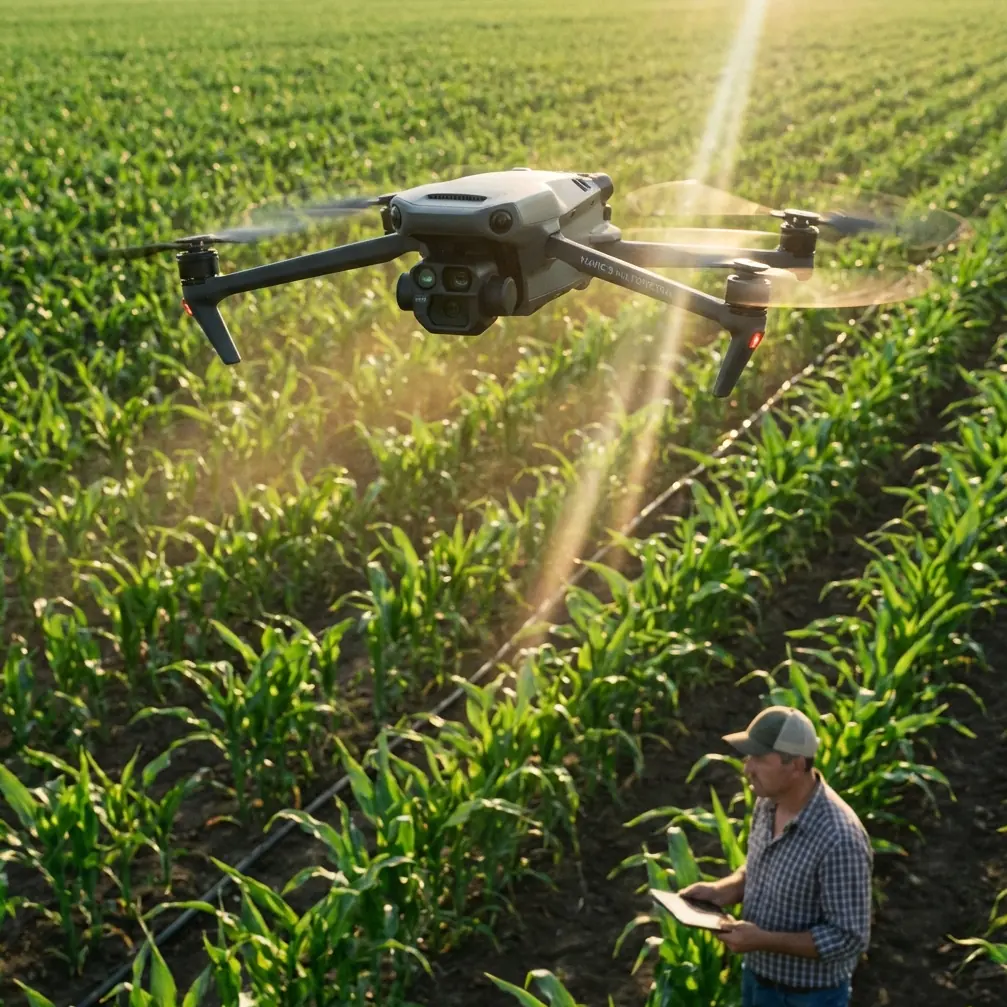
Wind changes everything on a construction site.
It changes how stable the aircraft feels over exposed slabs and steel frames. It changes overlap consistency from one mapping line to the next. It changes the quality of the model you hand to a project manager who wants usable progress data, not excuses. If you are planning to use the Mavic 4 Pro for mapping construction sites in windy conditions, the goal is not just to get the drone in the air. The goal is to return with imagery that can become a dependable site record.
That is where the real value of a modern drone workflow shows up.
The reference material behind this article points to a core idea from Esri’s drone application framework: drone capture is most useful when it feeds a larger spatial decision system, especially through outputs like oblique photography models and 3D site representations. Even though the source extract is rough, two clues stand out clearly: the mention of 倾斜摄影模型, which refers to oblique photogrammetry models, and the broader Esri context of turning aerial data into geographically organized operational information. For a construction team, that matters because a map is rarely the final product. The final product is a decision: whether grading is on plan, whether material stockpiles shifted, whether access roads are safe, whether steel placement matches the intended sequence.
The Mavic 4 Pro fits that workflow surprisingly well when flown with discipline.
Why windy construction mapping is different from normal drone flying
A construction site is not a park, and wind on a construction site is not uniform.
You can have calm conditions at takeoff and then turbulent air above retaining walls, cranes, modular units, or unfinished towers. Open soil lots can produce dust and visual haze. Tall structures create rotor-like pockets of disturbed air. Wind also tends to expose weak planning. If your flight pattern is sloppy, your overlap drops. If your camera settings drift, sharpness suffers. If your mission is too ambitious for the weather, the aircraft spends more time fighting conditions than collecting consistent data.
For mapping, consistency wins over creativity.
That sounds strange coming from a photographer, but it is true. As Jessica Brown, my instinct is usually to chase the best angle. On a mapping job, the discipline is different. You want repeatable lines, controlled altitude, and images that stitch cleanly into a model. The artistic instinct still helps, especially when reading light and surface texture, but on a construction site the real craft is creating data that can stand up to project review.
The Esri connection: why oblique capture matters
One of the most practical details in the source material is the reference to oblique photography modeling. Vertical top-down images are useful for orthomosaics, but construction sites are full of vertical detail: facades, excavation walls, scaffold geometry, stockpile edges, and partially completed structures. Oblique image sets capture that side-facing information, which dramatically improves 3D reconstruction.
Operationally, that means:
- Earthworks are easier to interpret in three dimensions.
- Site managers can inspect progress visually without being physically present in every corner of the property.
- You get richer context around elevations, access routes, and built structures than a flat overhead layer can provide.
That is exactly the kind of output that makes a drone meaningful inside a GIS environment. Esri’s “science of where” philosophy is not about pretty pictures. It is about turning imagery into location-based operational intelligence. If your Mavic 4 Pro data can support a 3D model that a planner, engineer, or construction lead can use inside a mapping platform, you are no longer just flying a drone. You are contributing to site intelligence.
Step 1: Plan the mission around wind, not around convenience
The first mistake I see is pilots planning flights based on available time rather than air behavior.
In windy conditions, start with the site layout. Identify the long axis of the jobsite and the tallest obstructions. If possible, fly mapping lines that reduce aggressive crosswind drift. Depending on the wind direction, that may mean slightly changing your usual grid orientation to keep the aircraft more predictable during turns and to preserve overlap.
If the site includes vertical construction, split the mission in two:
- Nadir mapping pass for the orthomosaic
- Oblique capture pass for 3D reconstruction
This two-part method connects directly to the source reference. The oblique model concept is not just academic. On a real construction site, it gives you a more legible digital twin of structures in progress.
Also keep your launch point smart. Avoid exposed corners where gusts wrap around containers or temporary fencing. A stable takeoff and landing zone reduces stress before the actual mapping work begins.
Step 2: Build for overlap margin when gusts are expected
Wind steals overlap more quickly than many pilots expect.
Even if the Mavic 4 Pro holds position well, gusts can shift actual image geometry enough to weaken reconstruction. That is why I recommend planning with a little more overlap than you would on a calm day. You are not padding the mission because the drone is weak. You are protecting the dataset.
Think of it this way: on a windy construction site, every extra bit of image consistency is insurance for your photogrammetry workflow.
This matters even more if you are delivering to a GIS or project platform where the imagery may support progress comparisons over time. If one weekly flight has noticeably weaker side overlap, the downstream model quality can become uneven. Once that inconsistency reaches the office, no one cares that the weather was inconvenient. They only see that one dataset aligns poorly with the others.
Step 3: Use obstacle avoidance as a safety layer, not a mission crutch
Obstacle avoidance is valuable on active sites, especially where cranes, temporary lighting, cable runs, and partially erected structures can shift from one visit to the next.
But for mapping, it should be treated as a safety buffer, not as your primary navigation strategy.
Why? Because automated obstacle responses can interrupt the geometry of a mapping run. If the aircraft brakes or detours unexpectedly, your line spacing and image timing can change. In a windy environment, that disruption can be amplified.
The better approach is to pre-plan clean corridors, maintain conservative stand-off distances, and let obstacle avoidance remain active in case reality differs from the morning briefing. The Mavic 4 Pro’s sensing capability is most useful here as risk control, especially when site conditions are changing faster than your previous map can reflect.
For structure-focused passes, ActiveTrack and subject tracking features may be tempting, but they are not the core tool for formal mapping. They are better reserved for supplemental progress visuals, equipment movement documentation, or a short explanatory sequence for stakeholders. Mapping needs deliberate geometry. Tracking features are excellent in other contexts, but they should support the documentation package rather than define it.
Step 4: Camera settings matter more than people think
Construction mapping in wind is not just a flight problem. It is a shutter problem.
If the aircraft is compensating for gusts, you need shutter speeds that preserve edge detail on repetitive site textures such as rebar grids, aggregate piles, concrete forms, and roofing patterns. Tiny motion blur can hurt stitching more than many beginners realize.
This is one place where a simple third-party accessory can make a real difference: a high-quality ND filter set. On bright days, ND filters let you keep exposure under control while choosing settings that work for your capture intent. For mapping, I still prioritize image sharpness over cinematic motion characteristics, but ND filtration can help maintain cleaner exposure choices without overdriving the image.
That accessory earns its place when the site has a mix of reflective surfaces, pale concrete, and exposed soil. The camera behaves more predictably, and predictable images are easier to process into reliable outputs.
If you are also producing stakeholder media alongside the map, the Mavic 4 Pro’s D-Log profile is useful for preserving tonal flexibility. Just keep your mapping imagery workflow consistent. Fancy grading is for presentation assets. Mapping datasets benefit from stability, clarity, and repeatability.
Step 5: Add oblique passes for operationally useful 3D models
This is where the article’s source material becomes especially relevant.
The mention of oblique photogrammetry models is not a decorative technical term. It points to one of the most practical ways to make drone data more useful on a construction site. A top-down orthomosaic answers some questions well: footprint, layout, staging, road access, surface progress. But it does not fully describe height, wall development, structure edges, or excavation faces.
An oblique capture pass helps fill those gaps.
I usually recommend adding a perimeter orbit or structured angled grid after the nadir mission, depending on site geometry. In windy conditions, keep the angle moderate and the flight path efficient. The goal is not dramatic footage. The goal is enough side-view information for solid 3D reconstruction.
When processed correctly, this can produce the kind of site model that integrates neatly into GIS workflows. That aligns with the Esri-oriented reference point: drone outputs become stronger when they are not isolated files, but part of a location-based management system.
For project teams, that operational significance is huge. A 3D model can support:
- progress verification
- communication with remote stakeholders
- visual checks of access constraints
- historical comparison over multiple site visits
That is a better story than “we flew the site last Tuesday.”
Step 6: Separate mapping flights from marketing flights
The Mavic 4 Pro can do both, but you should not treat them as the same task.
QuickShots, Hyperlapse, and tracking tools are excellent for creating digestible visual updates for clients, investors, or non-technical managers. A short reveal of a completed slab section or a time-compressed look at site logistics can communicate momentum well. But those features are not substitutes for a rigorous mapping mission.
My workflow is simple:
- First, complete the mapping mission while batteries are fresh and the light is consistent.
- Second, if conditions allow, capture supplementary visuals.
This keeps the data mission protected. It also prevents a common mistake: spending too much flight time on cinematic extras and then rushing the actual map collection once wind picks up.
Step 7: Think beyond the flight—deliverables should fit GIS and project workflows
The second major takeaway from the Esri reference is that drone operations gain value when outputs can plug into broader spatial systems. In plain language: your site map should help someone do their job.
That might mean:
- a georeferenced orthomosaic for progress review
- a 3D model for planning meetings
- change detection between weekly captures
- visual documentation linked to specific site zones
This is where many otherwise skilled pilots leave value on the table. They capture clean imagery but deliver it as disconnected media rather than structured project intelligence.
A construction team wants answers. Has the haul road shifted? Did grading advance in the southeast corner? Is the laydown yard becoming congested? Are retaining structures taking shape as expected? Drone mapping is strongest when each dataset helps answer those location-specific questions.
If you are coordinating that kind of workflow and want to compare notes on setup or accessories, this quick WhatsApp line for field workflow questions is a practical starting point.
A field-tested windy-day workflow for Mavic 4 Pro mapping
Here is the approach I trust most on exposed construction sites:
1. Arrive early enough to read the site
Stand still for a few minutes. Watch dust, flags, loose material, and crane behavior. Wind reports are useful, but site-specific turbulence tells the real story.
2. Fly the core grid first
Do not burn your best conditions on optional content. Collect the orthomosaic data while the light and your batteries are on your side.
3. Increase overlap margin
Wind can reduce consistency even when the aircraft appears stable. Extra overlap protects reconstruction quality.
4. Add a controlled oblique pass
This is the bridge from a flat map to a usable 3D model, and it connects directly to the oblique modeling concept referenced in the source material.
5. Review image sharpness before leaving
Zoom in on repetitive patterns. If rebar, gravel edges, or formwork look soft, fix the problem on site. Do not discover it later at your desk.
6. Capture secondary visuals only after the mapping work is secure
Use QuickShots, Hyperlapse, or ActiveTrack selectively for communication assets, not for the formal survey dataset.
What makes the Mavic 4 Pro especially practical here
For construction mapping, the Mavic 4 Pro’s appeal is not one isolated feature. It is the combination.
You want obstacle sensing for safety in a changing environment. You want stable flight behavior when air is uneven. You want camera flexibility that can support both technical capture and stakeholder-facing visuals. You want a platform that can move from top-down mapping to oblique site documentation without turning the workflow into a production.
That flexibility matters on construction projects because the requests rarely stay fixed. One day the team wants a progress orthomosaic. The next day they need a quick 3D view of a ramp excavation. After that, they want a short visual update for a meeting. A capable compact platform saves time because it can handle all three roles if the operator keeps the mission priorities straight.
The real benchmark: does the output help the site team?
That is the test.
Not whether the flight felt smooth. Not whether the drone looked impressive in the air. Not whether the footage got compliments. The benchmark is whether the final output supports better decisions on the ground.
The Esri reference, even in fragmented form, points toward exactly that mindset: drone imagery gains importance when transformed into mapped, modeled, location-aware information. The mention of oblique models is especially significant because construction teams do not work in two dimensions. Their problems are volumetric, phased, and spatially layered.
If you use the Mavic 4 Pro with that in mind, windy conditions stop being a reason to compromise and become a planning factor you account for. Better overlap. Smarter timing. Controlled oblique capture. Reliable image sharpness. GIS-ready outputs.
That is what separates a casual site flight from a professional mapping workflow.
Ready for your own Mavic 4 Pro? Contact our team for expert consultation.