M4P Vineyard Inspection Tips for Urban Growers
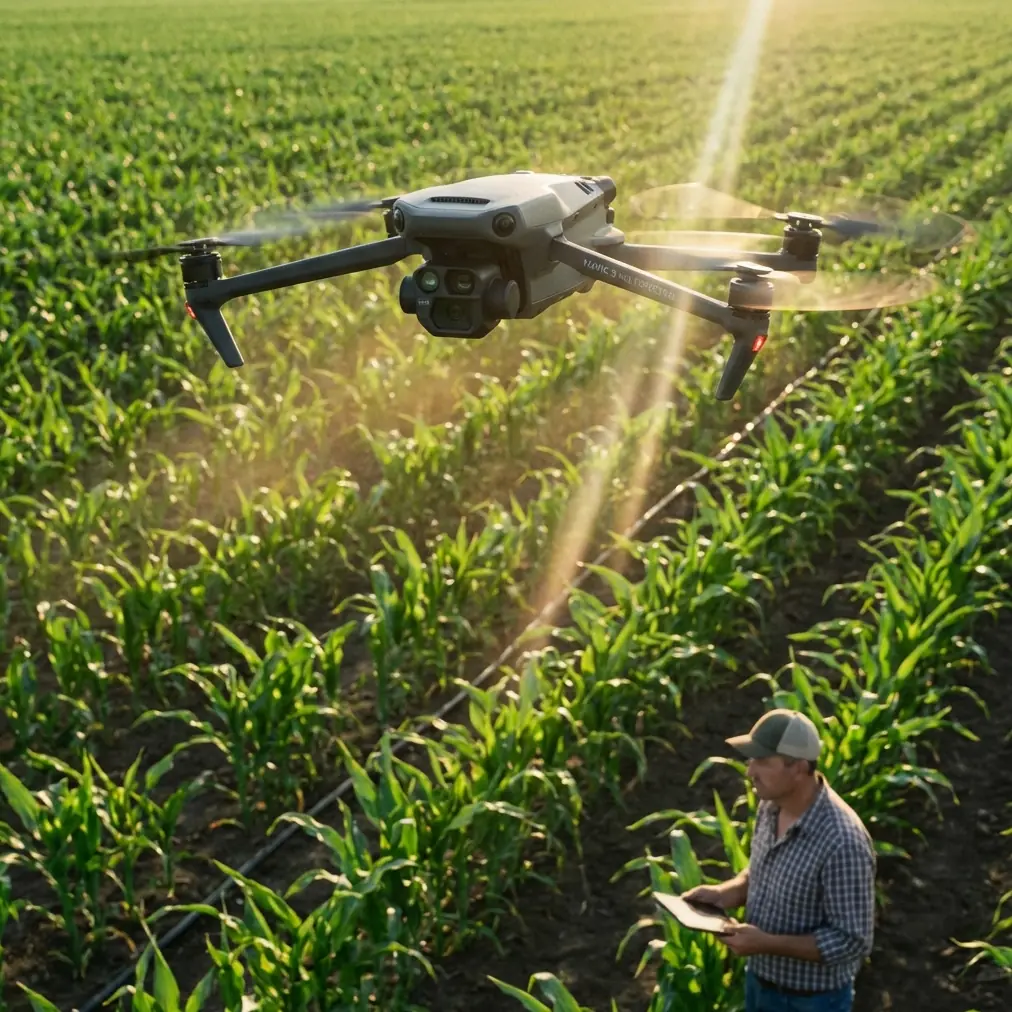
M4P Vineyard Inspection Tips for Urban Growers
META: Learn how to inspect urban vineyards with the Mavic 4 Pro. Master obstacle avoidance, D-Log color, and ActiveTrack for precise aerial surveys.
TL;DR
- Urban vineyard inspections require precise drone navigation through tight spaces, trellises, and surrounding structures—the Mavic 4 Pro handles all of it.
- Omnidirectional obstacle avoidance and ActiveTrack let you focus on data collection instead of crash anxiety.
- D-Log color profile captures the dynamic range needed to spot disease, nutrient deficiency, and irrigation issues from the air.
- This tutorial walks you through a complete inspection workflow from pre-flight to post-processing, based on real fieldwork.
Why Urban Vineyard Inspections Are Uniquely Difficult
Urban vineyards sit inside a collision course of challenges. You're flying near buildings, power lines, fences, and tree canopies—all while trying to capture usable data across tightly spaced vine rows. A single miscalculated flight path can mean a crashed drone or, worse, missed crop stress that costs an entire harvest.
I learned this the hard way. Two seasons ago, I was contracted to inspect a 2.5-acre rooftop vineyard in Portland surrounded by three-story buildings on every side. My older drone lacked reliable obstacle sensing on its underside and rear. I clipped a trellis wire on a low pass, damaged a propeller mid-flight, and lost the entire afternoon's data.
That experience pushed me to adopt the Mavic 4 Pro for every vineyard job since. Here's the exact workflow I now use to deliver consistent, high-quality inspection results.
Step 1: Pre-Flight Planning for Urban Environments
Scout the Site Digitally First
Before you ever power on the Mavic 4 Pro, open Google Earth or DJI FlightHub and study the vineyard's surroundings. Identify:
- Tall structures within 500 meters of the vineyard perimeter
- Power lines and utility poles crossing or adjacent to the property
- Tree canopy heights that could interfere with low-altitude passes
- No-fly zones or airspace restrictions (urban areas frequently overlap controlled airspace)
- Wind corridors created by buildings that funnel gusts unpredictably
Set Your Flight Parameters
For urban vineyard work, I consistently use these settings on the Mavic 4 Pro:
- Altitude: 15–30 meters for canopy overview; 5–8 meters for close row inspection
- Speed: 3–5 m/s during inspection passes (slower than open-field work)
- Overlap: 75% front overlap, 70% side overlap for orthomosaic stitching
- Return-to-Home altitude: Set at least 10 meters above the tallest nearby structure
Pro Tip: Always set your Return-to-Home altitude before takeoff, not after. In urban environments, the Mavic 4 Pro's RTH path could fly directly into a building if the altitude defaults to a value lower than surrounding structures.
Step 2: Leveraging Obstacle Avoidance in Tight Spaces
The Mavic 4 Pro's omnidirectional obstacle sensing system uses multiple vision sensors and ToF (Time-of-Flight) sensors to detect objects in all directions. This is non-negotiable for urban vineyard work, where hazards come from every angle.
Recommended Obstacle Avoidance Configuration
| Setting | Recommended Value | Why |
|---|---|---|
| Obstacle Avoidance Mode | Bypass | Allows the drone to navigate around obstacles rather than simply stopping |
| Sensing Range | Maximum | Detects trellis wires and thin structures earlier |
| Braking Distance | 3–5 meters | Provides adequate stopping buffer near buildings |
| Downward Sensing | Always On | Critical for low passes over vine canopy |
| APAS (Advanced Pilot Assistance) | Enabled | Enables intelligent path adjustment during ActiveTrack |
During my Portland rooftop job, the lack of rear and downward sensing was what caused the trellis collision. With the Mavic 4 Pro's full 360-degree sensing, I've since flown rows at 6 meters altitude without a single incident—even when wind gusts pushed the aircraft laterally toward support posts.
Step 3: Using ActiveTrack and Subject Tracking for Row Inspections
One of the most efficient inspection methods for vineyards is to fly along each row while the camera maintains a consistent angle on the canopy. This is where ActiveTrack transforms the workflow.
How to Set Up ActiveTrack for Vine Rows
- Take off and position the Mavic 4 Pro at the start of the first row at 7 meters altitude.
- Tilt the gimbal to approximately 45–60 degrees downward.
- On the controller screen, draw a box around the vine row you want to track.
- Select Trace mode so the drone follows alongside the row rather than orbiting it.
- Set movement speed to 3 m/s for adequate frame coverage.
The Mavic 4 Pro's subject tracking algorithm locks onto the row structure and maintains consistent framing as you fly the length of the vineyard. This eliminates the constant stick adjustments that cause shaky footage and inconsistent data capture.
Step 4: Capturing Inspection-Grade Footage with D-Log
Standard color profiles crush shadow detail and clip highlights—exactly the data you need to spot early-stage vine disease, chlorosis, or water stress. D-Log is the Mavic 4 Pro's flat color profile that preserves maximum dynamic range for post-processing analysis.
D-Log Settings for Vineyard Inspection
- Resolution: 4K at 30fps for video surveys; 48MP stills for orthomosaics
- Color Profile: D-Log (or D-Log M for slightly more contrast in-field)
- ISO: 100–400 to minimize noise in shadow regions
- Shutter Speed: Use 2x your frame rate (1/60 for 30fps) as a baseline; adjust for light
- White Balance: Manual at 5500K—do not use auto, as shifting white balance ruins color consistency across rows
Expert Insight: When reviewing D-Log footage for crop health, pay close attention to the green channel. Subtle shifts from deep green toward yellow-green in D-Log's flat profile often reveal nitrogen deficiency 7–10 days before it's visible to the naked eye on the ground. Color-grade in DaVinci Resolve using a vineyard-specific LUT for the most accurate assessment.
Step 5: Supplementary Techniques — QuickShots and Hyperlapse
While ActiveTrack handles row-by-row inspection, QuickShots and Hyperlapse serve a different but valuable purpose: client reporting and documentation.
When to Use QuickShots
- Dronie: Pulls back and up from a specific problem area—great for showing context around a diseased section.
- Circle: Orbits a particular vine block to document canopy uniformity from all angles.
- Rocket: Ascends directly above a target row, revealing the overall row structure and spacing.
When to Use Hyperlapse
- Waypoint Hyperlapse: Set waypoints along the vineyard perimeter to create a compressed time-lapse flyover. This is excellent for seasonal comparison videos when you inspect the same vineyard monthly.
- Duration: Set 5–10 second output with 2-second intervals for smooth results.
These features add significant production value to inspection reports without requiring additional flight time.
Step 6: Post-Flight Data Processing
After landing, your workflow determines whether the flight data becomes actionable intelligence or just pretty footage.
- Stitch orthomosaics using DJI Terra, Pix4D, or DroneDeploy
- Apply NDVI analysis if you captured multispectral data alongside RGB
- Color-correct D-Log footage using consistent LUTs across all inspection dates
- Export annotated maps highlighting problem zones with GPS coordinates
- Archive raw files with flight logs for regulatory compliance and historical comparison
Common Mistakes to Avoid
Flying too fast over vine rows. At speeds above 5 m/s, the Mavic 4 Pro's camera cannot capture sufficient detail for disease identification at low altitudes. Slow down.
Ignoring wind patterns between buildings. Urban structures create turbulence that doesn't exist in open fields. Fly during early morning when thermal-driven gusts are minimal.
Using Auto white balance. This creates inconsistent color data between passes, making it impossible to compare row health accurately.
Skipping gimbal calibration. Before every urban inspection, run a gimbal calibration. Vibration from transport and temperature changes affect gimbal accuracy, which directly impacts image sharpness.
Not updating firmware before critical jobs. Obstacle avoidance algorithms improve with updates. Running outdated firmware in a tight urban environment is an unnecessary risk.
Frequently Asked Questions
Can the Mavic 4 Pro detect thin trellis wires during flight?
The omnidirectional sensing system detects objects as thin as approximately 8–10mm in diameter under good lighting conditions. However, very thin gauge wires (under 5mm) may not register reliably. Always maintain a 3-meter buffer from known wire locations and fly at moderate speeds to give the sensors maximum processing time.
What is the best altitude for vineyard canopy inspection?
For general canopy health assessment, 15–20 meters provides the best balance of coverage and detail. For identifying specific pest damage or leaf-level symptoms, drop to 5–8 meters and use the 48MP photo mode to capture high-resolution stills. The Mavic 4 Pro's obstacle avoidance makes these low passes significantly safer than with previous-generation drones.
How does D-Log compare to normal color for spotting vine disease?
D-Log captures approximately 2–3 additional stops of dynamic range compared to the standard color profile. This means shadow areas under the canopy—where early fungal infections often appear—retain detail that would be crushed to black in a standard profile. The trade-off is that D-Log footage looks flat and desaturated straight out of camera, requiring post-processing. For pure inspection work, the additional data is always worth the extra editing step.
Technical Comparison: Mavic 4 Pro vs. Previous Generation for Vineyard Work
| Feature | Mavic 4 Pro | Previous Generation |
|---|---|---|
| Obstacle Sensing | Omnidirectional (360°) | Limited (forward/backward/downward) |
| Max Photo Resolution | 48MP | 20MP |
| Video Color Profiles | D-Log, D-Log M, HLG, Normal | D-Log, Normal |
| ActiveTrack Version | ActiveTrack 6.0 | ActiveTrack 5.0 |
| Wind Resistance | Up to 12 m/s | Up to 10 m/s |
| Flight Time | Up to 45 minutes | Up to 34 minutes |
| Sensor Size | 4/3 CMOS | 1-inch CMOS |
| QuickShots Modes | 6 modes | 4 modes |
| Hyperlapse Support | Waypoint, Circle, Course Lock, Free | Limited modes |
The performance gap is most apparent in flight time and obstacle sensing—the two factors that matter most when navigating complex urban vineyard environments over extended inspection sessions.
Written by Chris Park, drone inspection specialist and content creator with over 200 commercial vineyard surveys completed across the Pacific Northwest.
Ready for your own Mavic 4 Pro? Contact our team for expert consultation.