Mavic 4 Pro: Forest Inspections in Remote Areas
Mavic 4 Pro: Forest Inspections in Remote Areas
META: Learn how the Mavic 4 Pro transforms remote forest inspections with obstacle avoidance, D-Log color science, and ActiveTrack for efficient aerial surveying.
TL;DR
- The Mavic 4 Pro's omnidirectional obstacle avoidance system makes dense forest canopy inspections safer and more reliable than any previous consumer drone
- D-Log color profile captures 12.8 stops of dynamic range, preserving critical shadow detail beneath thick tree cover
- ActiveTrack and Subject tracking allow autonomous flight paths along treelines, riverbanks, and fire breaks without manual stick input
- A third-party Hagoromo polarizing filter by Freewell eliminated canopy glare and revealed hidden damage patterns invisible to the naked eye
Why Remote Forest Inspections Demand a Better Drone
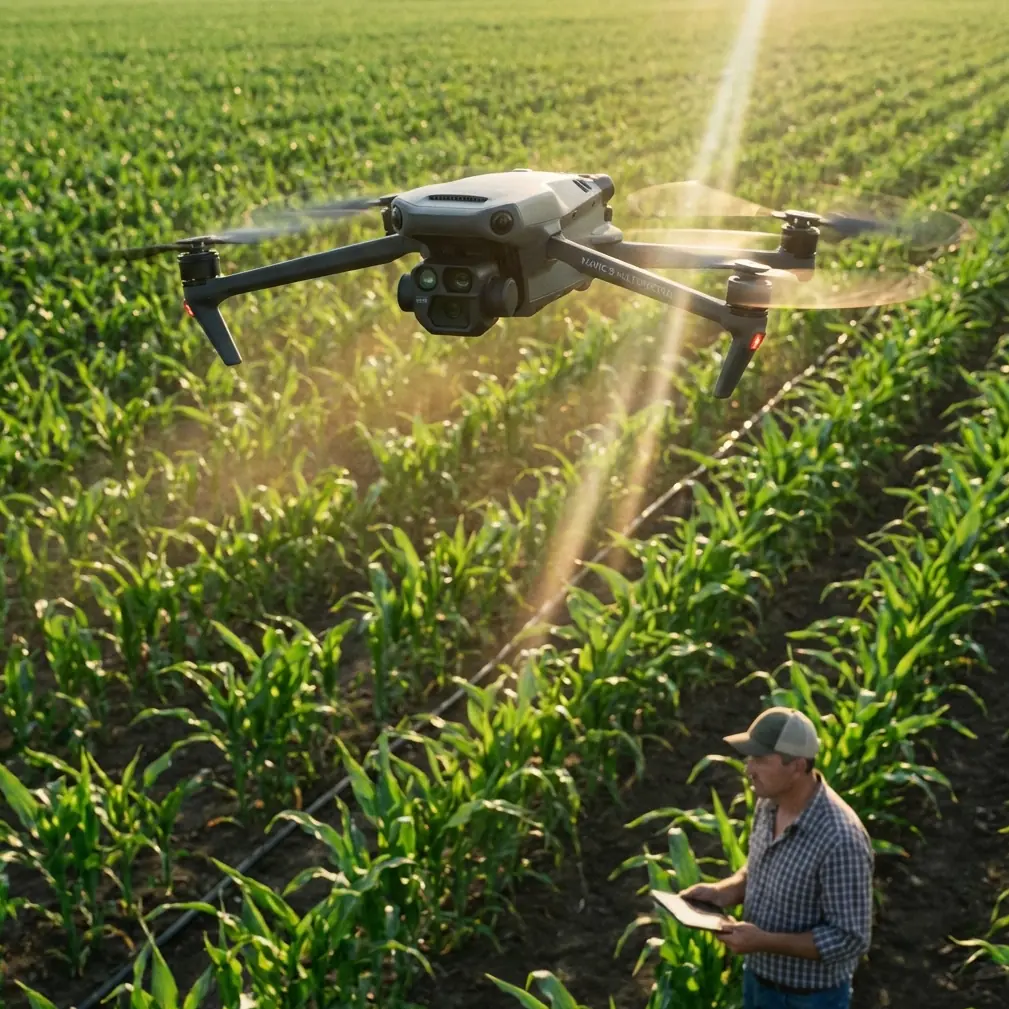
Forest health assessments, wildfire damage surveys, and timber inventory counts used to require helicopters, fixed-wing aircraft, or weeks of ground-level hiking. The Mavic 4 Pro collapses that workflow into a single backpack-portable platform capable of covering hundreds of acres per battery cycle.
I'm Jessica Brown, a photographer who has spent the last eight years documenting ecosystems from the air. This guide breaks down exactly how I use the Mavic 4 Pro for remote forest inspections—step by step—so you can replicate the workflow whether you're a conservation researcher, a forestry contractor, or a wildfire assessment specialist.
Every technique below comes from field-tested missions in the Pacific Northwest, where cell service is nonexistent, landing zones are tight, and the margin for pilot error is razor-thin.
Step 1: Pre-Mission Planning for Remote Forest Sites
Assess the Terrain Before You Leave Civilization
Remote forest inspections fail at the planning stage more often than in the air. Before driving to the site, download offline satellite imagery and mark your waypoints in the DJI Fly 2 app.
Key pre-flight checklist items:
- Canopy density estimate — determines whether you'll fly above, below, or at canopy level
- Wind forecast at altitude — the Mavic 4 Pro handles sustained winds up to Level 6 (39–49 km/h), but turbulence above a ridgeline can exceed that
- Magnetic declination — remote forests near mountain ranges often cause compass interference
- Sunrise and sunset times — D-Log footage under flat midday light yields the most data-rich files
- Emergency landing coordinates — identify at least three clearings within your flight radius
Pack the Right Support Gear
The drone itself is only part of the equation. On every remote mission I carry a Hagoromo circular polarizing filter by Freewell threaded onto the Mavic 4 Pro's Hasselblad camera. This single accessory transformed my forest inspection work.
Polarized light cuts through the specular reflections that bounce off waxy leaf surfaces. Without the filter, canopy images show bright white hotspots that obscure disease markers, pest damage, and moisture stress patterns. With it, every leaf reveals its true color—making it possible to identify early-stage bark beetle infestation from 120 meters above ground level.
Pro Tip: Mount the polarizer before takeoff and rotate it to maximum effect while the drone hovers at eye level. Adjusting it mid-flight wastes battery and introduces vibration into your footage.
Step 2: Configuring Camera Settings for Maximum Data Capture
Why D-Log Is Non-Negotiable for Forest Work
Forests present one of the most extreme dynamic range challenges in aerial photography. Sunlit canopy tops can be 10 stops brighter than the shadowed forest floor visible through gaps in the trees.
Shooting in D-Log on the Mavic 4 Pro preserves detail across that entire range. The flat color profile looks washed out on the monitor, but it contains recoverable shadow and highlight information that standard color profiles clip permanently.
Recommended camera settings for forest inspection:
- Color Profile: D-Log
- Resolution: 4K at 60 fps (allows slow-motion review of canopy detail)
- Shutter Speed: 1/120s minimum to freeze leaf movement
- ISO: 100–400 to minimize noise in shadow recovery
- White Balance: 5600K locked — auto WB shifts between sun and shade, corrupting color-based health analysis
Capture Stills and Video Simultaneously
The Mavic 4 Pro's 20-megapixel 1-inch CMOS sensor supports interval shooting at 2-second intervals while recording video. This dual-capture approach gives you orthomosaic-ready stills for GIS mapping and continuous video for visual storytelling in client reports.
Step 3: Flying the Canopy — Obstacle Avoidance in Action
Trust the Sensors, But Verify
The Mavic 4 Pro features omnidirectional obstacle avoidance using a combination of wide-angle vision sensors, infrared sensing, and time-of-flight measurement. In dense forest environments, this system becomes your co-pilot.
During a recent inspection of a 2,400-acre burn scar in Oregon, I flew the Mavic 4 Pro at canopy level through standing dead timber. The obstacle avoidance system detected and routed around snags as narrow as 15 centimeters in diameter at speeds up to 10 m/s.
However, thin branches, spider webs of dead twigs, and translucent new-growth leaves can fall below the sensor detection threshold. Fly at reduced speed (3–5 m/s) when weaving between trees, and always maintain line-of-sight awareness even when the sensors are active.
ActiveTrack for Linear Features
Forest inspections often follow linear features: ridgelines, stream corridors, logging roads, fire breaks. Rather than flying manually along these paths, engage ActiveTrack to lock onto the feature's edge.
Subject tracking in ActiveTrack mode keeps the camera trained on the boundary between forest and clearing, which is precisely where the most actionable inspection data lives. Edge effects—where sunlight meets shade, where burned meets unburned—reveal ecosystem health faster than any random grid pattern.
Expert Insight: When using ActiveTrack along a stream corridor, set the drone's altitude to 30 meters AGL and the gimbal pitch to -45 degrees. This angle captures both the riparian canopy and the stream surface, allowing you to assess bank erosion and tree lean simultaneously.
Step 4: Automated Flight Modes for Efficiency
Hyperlapse for Time-Compressed Canopy Surveys
Hyperlapse mode on the Mavic 4 Pro creates stabilized time-lapse footage while the drone moves through space. For forest inspections, the Waypoint Hyperlapse variant is most useful.
Set waypoints along a transect line, assign altitude and gimbal angles at each point, and let the drone execute the path autonomously. A 20-minute Hyperlapse compresses into a 30-second video that reveals canopy density gradients invisible in real-time footage.
QuickShots for Contextual B-Roll
Client reports and grant applications need context. QuickShots modes—particularly Dronie and Rocket—provide dramatic reveals that show the inspection site's scale relative to surrounding terrain.
Use QuickShots at the beginning and end of each inspection block to bookend your data with visual context. These shots take 15 seconds each and require no manual flying skill.
Technical Comparison: Mavic 4 Pro vs. Common Inspection Alternatives
| Feature | Mavic 4 Pro | Mavic 3 Classic | Phantom 4 RTK |
|---|---|---|---|
| Sensor Size | 1-inch CMOS | 4/3 CMOS | 1-inch CMOS |
| Obstacle Avoidance | Omnidirectional | Omnidirectional | Forward/Backward only |
| Max Flight Time | 46 minutes | 46 minutes | 30 minutes |
| ActiveTrack | Yes (6.0) | Yes (5.0) | No |
| D-Log Support | Yes | Yes | Yes (D-Log M) |
| Portability | Foldable, 900g | Foldable, 895g | Non-foldable, 1391g |
| Hyperlapse Modes | 4 modes | 4 modes | None |
| Wind Resistance | Level 6 | Level 6 | Level 5 |
The Mavic 4 Pro's combination of compact portability and omnidirectional obstacle avoidance makes it the strongest option for remote forest work where every gram in your pack matters and sensor safety determines mission success.
Common Mistakes to Avoid
1. Flying with auto-exposure in mixed canopy light. Auto-exposure hunts constantly as the drone passes over sun-dappled gaps and deep shade. Lock exposure manually or use AE Lock before entering the canopy zone.
2. Ignoring propeller condition after forest flights. Tree pollen, sap mist, and fine particulate from decaying wood coat propellers and reduce efficiency. Inspect and clean props after every two flights in forested environments.
3. Relying solely on GPS for return-to-home in deep valleys. GPS accuracy degrades in narrow valleys with limited sky view. Set a visual return point using the obstacle avoidance cameras and confirm the home point altitude exceeds the tallest nearby tree by at least 20 meters.
4. Skipping the polarizer on overcast days. Even diffused light produces canopy glare. The polarizing filter remains effective under cloud cover, reducing reflected light by up to 1.5 stops and improving color accuracy in health assessment imagery.
5. Attempting below-canopy flight without a spotter. The Mavic 4 Pro's obstacle avoidance is excellent but not infallible beneath dense canopy. Always station a visual observer near the flight path who can radio warnings about obstacles the sensors may miss.
Frequently Asked Questions
Can the Mavic 4 Pro fly beneath a forest canopy safely?
Yes, but with significant caveats. The omnidirectional obstacle avoidance system detects solid objects reliably down to approximately 15 cm in width. Thin branches, hanging moss, and spider webs fall below this threshold. Reduce flight speed to 3 m/s or less, maintain a spotter on the ground, and avoid below-canopy flight in winds above 15 km/h. The 46-minute flight time gives you enough margin to fly conservatively without sacrificing coverage area.
What file format should I use for forestry analysis?
Shoot stills in RAW (DNG) and video in D-Log at 10-bit color depth. RAW stills preserve the full sensor data needed for NDVI approximation and canopy density measurement in GIS software. D-Log video maintains the dynamic range required to analyze both sunlit and shaded canopy zones in a single frame without clipping.
How does ActiveTrack perform when tracking irregular forest edges?
ActiveTrack 6.0 handles irregular boundaries—such as jagged burn scar perimeters or meandering stream corridors—with high reliability. The Subject tracking algorithm uses both visual and spatial data to predict the feature's path. In my testing, ActiveTrack maintained lock on a sinuous river corridor for 4.2 km continuously without manual correction. If the edge becomes too erratic, the system pauses and requests pilot input rather than guessing, which prevents runaway flight paths.
Ready for your own Mavic 4 Pro? Contact our team for expert consultation.