Mavic 4 Pro for Low-Light Field Inspection: The Altitude
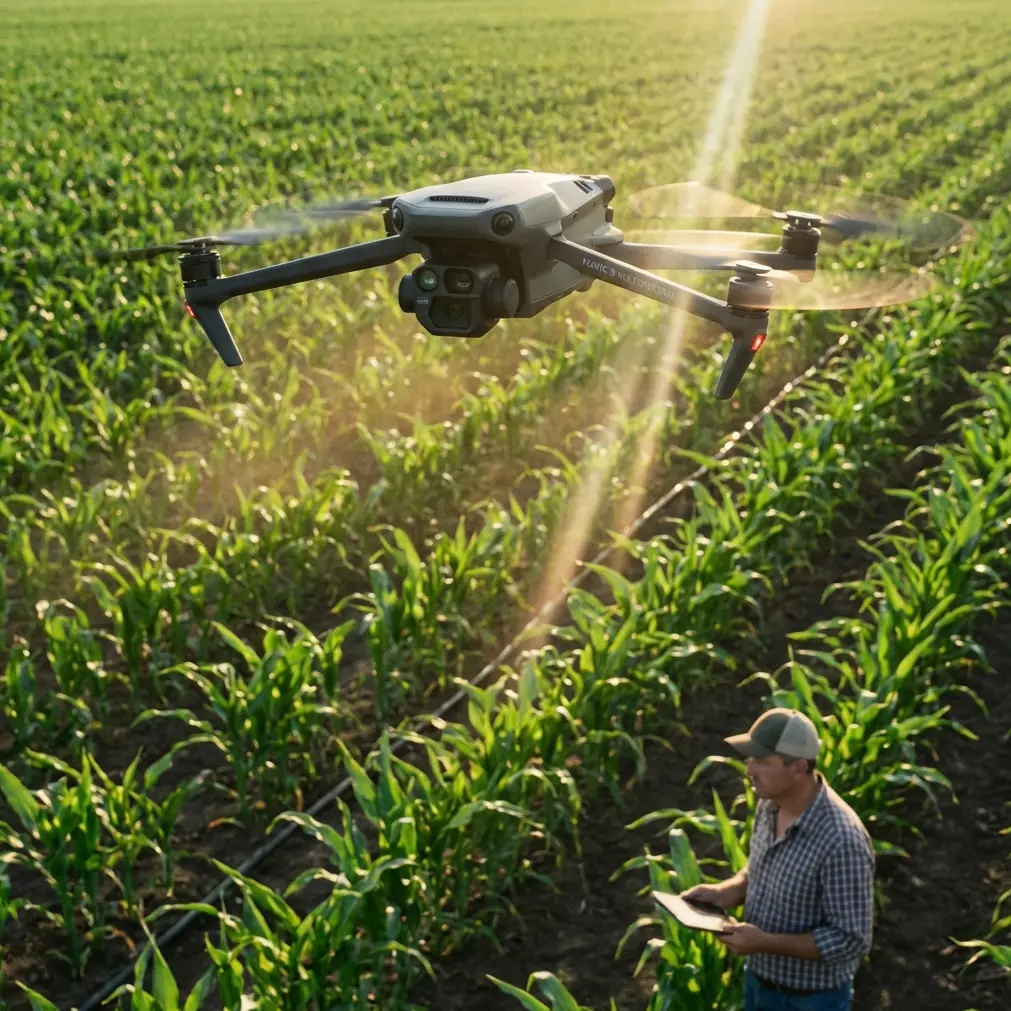
Mavic 4 Pro for Low-Light Field Inspection: The Altitude, Camera, and Flight Choices That Actually Matter
META: A practical expert guide to using the Mavic 4 Pro for low-light field inspection, including optimal flight altitude, obstacle avoidance limits, D-Log workflow, ActiveTrack use, and safe capture strategy.
Low-light field inspection sounds simple until you are the one standing at the edge of a wet field, watching light disappear faster than your checklist can keep up.
This is where the Mavic 4 Pro becomes more than a camera drone. It turns into a decision-making tool. Not because it removes the complexity of inspecting crops, irrigation lines, fence boundaries, access roads, drainage patterns, or storm damage at dusk, but because it gives you enough control to make good choices when visibility is working against you.
I approach this as a photographer first, but field inspection is never just about aesthetics. You are trying to see structure, contrast, change, and risk. In low light, every one of those is harder to read. Shadows flatten terrain. Crop variation disappears. Tree lines and utility edges blend together. A drone that performs well at noon can suddenly feel much less confident when the sun is low and the field is uneven.
So the real question is not whether the Mavic 4 Pro can fly in low light. The real question is how to use it properly for inspection work when the conditions are visually deceptive.
The core problem with low-light field inspection
When operators inspect fields late in the day, they usually run into three issues at the same time.
First, the aircraft has less visual information to work with. That affects obstacle sensing and your own ability to judge distance from trees, poles, wires, irrigation equipment, and the subtle rise and fall of the terrain.
Second, the camera is under pressure. To maintain exposure, you often need slower shutter speeds or higher ISO. That can introduce motion blur or image noise right when you need clarity for identifying damaged rows, pooling water, wheel tracks, erosion, or animal intrusion.
Third, flight planning becomes less forgiving. The margin for error shrinks. A route that feels safe in daylight may not feel nearly as clean once the field edge is dark, reflective, or partially obscured by haze.
This is exactly why the Mavic 4 Pro’s feature set matters in an operational sense, not just on a spec sheet.
Why obstacle avoidance matters differently in fields at dusk
Obstacle avoidance is often discussed as a convenience feature. For field inspection in low light, it is a risk management feature.
Open farmland looks empty from a distance, but inspection flights rarely happen in truly obstacle-free airspace. You have shelterbelts, utility poles, scattered trees, pump houses, sheds, fencing, pivot irrigation structures, and sometimes elevated terrain transitions that are easy to misread at sunset. In these conditions, obstacle avoidance can help maintain a margin around obvious hazards, but it should not be treated as permission to fly aggressively.
The operational significance is simple: obstacle sensing is most useful when you are already flying conservatively. It is there to support good judgment, not replace it.
For this scenario, that means resisting the urge to skim the field just because you want more detail. If you fly too low in dim conditions, you reduce your reaction time and increase the chance that a hard-to-see object enters the flight path before either you or the aircraft can respond cleanly.
The altitude sweet spot: what usually works best
If I am inspecting fields in low light with a Mavic 4 Pro, my practical starting altitude is 30 to 50 meters above ground level.
That range is useful for a reason.
At around 30 meters, you can still capture enough ground detail to evaluate row consistency, standing water, tire damage, edge encroachment, and drainage behavior. You are low enough for meaningful visual inspection, but generally high enough to preserve a safe reaction window if terrain or obstacles become harder to read.
At around 50 meters, you gain a much better overview of patterns. That helps when you are trying to spot broader issues such as irregular irrigation coverage, flood spread, wind damage corridors, or access road washout. In low light, this altitude also gives the aircraft more buffer from isolated obstacles and gives the pilot a cleaner read on the landscape layout.
Below 20 meters, dusk inspections become significantly less forgiving unless the site is exceptionally well known and unobstructed. You may gain detail, but you lose the strategic view and compress your time to react. Above 60 meters, you often start trading away the very detail that justified sending the drone up in the first place, especially if your goal is not mapping but visual inspection.
So if you want one clear operational rule, it is this: start high enough to understand the field, then descend only where the inspection objective truly requires it.
That sequence matters. It prevents the common mistake of chasing detail too early and missing the larger pattern.
Use the camera deliberately, not dramatically
The Mavic 4 Pro is attractive to photographers because it gives you room to shape the image, especially if you are shooting in D-Log. For field inspection, that flexibility has a very practical benefit. D-Log can help preserve tonal information in difficult scenes where the sky is still bright but the field surface is slipping into shadow.
This is not just about making footage look better later. It is about keeping subtle visual information available in post-review. If you are trying to compare darker crop sections against healthy areas, or evaluate whether a drainage path is holding moisture longer than expected, retaining more tonal range can make the difference between a useful file and a pretty but less informative one.
The tradeoff is workflow. D-Log needs proper exposure discipline and post-processing. If your inspection process depends on immediate handoff with minimal editing, standard color profiles may be more efficient. But if the footage will be reviewed carefully after the flight, D-Log is worth considering because low-light field scenes often contain exactly the kind of compressed highlights and shadows that benefit from a flatter profile.
A simple rule helps here: if the mission is documentation for later analysis, shoot with maximum grading flexibility. If the mission is immediate field decision-making, prioritize speed and clarity over post-production latitude.
ActiveTrack and subject tracking: useful, but only in the right role
The Mavic 4 Pro’s ActiveTrack and subject tracking tools sound more relevant to creators than inspectors, but they do have a place in agricultural and land-management workflows.
Imagine you are monitoring a utility vehicle moving slowly along a field edge, checking irrigation lines or perimeter fencing. Subject tracking can help maintain consistent framing while you focus on the surroundings and route context. It can also be useful for documenting repetitive movements, such as maintenance passes along drainage cuts or service access tracks.
But in low light, the operational significance changes. Tracking systems rely on reliable subject recognition and scene separation. As contrast drops, that task gets harder. So ActiveTrack is best treated as a supplementary tool for controlled documentation, not as the backbone of a dusk inspection plan.
That distinction keeps you out of trouble. Let the drone assist with framing where visibility remains clean. Do not hand over too much control when the environment is getting visually ambiguous.
QuickShots and Hyperlapse are not just creative features
On paper, QuickShots and Hyperlapse look like content tools. In the field, they can support repeatable visual records when used with discipline.
Hyperlapse can be surprisingly useful for documenting gradual environmental shifts over a short period, such as fog settling over low ground, water movement into drainage channels, or changing light across crop texture near sunset. The advantage is not cinematic flair. It is compressed observation. You can see change over time without running a long manual watch.
QuickShots are less central to inspection work, but standardized automated camera paths can help produce consistent visual references from one visit to the next if the objective is broad site documentation rather than close technical analysis.
The caution is obvious: any automated movement in low light should be planned in open space with generous separation from obstacles. A feature is only helpful if it preserves repeatability without adding unnecessary risk.
Flight pattern strategy for dusk field work
A good low-light inspection with the Mavic 4 Pro usually has three passes, not one.
Pass one: overview pass at 45 to 50 meters.
Use this to read the whole site. Identify reflective water, dark tree boundaries, road access, and any obvious obstacle zones. Keep speed moderate. This pass is about orientation, not detail.
Pass two: focused inspection at 30 to 40 meters.
Now narrow in on problem areas. Drainage scars, weak crop patches, pooling, fence breaches, damaged tracks, or equipment placements become easier to evaluate from this range.
Pass three: selective low pass only where justified.
If you need closer documentation, descend carefully over known clear zones. Do not make low-level exploratory passes into uncertain field edges at dusk. That is where low-light inspections go sideways.
This layered structure solves a common problem: operators often start with the close-up they want instead of the overview they need.
A photographer’s note on exposure and readability
Low-light inspection footage is only useful if you can read it later. That means resisting overly cinematic settings that look beautiful but soften evidence.
Keep shutter speed high enough to protect detail during movement. If that means a little more noise, accept the noise. Inspection images need edge information more than mood. Stable exposure also makes side-by-side comparisons easier when you revisit the same field on another evening.
White balance consistency matters too. If color shifts wildly across clips, visual comparison becomes less reliable. For agricultural readers, that can affect how confidently you interpret plant stress, soil wetness, and surface variation from visual footage alone.
The safest way to use obstacle avoidance in this scenario
There is a bad habit among some pilots: they start trusting obstacle avoidance most when conditions are least forgiving.
Do the opposite.
In low light, use obstacle avoidance as a backup layer while flying routes that would still be reasonable if sensing performance were degraded. That means wider stand-off distances from tree lines, no tight threading between poles or structures, and no assumption that every thin or low-contrast obstacle will be detected perfectly.
Fields are deceptive because they create long stretches of visual emptiness punctuated by isolated hazards. Those isolated hazards are the ones that matter.
When low light is still too low
There is a point where a safe and useful inspection is simply no longer practical with a visual camera workflow. If the field has dense obstacles, uneven elevation, or uncertain boundaries, pushing into deeper darkness can reduce both safety and data quality. The Mavic 4 Pro may still be capable of stable flight, but that does not mean the mission remains smart.
The professional move is to stop before the footage becomes ambiguous and the route becomes guesswork.
A realistic Mavic 4 Pro setup for this job
For a late-day field inspection, I would keep the setup simple:
- Start at 45 to 50 meters for the opening survey
- Drop to 30 to 40 meters for target areas
- Use obstacle avoidance as a support layer, not a primary control method
- Use D-Log when post-flight review matters
- Use ActiveTrack only for clear, controlled tracking tasks
- Reserve Hyperlapse for change-over-time documentation in open areas
- Avoid low exploratory runs near dark tree lines or structures
That approach respects what the aircraft does well while staying honest about what low light takes away.
Final thought
The Mavic 4 Pro is a strong platform for field inspection near dusk because it combines image flexibility with modern automation and sensing tools. But those features only become valuable when the pilot builds the mission around visibility limits instead of pretending they do not exist.
For this kind of work, altitude is the first big decision. Start around 30 to 50 meters, let the field reveal its patterns, and descend only when you have earned the closer look. That one habit will do more for your inspection quality and flight safety than any flashy automated mode.
If you are comparing workflows or want to talk through a practical setup for your own inspection routine, you can message an experienced team here.
Ready for your own Mavic 4 Pro? Contact our team for expert consultation.