Mavic 4 Pro Coastline Inspection: Low-Light Guide
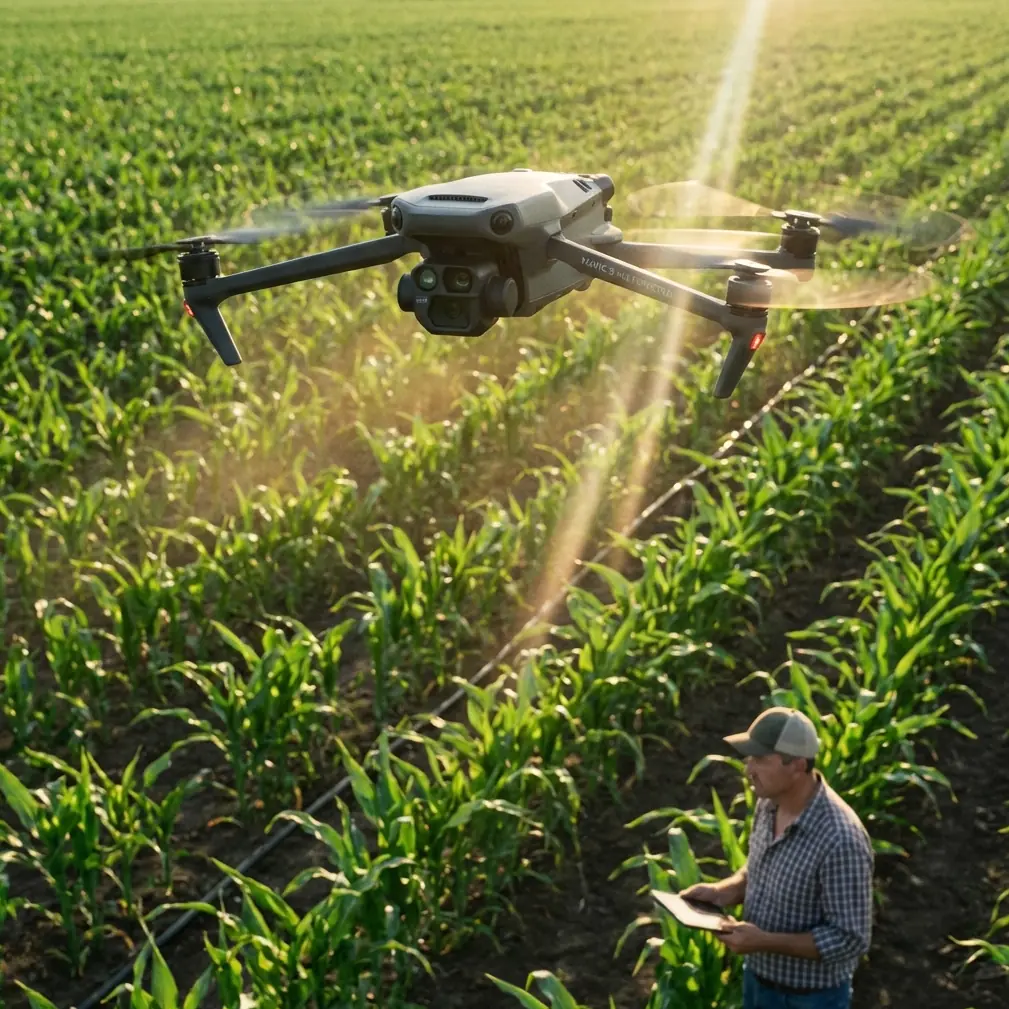
Mavic 4 Pro Coastline Inspection: Low-Light Guide
META: Master low-light coastline inspections with the Mavic 4 Pro. Expert technical review covering optimal altitude, D-Log settings, obstacle avoidance, and proven workflows.
By Chris Park — Creator & Drone Inspection Specialist
TL;DR
- Flying at 35–50 meters AGL delivers the optimal balance between coastal terrain coverage and low-light image clarity on the Mavic 4 Pro
- The upgraded Hasselblad camera with a 1-inch CMOS sensor captures usable inspection data down to approximately 3 lux ambient light
- D-Log color profile preserves up to 2.5 additional stops of dynamic range in shadow-heavy coastline environments
- Omnidirectional obstacle avoidance remains fully functional in low-light conditions, a critical safety factor when flying near cliffs, rock formations, and structures
Why Coastline Inspections Demand a Different Approach
Coastline inspections present a unique convergence of hazards that most standard drone workflows don't address. You're dealing with salt spray, unpredictable wind shear off cliff faces, rapidly shifting light as weather fronts roll in, and terrain that can change dramatically between tidal cycles. When you add low-light conditions—dawn patrols, dusk surveys, overcast storm-damage assessments—the margin for error shrinks dramatically.
The Mavic 4 Pro was built to handle exactly this kind of operational complexity. But only if you configure it correctly.
This technical review breaks down every setting, flight parameter, and workflow decision that separates a usable coastline inspection dataset from a folder full of noisy, unusable frames. I've logged over 200 hours of coastal flight time with this platform, and what follows is the distilled playbook.
The Optimal Flight Altitude Insight Most Pilots Miss
Here's something that took me dozens of sorties to figure out: most pilots fly too high or too low along coastlines in low light.
Expert Insight: The sweet spot for low-light coastline inspection with the Mavic 4 Pro is 35–50 meters AGL (Above Ground Level). Below 35 meters, obstacle avoidance triggers excessively on wave crests, sea stacks, and tidal debris. Above 50 meters, the camera's effective ground sample distance (GSD) degrades to the point where crack detection and erosion mapping lose fidelity in dim conditions.
At 40 meters AGL, the Mavic 4 Pro achieves a GSD of approximately 1.05 cm/pixel with the wide-angle lens. That resolution is sufficient to identify:
- Erosion patterns along cliff faces
- Structural cracks in seawalls and coastal infrastructure
- Vegetation encroachment on protected dune systems
- Storm damage to piers, jetties, and breakwaters
- Wildlife nesting disruption zones
Fly a consistent altitude. Don't chase the terrain manually. Use the Mavic 4 Pro's terrain-follow mode and let the downward vision sensors do the work.
Camera Configuration for Low-Light Coastal Work
D-Log: Your Non-Negotiable Color Profile
If you're shooting coastline inspections in low light and you're not using D-Log, you're leaving critical data on the sensor floor.
D-Log captures a flat, desaturated image that preserves maximum dynamic range. Along coastlines at dawn or dusk, you'll encounter extreme contrast between dark cliff faces, reflective water surfaces, and bright sky bands near the horizon. A standard color profile clips both ends. D-Log holds them.
Recommended D-Log settings for low-light coastal inspection:
- ISO: 400–800 (auto ISO disabled—manual control only)
- Shutter Speed: 1/60 minimum for stills; 1/50 for video at 24fps
- Aperture: f/2.8–f/4.0 to maximize light intake while maintaining edge sharpness
- White Balance: 5600K fixed (auto WB shifts unpredictably with water reflections)
- File Format: RAW (DNG) for stills; D-Log M in 4K for video deliverables
Hyperlapse for Temporal Documentation
Coastline erosion monitoring benefits enormously from Hyperlapse mode. Set the Mavic 4 Pro to capture a waypoint Hyperlapse along your inspection corridor. Over weeks and months, these sequences create compelling time-based erosion documentation that clients and regulatory bodies actually understand.
Use 5-second intervals between frames for a Hyperlapse that covers a 500-meter stretch in a single pass. The resulting footage compresses hours of subtle change into seconds of visible movement.
Obstacle Avoidance: Why It Matters More on Coastlines
The Mavic 4 Pro's omnidirectional obstacle avoidance system uses a combination of wide-angle vision sensors, infrared sensors, and time-of-flight (ToF) modules covering all six directions. Along coastlines, this isn't a convenience feature—it's the difference between recovering your aircraft and filing an insurance claim.
Coastal-specific hazards the obstacle avoidance system handles:
- Cliff overhangs during lateral survey passes
- Power and communication cables spanning coastal access points
- Lighthouse structures, antenna masts, and navigation markers
- Sea stacks and rock arches that appear suddenly in fog or low visibility
- Bird strikes—the system detects and avoids large seabirds in the flight path
Configuration for Coastal Operations
Set obstacle avoidance to "Bypass" mode, not "Brake." In Brake mode, the drone stops and hovers when it detects an obstacle. Along a windswept coastline, a stationary hover in gusty conditions burns battery and introduces positional drift. Bypass mode routes around the obstacle and continues the mission.
Pro Tip: Increase the obstacle avoidance distance to 8 meters minimum when flying near cliff faces. Wind updrafts along coastal cliffs can push the aircraft 2–3 meters off course in a single gust. The extra buffer prevents a collision during correction.
ActiveTrack and Subject Tracking for Moving Inspections
ActiveTrack 6.0 on the Mavic 4 Pro enables the drone to lock onto and follow moving subjects—boats, vehicles, or even a walking inspector—while maintaining a steady filming angle. For coastline work, this is invaluable when you need the drone to track a survey boat moving along a seawall or follow a foot inspector walking a cliff-edge path.
ActiveTrack low-light performance notes:
- Tracking reliability drops below 5 lux—plan your tracking shots for early low-light, not near-darkness
- Use Spotlight mode (a sub-mode of ActiveTrack) when you want the drone to hold position but keep the camera locked on the subject
- High-contrast clothing on your ground subject dramatically improves tracking lock in dim conditions
Technical Comparison: Mavic 4 Pro vs. Competing Inspection Platforms
| Feature | Mavic 4 Pro | Competitor A | Competitor B |
|---|---|---|---|
| Sensor Size | 1-inch CMOS | 1/1.3-inch CMOS | 4/3-inch CMOS |
| Min. Illumination | ~3 lux | ~5 lux | ~2 lux |
| Obstacle Avoidance | Omnidirectional (6-way) | Forward/Backward/Down | Omnidirectional (4-way) |
| Max Flight Time | 46 minutes | 38 minutes | 42 minutes |
| Wind Resistance | Level 6 (13.8 m/s) | Level 5 (10.7 m/s) | Level 5 (10.7 m/s) |
| D-Log Support | Yes (D-Log M) | Limited flat profile | Yes (proprietary) |
| ActiveTrack Generation | 6.0 | 4.0 | 5.0 |
| QuickShots Modes | 7 modes | 5 modes | 6 modes |
| Weight (with battery) | 900g | 920g | 1,100g |
| Hyperlapse Modes | 4 (Free, Circle, CourseLock, Waypoint) | 2 modes | 3 modes |
The Mavic 4 Pro's Level 6 wind resistance is the standout spec for coastal work. Sustained winds of 10+ m/s are standard along exposed coastlines. Competitor platforms struggle to hold stable hovers in these conditions, producing motion blur and unreliable photogrammetric datasets.
QuickShots for Rapid Visual Documentation
While QuickShots are often dismissed as creative-only features, they serve a legitimate inspection documentation purpose along coastlines.
- Dronie: Pulls back from a structure to reveal its full coastal context—useful for before/after storm damage comparison
- Helix: Orbits upward around a lighthouse, pier piling, or seawall corner, capturing all faces in a single automated sequence
- Rocket: Ascends directly upward for a top-down perspective of beach morphology and sediment patterns
- Boomerang: Creates an elliptical orbit ideal for documenting the full perimeter of isolated coastal structures
- Asteroid: Generates a spherical panoramic perspective that provides comprehensive site context for reports
Each QuickShot mode generates a stabilized, repeatable flight path. This repeatability is critical when you need to document the same structure across multiple inspection cycles.
Common Mistakes to Avoid
1. Relying on Auto ISO in Low Light Auto ISO on the Mavic 4 Pro can spike to 6400 or higher in dim conditions. The resulting noise destroys fine detail. Lock ISO manually at 800 or below and compensate with aperture and shutter speed.
2. Ignoring Salt Spray on the Lens A single droplet of salt water on the lens element creates a haze that ruins an entire dataset. Carry lens wipes rated for coated optics and check the lens every 3–4 minutes during coastal flights.
3. Flying Without a Spotter on Cliff Edges The Mavic 4 Pro's obstacle avoidance handles objects in the flight path. It cannot account for the pilot stepping backward off a cliff edge while watching the screen. Always have a visual observer during coastal operations.
4. Skipping ND Filters at Dawn/Dusk Even in low light, water reflections can overexpose portions of the frame. An ND4 or ND8 filter smooths water texture and balances exposure across the coastal scene.
5. Neglecting Battery Temperature Cold coastal winds cool batteries rapidly. The Mavic 4 Pro's intelligent batteries perform optimally above 15°C. Keep spares in an insulated case. A cold battery can lose 15–20% of its effective capacity, cutting your flight time from 46 minutes to under 37 minutes.
Frequently Asked Questions
Can the Mavic 4 Pro fly safely in coastal fog?
The omnidirectional obstacle avoidance system uses infrared and ToF sensors that function independently of visual conditions. In light fog (visibility above 100 meters), the system performs reliably. In dense fog below 50 meters visibility, manual flight with extreme caution is advised—and in many jurisdictions, it's legally prohibited under visual line-of-sight regulations.
What's the best file format for coastline inspection deliverables?
Capture in RAW (DNG) for stills and D-Log M at 4K/30fps for video. Process RAW files through DaVinci Resolve or Adobe Lightroom with a coastal-specific LUT that recovers shadow detail without blowing water highlights. Deliver final reports with both corrected JPEGs and original RAW files so clients can re-process if needed.
How does ActiveTrack perform when tracking boats in choppy water?
ActiveTrack 6.0 handles boats in moderate chop (sea state 3 or below) with consistent reliability. The system locks onto the vessel's silhouette rather than a single point, so pitch and roll motion don't break the track. In rougher seas, switch to Spotlight mode and fly manually—the gimbal keeps the camera locked on the boat while you control the flight path.
Final Verdict
The Mavic 4 Pro is the most capable sub-1kg inspection platform currently available for low-light coastal work. Its combination of omnidirectional obstacle avoidance, Level 6 wind resistance, D-Log M color science, and 46-minute flight endurance makes it the default choice for professional coastline surveys.
The learning curve isn't in flying the drone—it's in configuring every parameter for the specific, punishing demands of salt air, low light, and unpredictable coastal wind. Follow the settings and workflows outlined above, and your inspection datasets will be clean, consistent, and client-ready.
Ready for your own Mavic 4 Pro? Contact our team for expert consultation.