How to Inspect Mountain Coastlines With Mavic 4 Pro
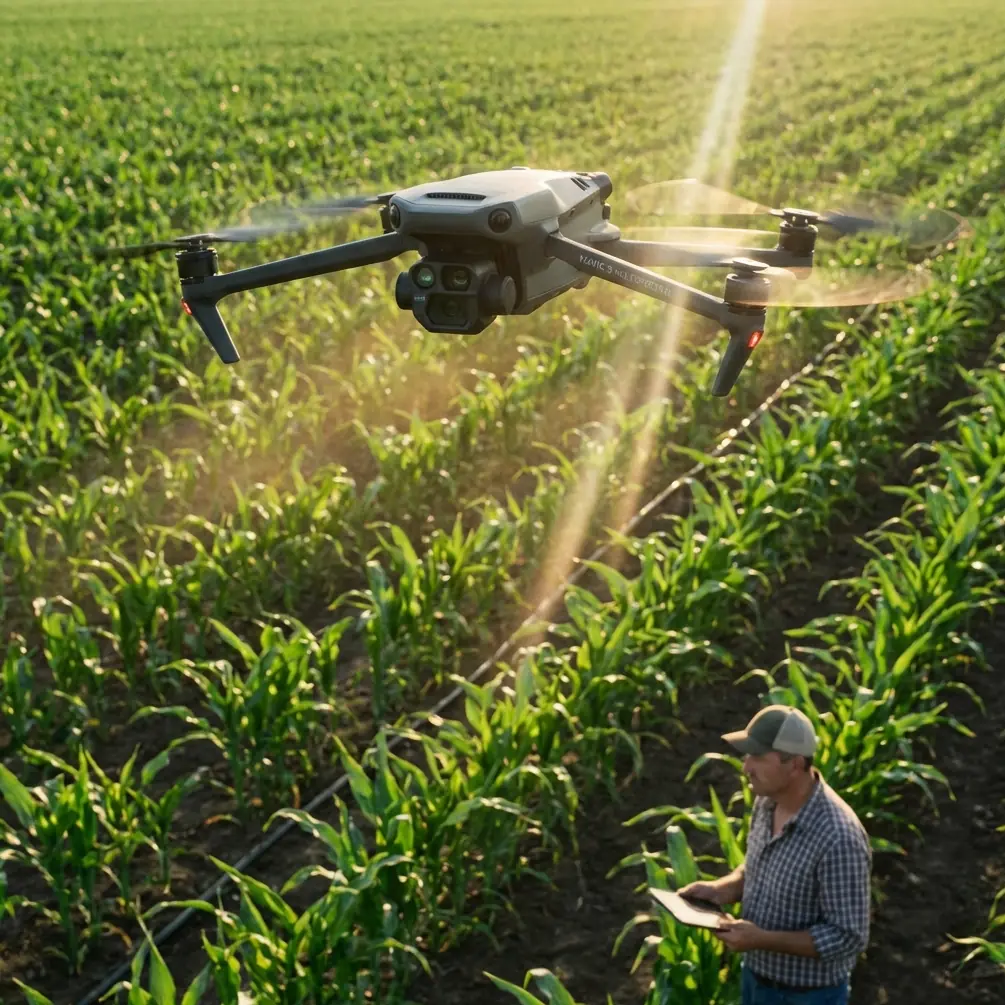
How to Inspect Mountain Coastlines With Mavic 4 Pro
META: Learn how to inspect rugged mountain coastlines using the DJI Mavic 4 Pro. Master obstacle avoidance, D-Log filming, and ActiveTrack for safer, faster surveys.
TL;DR
- The Mavic 4 Pro transforms dangerous mountain coastline inspections into repeatable, safe aerial workflows using omnidirectional obstacle avoidance and ActiveTrack technology
- D-Log color profile captures critical detail in high-contrast coastal environments where shadows meet bright ocean reflections
- Hyperlapse and QuickShots modes document erosion patterns and structural changes over time with cinematic precision
- Subject tracking keeps your lens locked on moving geological features like tidal surges, rockfalls, and wildlife activity along cliff faces
Why Mountain Coastline Inspections Demand Better Drone Technology
Coastal inspections along mountainous terrain are among the most hazardous survey environments on earth. The Mavic 4 Pro solves the three biggest challenges—unpredictable wind shear, extreme contrast lighting, and jagged obstacle-dense flight paths—with a sensor suite and intelligent flight system built specifically for professionals working in hostile conditions.
I'm Jessica Brown, a photographer who has spent the better part of a decade documenting coastal erosion, cliff stability, and environmental changes along mountain shorelines. Two years ago, I nearly lost a drone—and compromised an entire week of survey data—when a sudden updraft slammed my previous aircraft into a basalt sea stack I simply couldn't see on my monitor in bright sunlight.
That incident changed how I evaluate equipment. The Mavic 4 Pro has since become the centerpiece of my inspection workflow, and this guide walks you through exactly how to use it for mountain coastline work.
Step 1: Pre-Flight Planning for Coastal Mountain Terrain
Before you ever power on the Mavic 4 Pro, a mountain coastline inspection demands rigorous planning that accounts for variables flat-terrain operators never encounter.
Assess Wind and Tidal Windows
- Check wind forecasts at multiple altitudes—ground-level conditions rarely match what you'll encounter at 120m AGL along a cliff face
- Plan flights during slack tide to minimize spray interference with sensors
- Use the DJI Fly app's wind warning system as a secondary check, not a primary planning tool
- Schedule inspections during golden hour or overcast conditions to reduce the extreme dynamic range challenges of bright water and dark rock
Map Your Obstacle Environment
The Mavic 4 Pro features omnidirectional obstacle avoidance with sensing in all directions, but pre-mapping your flight corridor remains essential.
- Identify sea stacks, overhanging cliff faces, and cable infrastructure before launch
- Mark GPS waypoints for known hazards in the DJI Fly app
- Set your obstacle avoidance sensitivity to maximum in complex environments—the default "balanced" mode may not brake aggressively enough near jagged rock
Pro Tip: I always fly a slow, manual reconnaissance pass at 50% speed before engaging any automated flight modes. The Mavic 4 Pro's obstacle sensors are exceptional, but nothing replaces a pilot's situational awareness on the first run through an unfamiliar corridor.
Step 2: Configure Camera Settings for High-Contrast Coastal Environments
Mountain coastlines present one of the most demanding lighting scenarios in aerial photography: deep shadow under cliff overhangs directly adjacent to highly reflective open ocean. Getting this wrong means losing critical inspection detail in blown highlights or crushed shadows.
Why D-Log Is Non-Negotiable
The Mavic 4 Pro's D-Log color profile captures approximately 14+ stops of dynamic range, preserving detail in both the darkest rock crevices and the brightest wave crests simultaneously.
- Set color mode to D-Log before every inspection flight
- Use manual exposure with ISO locked between 100-400 for cleanest data
- Set shutter speed relative to your frame rate using the 180-degree rule (e.g., 1/60s at 30fps)
- Apply ND filters—I typically use ND8 or ND16 on overcast coastal days, ND32 or ND64 in direct sunlight
Resolution and Frame Rate Selection
| Setting | Recommended for Inspection | Recommended for Documentation |
|---|---|---|
| Resolution | 4K | 4K or 5.1K |
| Frame Rate | 30fps | 60fps (for slow-motion analysis) |
| Color Profile | D-Log | D-Log |
| Bit Rate | Maximum available | Maximum available |
| Photo Format | RAW (DNG) | RAW (DNG) |
| Video Format | H.265 (HEVC) | H.265 (HEVC) |
For still-image inspections of cliff faces, always shoot in RAW format. JPEG compression destroys the subtle tonal differences that reveal hairline fractures, moisture seepage, and early-stage erosion patterns.
Step 3: Master ActiveTrack for Moving Survey Targets
One of the Mavic 4 Pro's most powerful inspection features is ActiveTrack, which uses subject tracking algorithms to keep your camera locked on a defined target while the drone follows a programmed or manual flight path.
How I Use ActiveTrack for Coastline Work
During tidal surge documentation, I lock ActiveTrack onto the waterline contact point along a cliff base. As waves advance and retreat, the Mavic 4 Pro maintains framing automatically, freeing me to focus entirely on flight path safety.
- Draw a bounding box around your tracking subject on the controller screen
- Select Trace mode for following a moving target along the coastline
- Select Spotlight mode when you want the drone to remain stationary while the camera tracks
- Set tracking sensitivity to "High" for fast-moving subjects like tidal surges or wildlife
Subject tracking also proves invaluable when documenting rockfall zones. Lock onto a specific geological feature—a crack system, an unstable overhang—and orbit it smoothly while the Mavic 4 Pro's obstacle avoidance protects against collision with surrounding terrain.
Expert Insight: ActiveTrack works best when your subject has strong visual contrast against its background. On dark basalt coastlines, track the white foam line. On light limestone cliffs, track shadow edges or vegetation boundaries. Giving the algorithm a high-contrast target dramatically improves tracking reliability.
Step 4: Use QuickShots and Hyperlapse for Systematic Documentation
Repeatable, standardized footage is the backbone of any professional inspection program. The Mavic 4 Pro's QuickShots and Hyperlapse modes create consistent, comparable footage across multiple inspection visits.
QuickShots for Standardized Cliff Surveys
- Dronie: Pulls back from a cliff face to reveal overall context—excellent for before/after erosion comparison
- Circle: Orbits a specific feature like a sea cave entrance or fractured headland at a consistent radius
- Helix: Ascending spiral captures both close detail and wide context in a single automated maneuver
- Rocket: Vertical ascent directly up a cliff face reveals stratification layers and vegetation health zones
Hyperlapse for Tidal and Erosion Documentation
Set the Mavic 4 Pro's Hyperlapse mode to capture a tidal cycle compressed into 30-60 seconds of footage. This reveals wave impact patterns, drainage channels, and structural stress points invisible in real-time observation.
- Free mode: Full manual control of flight path during time-lapse capture
- Circle mode: Automated orbit during time-lapse—ideal for monitoring a single rock formation over hours
- Course Lock: Maintains a straight flight path while compressing time—perfect for documenting an entire stretch of coastline
- Interval settings between 2-5 seconds work best for tidal documentation at mountain coastlines
Step 5: Post-Flight Data Management and Analysis
Organizing Inspection Data
- Create a standardized folder structure: Date > Location > Flight Number > Raw/Processed
- Tag all files with GPS coordinates exported from the DJI Fly app flight logs
- Process D-Log footage through DaVinci Resolve or Adobe Premiere using a dedicated LUT for accurate color representation
- Compare current imagery against baseline data from previous inspections using split-screen or overlay techniques
Technical Comparison: Mavic 4 Pro vs. Previous Generation for Coastal Inspection
| Feature | Mavic 4 Pro | Previous Generation |
|---|---|---|
| Obstacle Sensing | Omnidirectional | Forward/Backward/Downward |
| Max Wind Resistance | Up to 12 m/s | Up to 10 m/s |
| Dynamic Range (D-Log) | 14+ stops | ~12.8 stops |
| ActiveTrack Generation | Latest AI-driven | Previous generation |
| Max Flight Time | ~46 minutes | ~34 minutes |
| Sensor Size | Hasselblad, large format | 1-inch or Micro 4/3 |
| QuickShots Modes | 6+ modes | 4-5 modes |
The jump in flight time alone—from roughly 34 to 46 minutes—means fewer battery swaps in remote mountain locations where every landing risks sand and salt contamination of your equipment.
Common Mistakes to Avoid
- Flying in "Sport" mode near cliff faces: Sport mode disables obstacle avoidance entirely. One unexpected gust near a rock wall and your drone is gone. Always use Normal or Cine mode during inspection work.
- Ignoring salt spray accumulation: Even when you're not flying through visible spray, salt aerosol coats sensors and lenses within minutes. Carry lens wipes and sensor cleaning swabs, and clean after every single flight.
- Using auto-exposure during inspections: The Mavic 4 Pro's auto-exposure constantly adjusts as you pan between dark rock and bright ocean, making frame-to-frame comparison impossible. Lock exposure manually.
- Skipping the pre-flight obstacle calibration: The vision sensors require recalibration after firmware updates or physical impacts. A cliff face is not where you want to discover your forward sensing is misaligned.
- Neglecting to monitor battery temperature: Cold ocean wind cools batteries faster than inland conditions. Land when batteries drop below 25% in cold coastal environments—voltage sag can cause sudden shutdowns that standard percentage indicators don't predict.
Frequently Asked Questions
Can the Mavic 4 Pro handle strong coastal winds during mountain inspections?
Yes. The Mavic 4 Pro is rated to resist winds up to approximately 12 m/s (Level 6). However, mountain coastlines generate turbulent, non-laminar wind that feels stronger than steady wind at the same speed. I recommend limiting flights to forecast winds below 8 m/s to maintain stable footage quality and adequate obstacle avoidance response time.
How does obstacle avoidance perform near irregular cliff surfaces?
The Mavic 4 Pro's omnidirectional sensing handles irregular surfaces significantly better than previous-generation forward-only systems. The sensors detect jagged, non-uniform surfaces like volcanic rock and fractured limestone reliably at distances from roughly 0.5m to 40m+. That said, very thin obstacles—like fishing lines, thin branches, or wire fencing—can fall below the detection threshold. Always pre-survey visually for these hazards.
Is D-Log necessary for inspection work, or can I use standard color profiles?
D-Log is strongly recommended for any coastal inspection where your footage will be analyzed for structural detail. Standard profiles apply aggressive contrast curves that crush shadow detail in cliff crevices and blow out highlights on water surfaces. The post-processing step adds roughly 15-20 minutes per flight's footage, but the information preserved in those extra stops of dynamic range has directly impacted my erosion assessments and client reports.
The Mavic 4 Pro has fundamentally changed how I approach mountain coastline inspections. What once required helicopter support, rope-access photography teams, and significant personal risk now fits in a backpack and delivers superior data quality. Whether you're documenting erosion for geological surveys, inspecting coastal infrastructure, or building long-term environmental monitoring databases, this platform delivers the reliability and image quality the work demands.
Ready for your own Mavic 4 Pro? Contact our team for expert consultation.