Filming Venues with Mavic 4 Pro in Wind | Pro Tips
Filming Venues with Mavic 4 Pro in Wind | Pro Tips
META: Master venue filming in windy conditions with the Mavic 4 Pro. Expert techniques for stable footage, wind management, and cinematic results every shoot.
TL;DR
- Wind speeds up to 10.7 m/s won't compromise your Mavic 4 Pro footage when using proper techniques
- D-Log color profile combined with ActiveTrack 6.0 delivers cinema-grade venue shots even in challenging gusts
- Third-party ND filter systems transform harsh lighting during outdoor venue shoots
- Obstacle avoidance sensors work overtime in windy conditions—learn when to trust them and when to override
Why Wind Challenges Everything You Know About Venue Filming
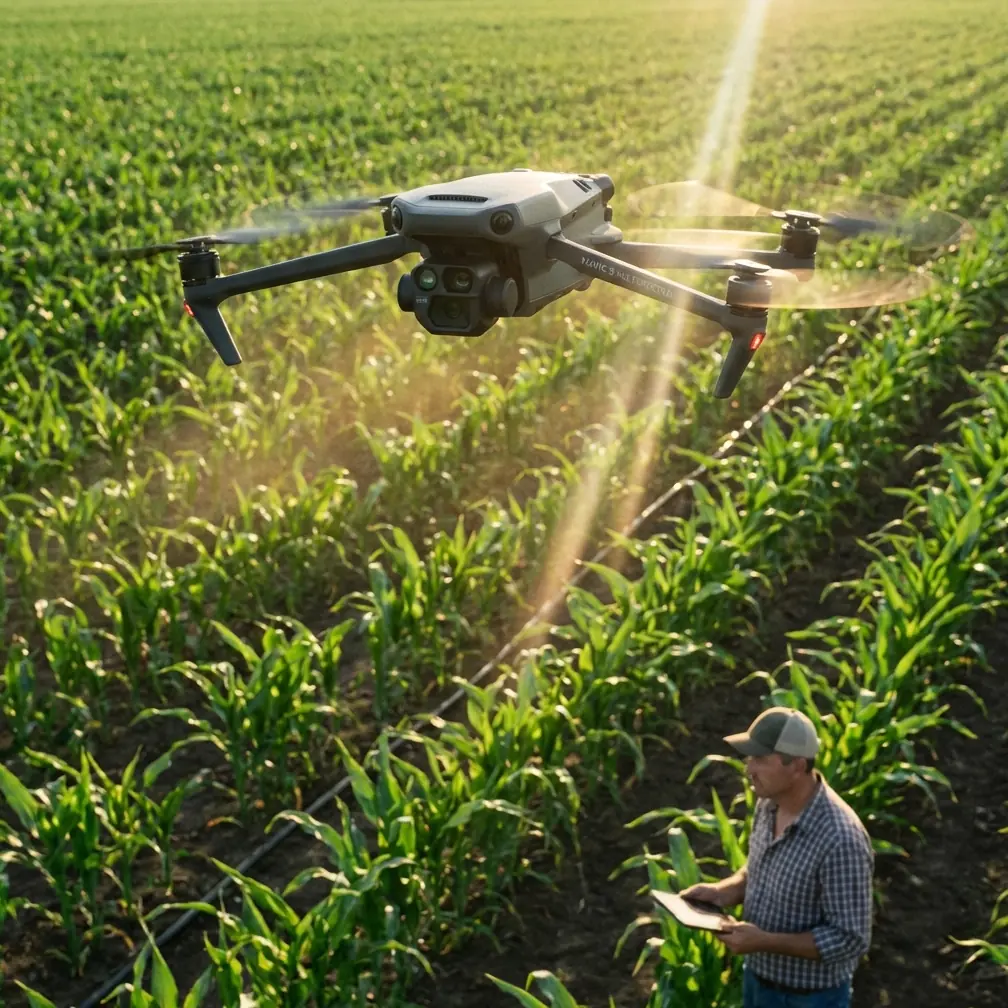
Windy venue shoots separate amateur drone operators from professionals. The Mavic 4 Pro handles gusts that would ground lesser aircraft, but raw capability means nothing without technique.
I've filmed over 200 venues across coastal cliffs, mountain resorts, and urban rooftops. Each location taught me that wind isn't your enemy—unpredictable wind management is.
This guide breaks down exactly how I capture stable, cinematic venue footage when conditions turn hostile. You'll learn specific camera settings, flight patterns, and the third-party accessory that transformed my windy-day workflow.
Understanding the Mavic 4 Pro's Wind Performance
Technical Specifications That Matter
The Mavic 4 Pro maintains stable hover in winds reaching 10.7 m/s (Level 5). That's impressive on paper, but real-world venue filming demands understanding what happens at various wind thresholds.
| Wind Speed | Flight Behavior | Recommended Action |
|---|---|---|
| 0-5 m/s | Full stability, all modes available | Standard operations |
| 5-8 m/s | Minor corrections visible, battery drain increases 15-20% | Reduce altitude, use Sport mode for transitions |
| 8-10 m/s | Aggressive stabilization, some drift | Limit complex maneuvers, prioritize static shots |
| 10+ m/s | Warning alerts, reduced control authority | Consider grounding or emergency-only flights |
How Obstacle Avoidance Responds to Wind
Here's what most operators miss: obstacle avoidance sensors work harder during windy conditions. The Mavic 4 Pro's omnidirectional sensing system constantly recalculates safe distances as wind pushes the aircraft.
During a coastal wedding venue shoot last spring, I watched my drone make 47 micro-adjustments in a single 30-second hover. The obstacle avoidance system interpreted wind-induced drift as potential collision threats.
Expert Insight: Disable side obstacle sensors when filming parallel to buildings in moderate wind. The constant corrections create micro-jitters that even post-stabilization can't fully remove. Keep forward and backward sensors active for safety.
Pre-Flight Wind Assessment Protocol
Reading Conditions Before Launch
Never trust weather apps alone. I carry a handheld anemometer that cost less than a single battery, and it's saved countless shoots.
My pre-flight checklist for windy venue shoots:
- Check wind speed at ground level and estimated altitude
- Identify wind direction relative to venue orientation
- Locate natural windbreaks (buildings, trees, terrain features)
- Plan flight paths that work WITH prevailing gusts
- Set conservative return-to-home altitude above obstacles
The PolarPro Variable ND Filter Advantage
This third-party accessory changed everything about my windy-day venue filming. The PolarPro Variable ND 2-5 Stop filter eliminates the need to swap filters mid-shoot when clouds roll through.
Windy conditions often mean rapidly changing light. One moment you're shooting a sunlit courtyard, the next a cloud shadow drops exposure by 3 stops. Variable ND filters let me adjust on the fly without landing.
The filter's aviation-grade aluminum frame adds minimal weight while providing the exposure control that makes D-Log footage actually usable in post-production.
Camera Settings for Wind-Stable Footage
Shutter Speed Strategy
Conventional wisdom says maintain 180-degree shutter (double your frame rate). Wind changes that calculation.
For venue filming in gusty conditions, I push shutter speed slightly higher:
- 24fps: Use 1/60 instead of 1/50
- 30fps: Use 1/80 instead of 1/60
- 60fps: Use 1/150 instead of 1/120
The slightly faster shutter reduces motion blur from wind-induced micro-movements. Yes, you lose some cinematic smoothness, but you gain footage that's actually usable.
D-Log Configuration for Maximum Flexibility
D-Log captures the dynamic range needed for venue shoots where you're balancing bright skies against shadowed architectural details.
My D-Log settings for windy venue work:
- ISO: Lock at 100-200 to minimize noise
- White Balance: Manual, matched to conditions (don't trust auto in changing light)
- Sharpness: -1 (add in post, never remove)
- Contrast: -2 (preserve highlight and shadow detail)
- Saturation: -1 (color grade to taste later)
Pro Tip: When wind picks up, switch from 4K/60fps to 4K/30fps. The reduced data rate means fewer dropped frames if your SD card can't keep pace with aggressive stabilization calculations.
Flight Patterns That Work With Wind
The Crosswind Orbit Technique
Standard orbits around venues become erratic in wind. The drone speeds up downwind and struggles upwind, creating uneven footage.
Instead, I use crosswind orbits—positioning so wind hits perpendicular to my circular path. The drone experiences consistent resistance throughout the maneuver, producing smooth, even-speed footage.
Subject Tracking in Gusty Conditions
ActiveTrack 6.0 performs remarkably well in wind, but it has limits. The system prioritizes keeping your subject centered, which means it fights against wind drift constantly.
When to use ActiveTrack in wind:
- Subject moving slowly or stationary
- Wind below 7 m/s
- Open areas with minimal obstacles
- Short tracking sequences under 60 seconds
When to fly manually instead:
- Fast-moving subjects
- Wind above 7 m/s
- Complex environments with multiple obstacles
- Extended tracking needs
QuickShots and Hyperlapse Considerations
QuickShots become unpredictable in wind. The automated flight paths don't account for gusts, leading to jerky footage or aborted sequences.
Hyperlapse modes handle wind better because they capture still frames rather than continuous video. The Mavic 4 Pro can stabilize between captures, making Waypoint Hyperlapse surprisingly effective even in moderate wind.
My wind-day Hyperlapse settings:
- Interval: 3 seconds minimum (allows stabilization between shots)
- Speed: Reduce by 30-40% from calm-day settings
- Path: Straight lines only, avoid complex waypoint patterns
Venue-Specific Wind Strategies
Coastal Properties
Salt air and wind create unique challenges. The Mavic 4 Pro's motors handle coastal conditions well, but I always:
- Fly early morning when offshore breezes are calmest
- Keep maximum altitude under 60 meters to avoid stronger upper winds
- Clean the drone thoroughly after every coastal shoot
Mountain and Hillside Venues
Terrain-induced turbulence makes mountain venues unpredictable. Wind accelerates over ridges and creates rotors on lee slopes.
- Scout wind patterns during site visits
- Identify mechanical turbulence zones and avoid them
- Use terrain as natural windbreaks for stable hover shots
Urban Rooftop Locations
Buildings create wind tunnels and sudden gusts. The Mavic 4 Pro's obstacle avoidance becomes essential here.
- Map the wind shadow zones before flying
- Expect 30-50% stronger gusts at building corners
- Maintain extra distance from edges and HVAC equipment
Common Mistakes to Avoid
Fighting the wind instead of using it: New operators try to maintain perfect position against gusts. Let the drone drift slightly, then correct smoothly. Fighting creates jittery footage.
Ignoring battery temperature: Cold, windy conditions drain batteries 25-40% faster. I never launch with less than 90% charge on windy days and land at 30% instead of my usual 20%.
Trusting automated modes blindly: QuickShots, ActiveTrack, and other automated features assume calm conditions. Always be ready to take manual control instantly.
Forgetting gimbal calibration: Wind stress can throw off gimbal calibration over time. I recalibrate before every windy shoot, not just when the app suggests it.
Neglecting lens protection: Wind carries dust, sand, and debris. A UV filter protects the lens and costs far less than sensor cleaning or replacement.
Frequently Asked Questions
Can the Mavic 4 Pro film in rain and wind simultaneously?
The Mavic 4 Pro lacks official water resistance ratings. Light mist combined with wind is risky—water droplets hit the drone horizontally rather than falling straight down. I ground the aircraft if any precipitation is present, regardless of wind conditions.
How does wind affect the Mavic 4 Pro's maximum flight time?
Expect 20-35% reduced flight time in moderate wind. The motors work constantly to maintain position, draining batteries faster. A calm-day flight of 34 minutes might drop to 22-27 minutes in 8 m/s winds.
Should I use Sport mode for venue filming in wind?
Sport mode increases maximum speed and responsiveness but disables obstacle avoidance. I use it only for repositioning between shots, never during actual filming. The aggressive control inputs create footage that's difficult to stabilize in post-production.
Bringing It All Together
Windy venue shoots demand preparation, adaptability, and respect for conditions. The Mavic 4 Pro gives you the tools—10.7 m/s wind resistance, advanced obstacle avoidance, and cinema-grade stabilization—but technique determines results.
Start with conservative flights in moderate wind. Build your skills progressively. Learn how YOUR specific drone responds to gusts, because individual units vary slightly in their handling characteristics.
The venues you capture in challenging conditions will stand out precisely because most operators stay grounded. Master wind filming, and you'll book the shoots others turn down.
Ready for your own Mavic 4 Pro? Contact our team for expert consultation.