Mavic 4 Pro for Solar Farm Filming: Mountain Guide
Mavic 4 Pro for Solar Farm Filming: Mountain Guide
META: Master solar farm filming in mountain terrain with Mavic 4 Pro. Expert tips on EMI handling, obstacle avoidance, and cinematic techniques for stunning aerial footage.
TL;DR
- Electromagnetic interference (EMI) from solar panels requires specific antenna positioning and flight planning strategies
- The Mavic 4 Pro's omnidirectional obstacle avoidance system prevents collisions with guy-wires, poles, and uneven mountain terrain
- D-Log color profile captures the full dynamic range needed for reflective panel surfaces against dark mountain backdrops
- Strategic use of ActiveTrack 360° and Hyperlapse modes creates compelling inspection and promotional content simultaneously
The Solar Farm Filming Challenge Nobody Talks About
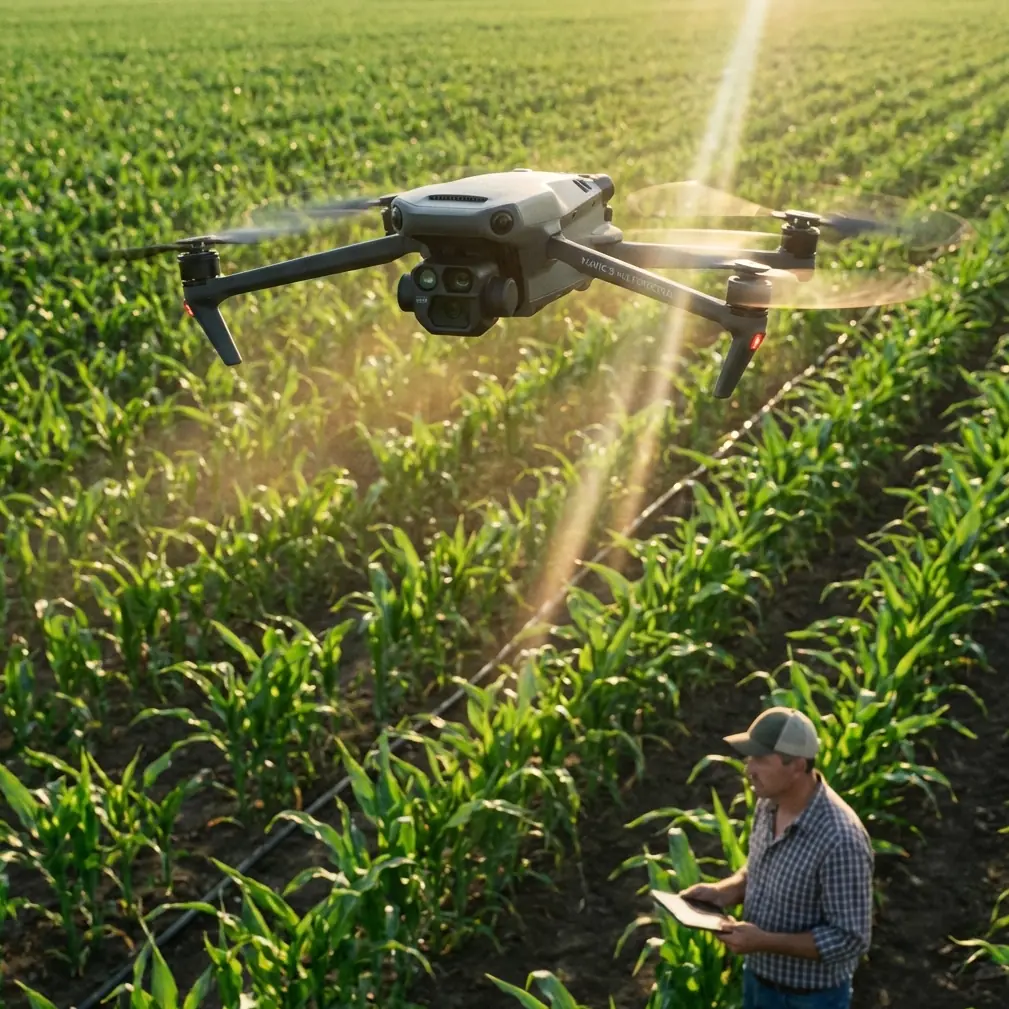
Solar farm operators need aerial footage. Content creators want cinematic shots. But filming photovoltaic installations in mountain environments combines every difficult variable in drone cinematography into one location.
Reflective surfaces confuse sensors. Metal racking generates electromagnetic fields. Mountain terrain creates unpredictable wind patterns. Elevation changes push battery performance to its limits.
The Mavic 4 Pro addresses these challenges through hardware design and intelligent flight systems that previous generations simply couldn't match. This guide breaks down exactly how to capture professional solar farm footage in mountain terrain—from pre-flight antenna configuration to post-processing workflows.
Understanding EMI: Why Solar Farms Fight Your Drone
Solar installations generate electromagnetic interference that disrupts communication between your controller and aircraft. The inverters converting DC to AC power are the primary culprits, producing radio frequency noise across multiple bands.
Expert Insight: Before each solar farm shoot, I perform a "radio sweep" by hovering at 30 meters for 60 seconds while monitoring signal strength. If the connection drops below three bars, I reposition my ground station upwind from the inverter bank—typically 50-75 meters creates sufficient separation.
The Mavic 4 Pro's O4 transmission system operates on 2.4GHz and 5.8GHz bands with automatic frequency hopping. This dual-band capability provides redundancy when one frequency encounters interference.
Antenna Positioning Protocol
Your controller antenna orientation directly impacts signal reliability. For solar farm operations:
- Position antennas perpendicular to the aircraft, not pointed at it
- Maintain line of sight above panel arrays—reflections create multipath interference
- Keep the controller elevated on a tripod or elevated surface when possible
- Avoid standing near metal structures, vehicles, or inverter housings
The Mavic 4 Pro's controller features adjustable high-gain antennas that outperform integrated designs. Extending these fully and maintaining proper orientation recovered signal in situations where my previous aircraft would have triggered return-to-home.
Obstacle Avoidance in Complex Terrain
Mountain solar installations present obstacle challenges that flat-ground facilities don't. Guy-wires supporting weather stations. Grounding cables running between rows. Uneven terrain with sudden elevation changes. Wildlife fencing at property boundaries.
The Mavic 4 Pro's omnidirectional obstacle sensing uses a combination of:
- Wide-angle vision sensors covering 360° horizontal detection
- Time-of-flight sensors for precise distance measurement
- Infrared sensors for low-light obstacle detection
- Downward-facing sensors for terrain following
This system detects obstacles as thin as 8mm in diameter at distances up to 40 meters in optimal conditions. For guy-wires and cables, detection range drops to approximately 15-20 meters—still sufficient for the aircraft to brake and hover.
Configuring Avoidance for Solar Operations
Default obstacle avoidance settings prioritize safety over shot flexibility. For professional solar farm work, I adjust these parameters:
- Set braking distance to maximum for cable detection margin
- Enable APAS 5.0 for automatic path planning around fixed obstacles
- Disable downward obstacle avoidance only when flying established paths over known terrain
- Configure return-to-home altitude at least 20 meters above the highest structure
Pro Tip: Create a custom flight mode specifically for solar farm work. Save your obstacle avoidance preferences, exposure settings, and gimbal behavior as a preset. Switching between "Solar Farm" and "General" modes takes two taps and eliminates reconfiguration time between projects.
Subject Tracking Across Panel Arrays
The visual uniformity of solar panels creates tracking challenges for AI-based systems. Rows of identical blue rectangles confuse algorithms trained on distinct subjects.
ActiveTrack on the Mavic 4 Pro handles this through deep learning object recognition that identifies structural elements rather than relying solely on color differentiation. The system tracks:
- Maintenance vehicles moving between rows
- Personnel performing inspections
- Specific panel sections marked with visual indicators
- Perimeter features like fencing and access roads
For B-roll footage, I use Spotlight mode rather than full ActiveTrack. This keeps the camera locked on a subject while I manually control aircraft position—essential for complex reveal shots that move through panel arrays.
Cinematic Techniques for Solar Installations
QuickShots That Actually Work
Not every QuickShots mode suits solar farm environments. Based on extensive testing:
| QuickShots Mode | Solar Farm Suitability | Notes |
|---|---|---|
| Dronie | Excellent | Clean pullback reveals installation scale |
| Circle | Good | Works around inverter stations, not panel fields |
| Helix | Excellent | Combines altitude gain with orbital movement |
| Rocket | Limited | Loses visual interest over uniform panels |
| Boomerang | Poor | Horizontal movement clips panel edges |
| Asteroid | Excellent | Creates dramatic "tiny planet" establishing shots |
Hyperlapse for Time-Compression
Solar farms transform throughout the day as shadow patterns shift across panels. Hyperlapse mode compresses hours of movement into seconds of footage.
The Mavic 4 Pro offers four Hyperlapse options:
- Free: Manual flight path with stabilized output
- Circle: Orbital movement around a central point
- Course Lock: Straight-line movement with fixed heading
- Waypoint: Pre-programmed path with precise repeatability
For solar installations, Waypoint Hyperlapse produces the most professional results. Program a path that follows panel row alignment, set 2-second intervals between frames, and capture the full shadow progression from morning to afternoon.
Battery limitations require planning. A single Hyperlapse sequence capturing 4 hours of real time needs approximately 7,200 frames at 2-second intervals. The Mavic 4 Pro's 46-minute flight time allows capturing roughly 1,380 frames per battery—meaning a full-day Hyperlapse requires 5-6 batteries and careful handoff timing.
D-Log and Exposure Strategy
Solar panels present extreme dynamic range challenges. Reflective surfaces can exceed 18 stops of brightness difference compared to shadowed mountain terrain in the same frame.
Why D-Log Matters Here
The Mavic 4 Pro's D-Log M color profile captures 12.8 stops of dynamic range—not enough to cover the full solar panel contrast range, but sufficient to preserve detail in both highlights and shadows when properly exposed.
Exposure strategy for solar installations:
- Expose for highlights to prevent panel reflection clipping
- Accept shadow crush in deep terrain features
- Use zebras at 85% to monitor reflection intensity
- Consider ND filters (ND16-ND64) to maintain cinematic shutter speeds
Color Grading Considerations
D-Log footage requires post-processing. For solar farm content, I apply:
- Highlight recovery targeting the 90-100% luminance range
- Shadow lift of approximately +15-20% for terrain detail
- Saturation reduction on blue channel to prevent panel color oversaturation
- Contrast curve with lifted blacks for a commercial aesthetic
Technical Specifications Comparison
| Feature | Mavic 4 Pro | Previous Generation | Impact on Solar Filming |
|---|---|---|---|
| Max Flight Time | 46 minutes | 34 minutes | Extended Hyperlapse capability |
| Obstacle Sensing | Omnidirectional | Forward/Backward/Downward | Cable and guy-wire detection |
| Transmission Range | 20km | 15km | Reliable signal through EMI |
| Video Resolution | 8K/30fps | 5.1K/50fps | Higher detail for inspection work |
| Dynamic Range | 12.8 stops | 12.4 stops | Better highlight/shadow balance |
| Wind Resistance | 12m/s | 10.7m/s | Mountain gust handling |
Common Mistakes to Avoid
Flying during peak reflection hours: Solar panels reflect maximum sunlight between 10am-2pm. This creates sensor confusion and unusable footage with blown highlights. Schedule flights for golden hour or overcast conditions.
Ignoring inverter proximity: Pilots often set up ground stations near equipment sheds where inverters are housed. This places you in the highest EMI zone. Survey the site and position yourself upwind and distant from electrical infrastructure.
Trusting automatic exposure: The Mavic 4 Pro's auto-exposure algorithm averages the entire frame. Over solar panels, this produces underexposed terrain and overexposed reflections. Switch to manual exposure and use histogram monitoring.
Neglecting pre-flight compass calibration: Mountain terrain and solar installation metal structures both affect magnetometer readings. Calibrate at your takeoff location before every session, even if the app doesn't prompt you.
Flying identical patterns repeatedly: Solar farm clients need variety. Capture wide establishing shots, detail passes along rows, vertical top-downs, and low-angle reveals. One flight pattern produces one type of footage.
Frequently Asked Questions
Can I fly the Mavic 4 Pro directly over active solar panels?
Yes, but with precautions. The aircraft's downward sensors may receive confusing reflections from panel surfaces. Maintain a minimum altitude of 15 meters above panels to ensure reliable terrain sensing. Avoid hovering stationary over panels for extended periods, as reflected heat can affect battery temperature readings.
How do I handle sudden wind gusts in mountain terrain?
The Mavic 4 Pro's 12m/s wind resistance handles most mountain conditions, but terrain-induced turbulence creates localized gusts exceeding this threshold. Monitor the wind warning indicator and establish a personal limit of 8m/s sustained winds for solar farm work. Position yourself where you can observe both the aircraft and nearby vegetation—tree movement provides advance warning of incoming gusts.
What's the best time of year for solar farm aerial content?
Late spring and early fall provide optimal conditions. Summer months create heat shimmer that degrades image quality, while winter brings low sun angles that cause extreme panel reflections. Shoulder seasons offer moderate temperatures for battery performance, manageable sun angles, and typically clearer atmospheric conditions for mountain filming.
Chris Park is a commercial drone operator specializing in renewable energy infrastructure documentation. His solar installation portfolio includes projects across mountain terrain in three countries.
Ready for your own Mavic 4 Pro? Contact our team for expert consultation.