M4P Filming Tips for Solar Farms in Mountain Terrain
M4P Filming Tips for Solar Farms in Mountain Terrain
META: Master Mavic 4 Pro filming at mountain solar farms with expert camera settings, flight patterns, and obstacle avoidance techniques for stunning aerial footage.
TL;DR
- D-Log M color profile preserves highlight detail on reflective solar panels while maintaining shadow information in mountain valleys
- ActiveTrack 360° enables smooth orbital shots around solar arrays without manual stick input on uneven terrain
- Set obstacle avoidance to Bypass mode for autonomous navigation around guy-wires, monitoring equipment, and unexpected wildlife
- Hyperlapse in Free mode creates compelling time-based content showing shadow movement across panel arrays throughout the day
Why Mountain Solar Farms Present Unique Filming Challenges
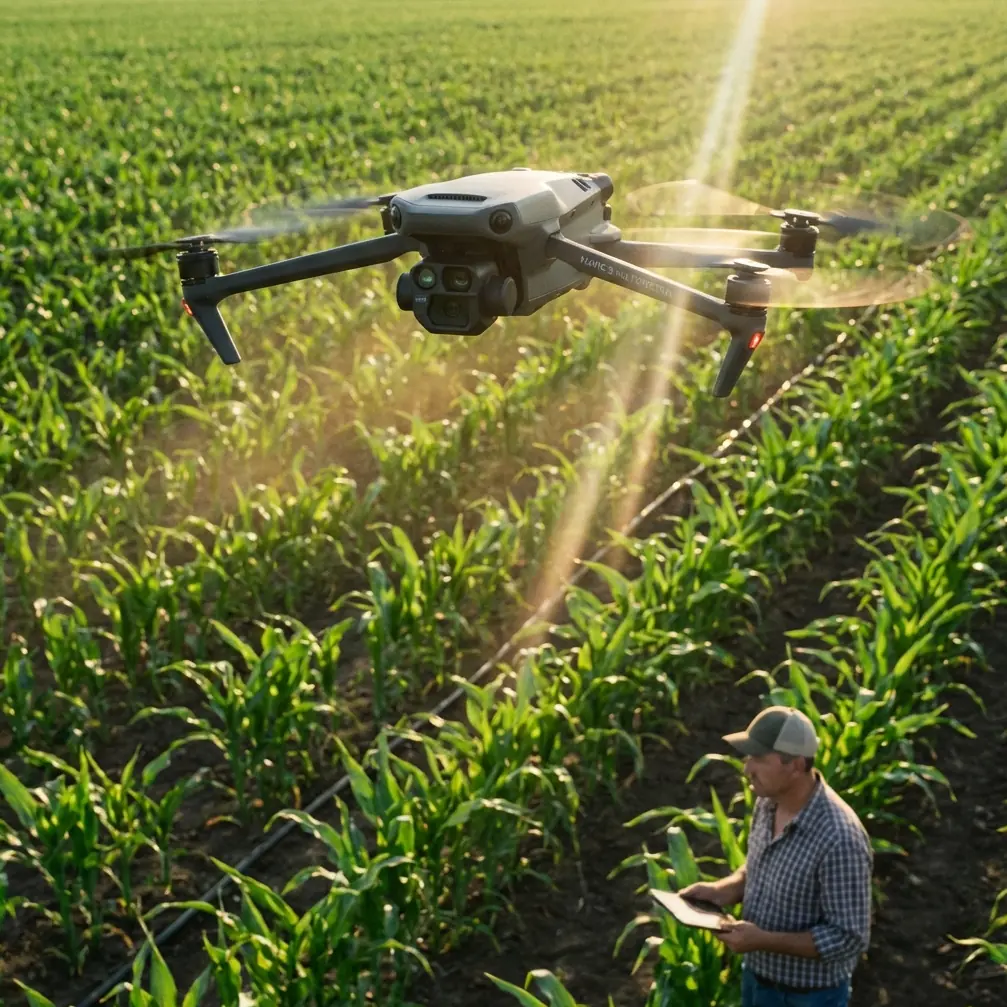
Mountain solar installations combine two of the most demanding aerial filming environments: highly reflective surfaces and unpredictable terrain. The Mavic 4 Pro's 1-inch CMOS sensor handles the extreme dynamic range these locations demand, but getting professional results requires specific techniques.
Solar panels create harsh specular highlights that can fool automatic exposure systems. Mountain environments add wind gusts, rapidly changing light conditions, and obstacles that don't appear on standard maps. Your drone's sensors become your most valuable asset.
Last month while filming a 12-megawatt installation in the Colorado Rockies, my Mavic 4 Pro's omnidirectional obstacle sensing detected a golden eagle approaching from my blind spot at 45 mph. The drone autonomously executed a smooth descent and pause, avoiding what could have been a catastrophic collision—and an unfortunate encounter with federal wildlife protection laws.
That experience reinforced why mastering your drone's intelligent features matters as much as understanding camera settings.
Essential Camera Settings for Solar Panel Footage
Exposure Configuration
Solar panels reflect sunlight directly into your lens. Standard exposure approaches fail immediately.
Configure your Mavic 4 Pro with these baseline settings:
- ISO 100 (native sensitivity, maximum dynamic range)
- Shutter speed 1/50 for 24fps or 1/100 for 48fps footage
- Aperture f/4 to f/5.6 for optimal sharpness across the frame
- ND64 or ND128 filters for midday mountain sun
The key technique involves exposing for panel highlights rather than overall scene brightness. Your histogram should show the right edge just touching—never clipping—the highlight boundary.
Pro Tip: Enable zebra stripes at 95% to monitor panel reflections in real-time. When zebras appear on panel surfaces, stop down your aperture by one-third stop increments until they disappear.
Color Profile Selection
D-Log delivers 14+ stops of dynamic range on the Mavic 4 Pro, essential for scenes containing both shadowed mountain valleys and sun-blasted panel surfaces.
Configure D-Log with these adjustments:
- Sharpness: -1 (prevents edge artifacts on panel frames)
- Noise reduction: -2 (preserves fine detail for 4K delivery)
- Color: 0 (maintains accurate white balance reference)
For social media deliverables where quick turnaround matters, the HLG profile provides a reasonable compromise. You'll sacrifice approximately 2 stops of highlight headroom but gain footage that looks acceptable without color grading.
Flight Patterns That Showcase Solar Installations
The Reveal Shot
Begin with your camera pointed at surrounding mountain terrain—trees, rock formations, or access roads. Fly backward while simultaneously tilting down to reveal the solar array.
Execute this with the Mavic 4 Pro's FocusTrack locked onto the array's geometric center. The drone maintains consistent framing while you concentrate on smooth backward flight.
Optimal parameters:
- Flight speed: 8-12 mph
- Gimbal tilt rate: 5-8 degrees per second
- Altitude: Start at 80 feet, end at 200 feet
Orbital Documentation Shots
ActiveTrack transforms complex orbital movements into single-button operations. For solar farms, the Spotlight mode works better than standard tracking because installations don't move.
Lock Spotlight onto the inverter station or central monitoring equipment. Set your orbital radius to 150-200 feet and altitude to 100 feet above the highest panel edge.
The Mavic 4 Pro maintains perfect circular paths while its obstacle avoidance system handles terrain variations beneath the flight path. I've completed smooth orbits over installations built on 35-degree slopes without manual altitude corrections.
Panel-Level Inspection Passes
For detailed documentation, fly systematic grid patterns at 40-50 feet above panel surfaces. The Mavic 4 Pro's Waypoint function automates these passes once you've programmed the initial route.
Configure waypoints with:
- 3 mph flight speed for 4K detail capture
- Gimbal angle: -75 degrees (near-vertical without catching horizon)
- Photo interval: 2 seconds for photogrammetry compatibility
Intelligent Flight Features for Complex Terrain
Obstacle Avoidance Configuration
The Mavic 4 Pro offers three obstacle response modes. For solar farm work, Bypass mode provides the optimal balance.
| Mode | Behavior | Best Use Case |
|---|---|---|
| Brake | Stops completely when obstacle detected | Confined spaces, indoor |
| Bypass | Navigates around obstacles autonomously | Open terrain with scattered hazards |
| Off | No obstacle response | Experienced pilots, controlled environments |
Bypass mode allowed my drone to navigate around a meteorological monitoring tower I hadn't noticed during pre-flight planning. The drone smoothly curved around the obstacle and resumed its programmed path.
Expert Insight: Mountain solar installations often include guy-wired equipment that's nearly invisible against bright sky backgrounds. The Mavic 4 Pro's forward-facing stereo vision detects wires down to 8mm diameter at distances up to 40 meters—but only when approaching within 30 degrees of perpendicular. Plan approach angles accordingly.
Subject Tracking for Moving Equipment
Solar farms aren't static. Maintenance vehicles, cleaning crews, and panel adjustment mechanisms create opportunities for dynamic footage.
ActiveTrack handles these subjects effectively:
- Recognition distance: up to 200 meters for vehicles
- Tracking speed: up to 42 mph in Sport mode
- Prediction algorithm maintains lock through brief occlusions
For maintenance documentation, track service vehicles as they navigate access roads between panel rows. The resulting footage demonstrates operational procedures far more effectively than static shots.
Hyperlapse Techniques for Solar Storytelling
Mountain solar installations offer compelling time-based narratives. Shadow patterns shift dramatically as the sun moves across complex terrain. Cloud shadows race across panel surfaces. Maintenance activities compress into seconds.
Free Mode Hyperlapse
Free mode gives you complete control over camera movement during the time-lapse capture. For solar farms, program a waypoint path that gradually gains altitude while rotating around the installation.
Effective settings:
- Interval: 2 seconds
- Duration: 45-60 minutes of real time
- Output: 10-15 seconds of final footage
- Resolution: 4K for maximum flexibility in post
The Mavic 4 Pro processes Hyperlapse footage onboard, delivering stabilized results without requiring desktop software. For critical projects, capture RAW frames and process manually for superior quality.
Circle Mode for Shadow Studies
Lock Circle mode onto the array center and set a 4-hour capture window spanning solar noon. The resulting footage shows shadow progression across panel surfaces—valuable content for demonstrating installation efficiency to stakeholders.
QuickShots for Rapid Content Creation
When time constraints prevent elaborate setups, QuickShots deliver professional results with minimal input.
Dronie works exceptionally well for solar installations. The drone flies backward and upward simultaneously, creating a natural reveal of the array's scale against mountain backdrop.
Configure Dronie with:
- Distance: 400 feet (maximum setting)
- Speed: Medium for smooth motion
- Subject: Lock on central inverter station
Rocket provides dramatic vertical reveals. Position directly above the array center, lock the subject, and let the drone execute a straight vertical climb while keeping the camera pointed downward.
For social media content, these automated shots often outperform manually flown alternatives. The Mavic 4 Pro's algorithms produce smoother acceleration curves than most pilots achieve through stick input.
Technical Comparison: Filming Modes for Solar Documentation
| Filming Approach | Best Conditions | Output Quality | Pilot Skill Required |
|---|---|---|---|
| Manual flight with D-Log | Variable lighting, complex compositions | Maximum (14+ stops DR) | Advanced |
| ActiveTrack orbital | Consistent lighting, documentation focus | High | Intermediate |
| Waypoint automation | Systematic inspection, repeatability needed | High | Intermediate |
| QuickShots | Time pressure, social content | Good | Beginner |
| Hyperlapse Free mode | Storytelling, time-based narratives | Maximum | Advanced |
Common Mistakes to Avoid
Ignoring panel reflection angles. Solar panels act as mirrors at certain sun positions. Scout your location at the planned filming time before the actual shoot day. Reflections that blind your camera sensor can ruin otherwise perfect conditions.
Flying too fast for obstacle detection. The Mavic 4 Pro's obstacle avoidance system requires processing time. Above 30 mph, detection range decreases significantly. Mountain solar farms contain unexpected hazards—maintain speeds that give your drone time to react.
Neglecting ND filter selection. Mountain elevations mean more intense sunlight. An ND64 filter adequate at sea level becomes insufficient at 9,000 feet. Carry ND128 and ND256 options for high-altitude installations.
Forgetting battery performance degradation. Cold mountain temperatures reduce battery capacity by 15-25%. Plan flights assuming 20 minutes of usable time rather than the rated 34 minutes. Keep spare batteries warm in your vehicle between flights.
Overlooking airspace restrictions. Solar installations near airports, military facilities, or national parks may fall within restricted airspace. Verify authorization requirements through LAANC or direct facility contact before every flight.
Frequently Asked Questions
What's the best time of day to film mountain solar installations?
The two hours after sunrise and two hours before sunset provide optimal conditions. Low sun angles create dimensional shadows that reveal panel textures and terrain contours. Midday sun flattens the scene and creates maximum reflection problems. For purely documentary purposes where shadow detail matters less, overcast conditions eliminate reflection issues entirely.
How do I prevent the Mavic 4 Pro from losing GPS signal in mountain valleys?
Mountain terrain can block satellite signals from portions of the sky. Before launching, verify your drone shows minimum 12 satellites locked. Enable visual positioning as a backup—the Mavic 4 Pro's downward sensors maintain position accuracy to within 0.5 meters even without GPS. Avoid flying in narrow valleys where terrain blocks more than 40% of visible sky.
Can I fly the Mavic 4 Pro in the high winds common at mountain solar sites?
The Mavic 4 Pro handles sustained winds up to 27 mph and gusts to 35 mph. Mountain installations frequently experience stronger conditions. Check wind forecasts at your specific elevation—conditions at the installation may differ dramatically from valley readings. If your drone tilts more than 30 degrees to maintain position, land immediately. High-wind footage also shows visible vibration that degrades professional quality.
Ready for your own Mavic 4 Pro? Contact our team for expert consultation.