Mavic 4 Pro in Urban Forests: A Field Case Study
Mavic 4 Pro in Urban Forests: A Field Case Study on Tracking, Avoidance, and Clean Signal Discipline
META: A practical Mavic 4 Pro case study for filming forests in urban areas, covering obstacle avoidance, ActiveTrack, D-Log workflow, Hyperlapse planning, and antenna positioning for stronger range and more reliable flights.
Urban forests are awkward places to fly well.
They look cinematic on screen, but in the air they compress nearly every challenge a pilot has to manage at once: broken sightlines, reflective glass nearby, patchy GNSS reception under tree cover, shifting contrast between deep shade and bright sky, and branches that seem farther away than they really are until the aircraft starts moving laterally. If your goal is polished footage rather than just getting airborne, these spaces expose every weakness in setup and decision-making.
That is exactly why the Mavic 4 Pro is interesting here.
Not because it promises easy flying. Because the aircraft class is built for the kind of mixed-environment work where a creator needs strong image flexibility, dependable obstacle sensing, and automation that helps without taking over the job. For a pilot filming forests inside or near a city, those three things matter more than headline specs on a product page.
I’ve been looking at the Mavic 4 Pro through that lens: not as a generic flagship drone, but as a working camera platform for dense green corridors, city parks, and wooded edges bordered by roads, towers, and apartment blocks. In this case study, I’ll break down how features like obstacle avoidance, ActiveTrack, QuickShots, Hyperlapse, and D-Log actually change the odds of bringing home usable footage.
The scenario: a forest corridor inside the city
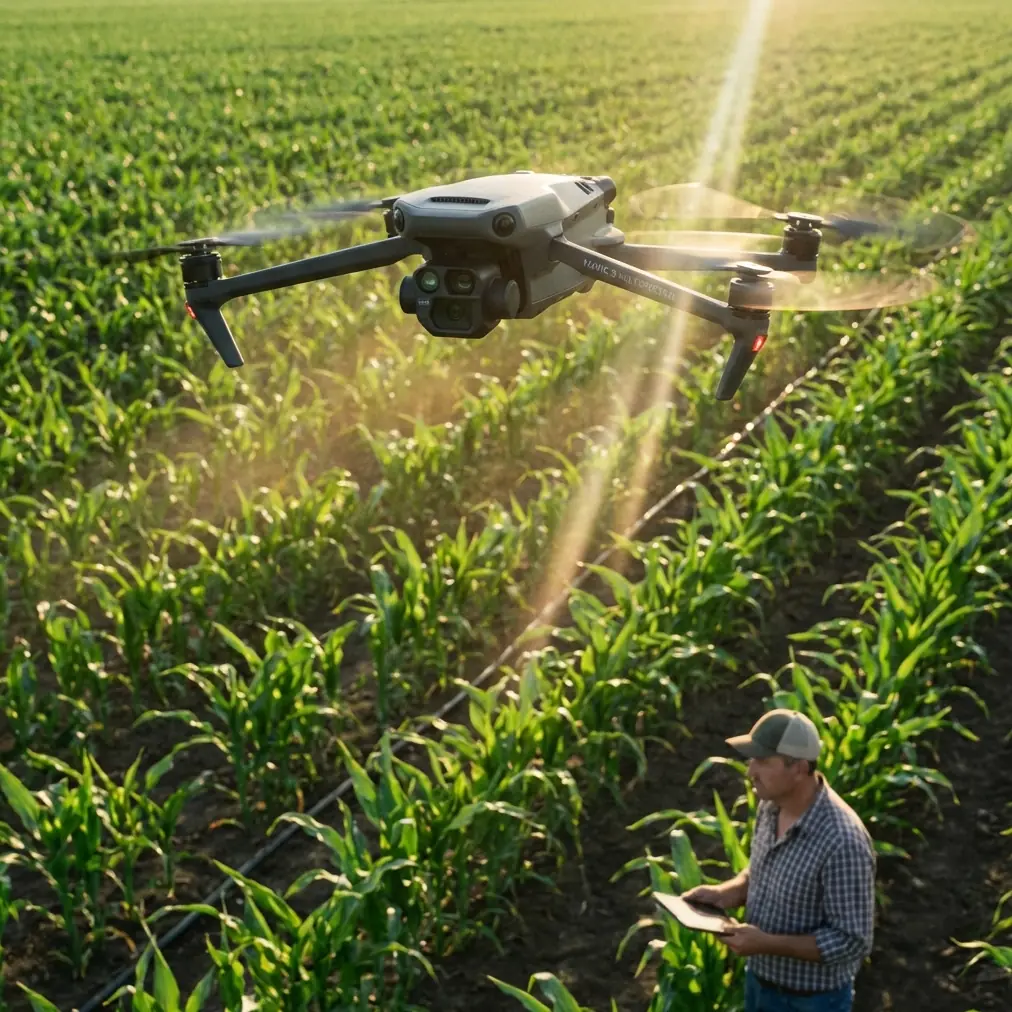
Picture a familiar assignment. You’re filming a cycling trail that disappears into a stand of tall trees, with mid-rise buildings just beyond the canopy. The brief sounds simple: create a short sequence that starts wide, drops into the trees, follows the subject along a path, and ends with a reveal of the skyline. On the ground, the location feels spacious. In the air, it becomes a layered obstacle maze.
Branches are the obvious threat, but they aren’t the only one. Urban forests create signal trouble because the aircraft may move in and out of partial obstruction. Your control link can be affected not just by distance, but by the geometry between the remote controller, the drone, trunks, terrain, and nearby structures. That is why range conversations are often misunderstood. Maximum distance is less useful than maximum signal quality for the exact angle and environment you are flying.
This is where antenna positioning advice stops being a minor tip and becomes part of the flight plan.
Antenna positioning: the overlooked factor behind “mysterious” signal drops
Pilots often point the controller antennas directly at the drone as if they were aiming a flashlight. That is usually the wrong habit.
For the best link, you generally want the broad face of the antenna pattern presented toward the aircraft rather than the tip aimed at it. In practical terms, that means adjusting the controller so the flat side of the antenna orientation is facing the drone’s position as it moves, especially when working low along a tree line or behind partial canopy. The signal radiates more effectively off the sides than the end.
In urban forest work, this operationally matters for two reasons.
First, flights are often low and shallow. The aircraft may be only tens of meters above ground while moving forward through foliage gaps. A small change in your body position or antenna angle can improve the link more than climbing another few meters and ruining the shot. Second, city-adjacent interference is rarely uniform. You may have a clean signal facing one corridor and a weaker link the moment the aircraft rotates around a cluster of buildings or dense trunks. If you do not actively manage antenna orientation during the run, you can mistake a controllable signal issue for a drone limitation.
A simple field habit helps: before launching, stand in your intended direction of travel and rehearse the controller angle you’ll use for the first leg, midpoint, and return. It sounds trivial. It isn’t. In tight green spaces, disciplined antenna positioning can be the difference between smooth monitoring and an early decision to abort.
If you want to compare field setups for this kind of location, I usually suggest sending the route sketch and surrounding obstacles before the shoot through this WhatsApp contact so the flight geometry can be thought through in advance.
Obstacle avoidance is not a substitute for route design
The Mavic 4 Pro conversation inevitably includes obstacle avoidance, and it should. In an urban forest, this is one of the most operationally significant capabilities a pilot can have. Not because it makes branch strikes impossible, but because it changes how confidently you can build moving shots in complex airspace.
Obstacle sensing earns its keep when the pilot is splitting attention between composition, subject motion, and aircraft attitude. Following a runner or cyclist through alternating sun and shade is not just a camera task. Exposure, framing, speed management, and path prediction all stack up quickly. If the aircraft can identify hazards and assist with path preservation, the pilot keeps more mental bandwidth for storytelling.
Still, this is where discipline matters. Avoidance systems are strongest with clear, detectable obstacles and enough time to react. Thin branches, overlapping leaves, and irregular texture can create ambiguous scenes. In a forest inside a city, you also get false confidence from open-looking spaces that close rapidly once the aircraft yaws or slides sideways. So the correct use of obstacle avoidance is not “fly boldly because the sensors are there.” It is “design a route conservative enough that the sensors become your backup, not your plan.”
My own rule for this environment is simple: if a path cannot be flown manually at reduced speed with a comfortable margin, it is not a good candidate for automation. The Mavic 4 Pro’s obstacle awareness is most valuable when it supports a route that was already intelligently chosen.
ActiveTrack and subject tracking: where it helps, and where it quietly fails
Subject tracking is one of the most tempting features to use in wooded areas because it promises a clean follow shot while the pilot focuses on clearance and framing. In the right conditions, ActiveTrack can produce exactly that: a more stable, more repeatable follow sequence than hand-flying under pressure.
The catch is the environment.
Urban forests challenge tracking because subjects disappear behind trunks, enter hard shadows, or blend into background texture. A cyclist in dark clothing on a shaded path can be much harder for the system to retain than the same rider on an open road. Tracking is strongest when the subject remains visually distinct and the route ahead is not a tunnel of interruptions.
So how should Mavic 4 Pro pilots actually use it? Not as an all-or-nothing mode. Use ActiveTrack in segments. Start with open approach sections, transitions at the forest edge, or wider corridors where the subject stays isolated from clutter. Then switch back to direct control for denser areas where you know the system may hesitate or reframe at the wrong moment. This hybrid approach is more professional than insisting the drone stay autonomous for the entire shot.
That distinction matters in post. A single 12-second tracking sequence that stays smooth and readable is more valuable than a 45-second take with two visible corrections and one near-loss of the subject. The Mavic 4 Pro’s tracking tools are strongest when they are used surgically.
QuickShots and Hyperlapse are not gimmicks in this setting
A lot of experienced pilots dismiss automated modes too quickly. In an urban forest project, that’s a mistake.
QuickShots can be genuinely useful for repeatable transitions when you need short, structured movement around a clearing, statue, lookout deck, or trailhead. The key is choosing scenes with predictable geometry and enough open volume. In other words, not deep inside the trees. A controlled reveal from the edge of the canopy into a city backdrop can be more reliable with a pre-defined move than with a rushed manual orbit, especially if you need multiple takes that match.
Hyperlapse is even more interesting here. Forests in urban areas have a tempo you can’t fully express in real time: moving cloud shadow over the canopy, traffic pulsing beyond the tree line, pedestrians threading through paths while towers sit static in the background. A well-planned Hyperlapse can compress that layered motion into something much more revealing than a standard establishing shot.
But it only works if the route is conservative. Tree movement, branch proximity, and changing light make this a mode where planning beats improvisation. Build your Hyperlapse path away from overhead branches and avoid routes that force the aircraft to hold too close to uneven foliage. The best result usually comes from a modestly elevated line with visual separation between near trees and distant city structures. That gives the sequence depth without inviting unnecessary risk.
D-Log matters most where light is ugly
Urban forest footage often suffers from one problem more than any other: contrast that breaks the image apart. Bright sky. Dark under-canopy. Reflective windows beyond the trees. Sun patches on leaves. Deep shadow on the subject. It is not a forgiving environment.
That is why D-Log is not just for colorists chasing a look. It is operationally useful here because it gives you more room when the scene itself is unstable. If you expose carefully, the flatter profile can preserve highlight and shadow information that would otherwise collapse under mixed lighting. That flexibility is especially valuable when your edit has to intercut an open skyline reveal with lower, darker trail footage from the same flight.
There is a practical tradeoff, of course. D-Log asks more of your workflow. You need to expose with intent, monitor your highlights, and finish the footage properly in post. But for urban forest work, that extra step is often what separates footage that feels expensive from footage that looks like the camera was constantly struggling.
My advice is to make D-Log your default for planned sequences in variable light, then reserve standard looks for quick turnaround jobs where speed matters more than grading latitude. The Mavic 4 Pro becomes more useful when the pilot chooses profile based on environment rather than habit.
The real workflow: split the mission into layers
The best Mavic 4 Pro results in forests near urban infrastructure usually come from dividing the flight into three distinct jobs.
First, the survey pass.
Fly high enough to understand the canopy breaks, signal shadows, and safest return lines. This is where you identify the dead zones that may not be obvious from the ground.
Second, the hero shot pass.
This is the cinematic run: tracking, reveal, orbit, or lateral glide. Here, obstacle avoidance and ActiveTrack have their place, but only on routes you have already proven.
Third, the utility pass.
Pick up inserts: a QuickShot over a clearing, a Hyperlapse setup from a safer altitude, or a static skyline hold for edit flexibility.
That structure sounds basic, but it solves a common failure point. Too many pilots try to discover the location and capture final footage at the same time. In urban forests, that overlap creates rushed decisions. The Mavic 4 Pro can do a lot, but it performs best when the pilot does not ask one flight to solve every problem at once.
What makes the Mavic 4 Pro compelling for this specific job
For this use case, the aircraft’s value is not one feature in isolation. It is the way several capabilities reinforce each other.
Obstacle avoidance reduces the penalty for momentary attention shifts. ActiveTrack helps on cleaner segments where manual follow shots would divide your focus too much. QuickShots offer repeatability for structured transitions. Hyperlapse captures the rhythm of forest-meets-city spaces better than real-time footage alone. D-Log gives you recovery room when the location’s contrast turns brutal. And none of that reaches its potential if you ignore the fundamentals of signal management, especially controller and antenna orientation.
That last point deserves emphasis because it is the one many pilots skip. A premium aircraft in a difficult environment still depends on basic radio discipline. If your controller is poorly oriented, your body is blocking the signal, or you are standing in the wrong place relative to the route, you are reducing the drone’s performance before the shot even begins.
For creators filming urban forests, that is the larger lesson. The Mavic 4 Pro is not a shortcut machine. It is a system that rewards good habits. When you combine thoughtful route planning, smart use of automation, careful D-Log capture, and proper antenna positioning, the aircraft becomes much more than a spec sheet favorite. It becomes a dependable platform for difficult, layered visual work.
And that is exactly the kind of place where a serious drone proves what it is really worth.
Ready for your own Mavic 4 Pro? Contact our team for expert consultation.