How to Film Fields with Mavic 4 Pro: Remote Guide
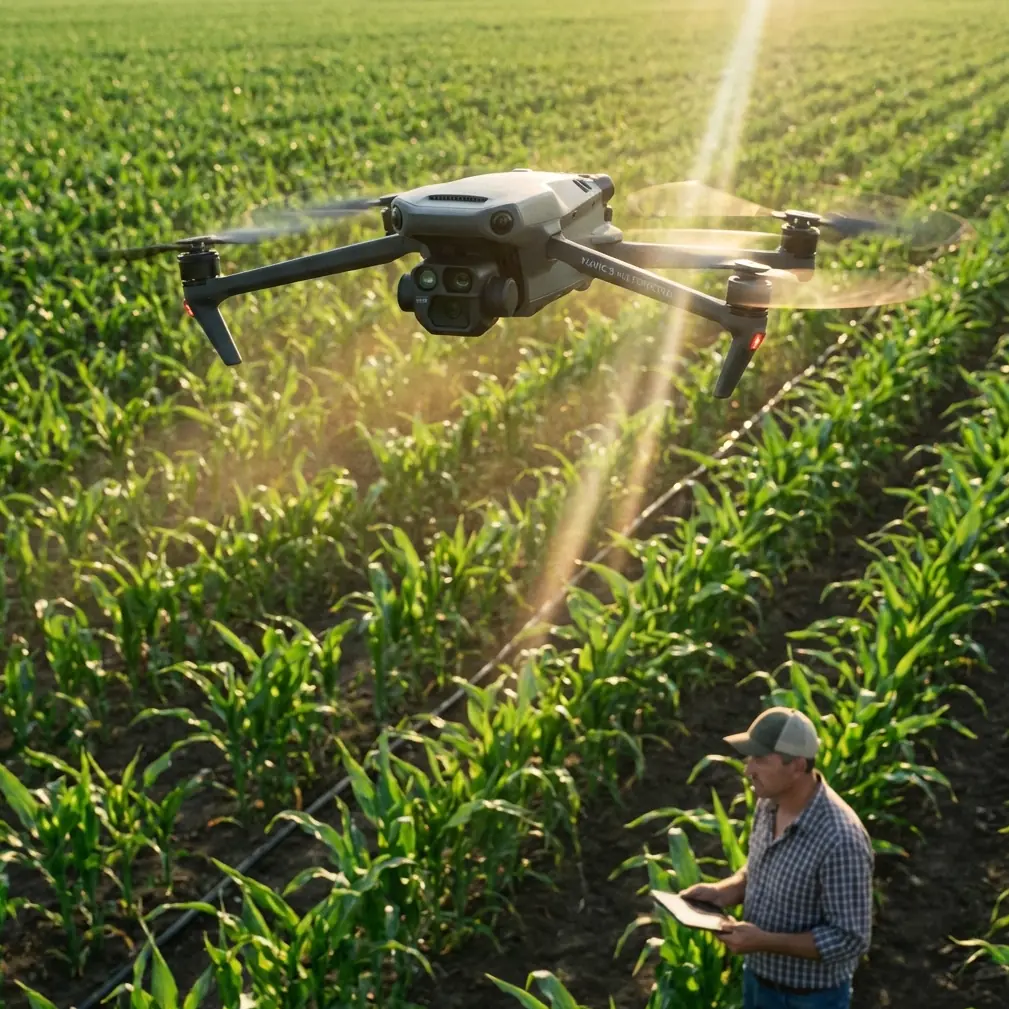
How to Film Fields with Mavic 4 Pro: Remote Guide
META: Master remote field filming with the Mavic 4 Pro. Learn essential techniques, camera settings, and safety protocols for stunning agricultural aerial footage.
TL;DR
- Pre-flight sensor cleaning is critical—dust and debris disable obstacle avoidance in remote locations
- D-Log color profile captures 13+ stops of dynamic range for professional field footage
- ActiveTrack 360° maintains subject lock on moving farm equipment without manual input
- 46-minute flight time allows complete coverage of fields up to 400 acres per battery
Remote agricultural filming presents unique challenges that standard drone operation guides simply don't address. Your Mavic 4 Pro becomes your most valuable tool when you understand how to maximize its capabilities in dusty, isolated environments where second chances don't exist.
This guide walks you through every step of capturing professional field footage—from critical pre-flight preparations to advanced filming techniques that separate amateur clips from broadcast-ready content.
Why Pre-Flight Cleaning Determines Your Safety System Performance
Before discussing camera settings or flight paths, we need to address the step most pilots skip: sensor maintenance.
The Mavic 4 Pro relies on omnidirectional obstacle sensing using vision sensors and infrared systems positioned around the aircraft body. In field environments, these sensors accumulate:
- Fine agricultural dust
- Pollen particles
- Moisture residue from morning dew
- Insect debris from low-altitude flights
Expert Insight: I learned this lesson filming wheat harvests in Kansas. After two hours of shooting, my obstacle avoidance suddenly failed mid-flight. A thin dust film had accumulated on the downward vision sensors, causing the system to disable itself as a safety precaution. Now I clean all sensors between every battery swap—no exceptions.
Essential Cleaning Protocol
Required supplies for your field kit:
- Microfiber lens cloths (minimum 4)
- Compressed air canister (non-flammable)
- Lens cleaning solution (alcohol-free)
- Soft-bristle brush for motor vents
Cleaning sequence before each flight:
- Power off the aircraft completely
- Use compressed air on all sensor surfaces from 6 inches away
- Wipe each sensor with dry microfiber using circular motions
- Inspect gimbal glass for particulates
- Clear motor vents of debris accumulation
- Verify sensor status in DJI Fly app before takeoff
This 3-minute routine prevents the obstacle avoidance system from auto-disabling during critical moments.
Camera Configuration for Agricultural Landscapes
Field filming demands specific settings that differ dramatically from urban or coastal environments.
Resolution and Frame Rate Selection
The Mavic 4 Pro's Hasselblad camera system offers multiple recording options. For field work, consider your delivery format:
| Use Case | Resolution | Frame Rate | Best For |
|---|---|---|---|
| Documentary | 4K | 24fps | Cinematic grain, smaller files |
| Commercial | 4K | 30fps | Broadcast standard, smooth motion |
| Slow Motion | 4K | 60fps | Equipment details, wildlife |
| Maximum Detail | 5.1K | 30fps | Large screen projection |
| Social Media | 1080p | 60fps | Quick turnaround, small files |
D-Log Configuration for Maximum Flexibility
Flat color profiles preserve highlight and shadow information that standard profiles clip permanently.
D-Log setup steps:
- Enter camera settings via the gimbal wheel press
- Navigate to Color Profile
- Select D-Log M
- Reduce sharpness to -1
- Set contrast to -2
- Keep saturation at 0
This configuration captures the subtle green variations in crop canopies and prevents sky blowout during golden hour—the two most common exposure challenges in field filming.
Pro Tip: Always shoot one stop underexposed in D-Log when filming fields. Recovering shadow detail is far easier than rescuing blown highlights in post-production. The Mavic 4 Pro's sensor handles shadow recovery remarkably well up to +2.5 stops in editing software.
White Balance Considerations
Auto white balance creates inconsistent footage when your drone passes between shadowed and sunlit areas. Lock your white balance manually:
- Morning shoots: 5600K
- Midday: 5200K
- Golden hour: 6500K
- Overcast conditions: 6000K
Mastering Subject Tracking for Agricultural Equipment
ActiveTrack technology transforms how you capture moving subjects across expansive fields.
ActiveTrack Setup for Farm Equipment
Large machinery presents tracking challenges due to:
- Dust clouds obscuring the subject
- Reflective surfaces confusing the algorithm
- Similar-colored backgrounds reducing contrast
Optimal tracking configuration:
- Enable ActiveTrack in the flight mode menu
- Draw a selection box around the cab section only—not the entire machine
- Set tracking distance to minimum 30 meters for safety
- Choose Trace mode for following shots or Parallel for side profiles
- Set altitude 15 meters above the subject's highest point
The system maintains lock even when combines kick up significant dust, provided you've selected a high-contrast portion of the equipment.
QuickShots for Efficient B-Roll Collection
When time constraints limit your shooting window, QuickShots automate complex maneuvers:
Most effective QuickShots for field work:
- Dronie: Reveals field scale by pulling back and up simultaneously
- Circle: Orbits equipment or structures for 360° coverage
- Helix: Combines orbit with altitude gain for dramatic reveals
- Rocket: Vertical ascent showing field patterns from above
Each QuickShot completes in 15-30 seconds, allowing rapid b-roll collection across multiple field locations.
Hyperlapse Techniques for Time-Compressed Storytelling
Agricultural processes unfold slowly. Hyperlapse condenses hours into seconds while maintaining smooth motion.
Hyperlapse Mode Selection
| Mode | Movement | Best Application |
|---|---|---|
| Free | Manual control | Custom flight paths |
| Circle | Automated orbit | Irrigation pivots, silos |
| Course Lock | Straight line | Field rows, fence lines |
| Waypoint | Pre-programmed | Repeatable shots, sunrise/sunset |
Settings for Field Hyperlapse
- Interval: 2 seconds for slow-moving subjects, 5 seconds for static landscapes
- Duration: Minimum 20 minutes of capture for usable 10-second final clips
- Speed: 1x-2x for subtle motion, 5x+ for cloud movement emphasis
The Mavic 4 Pro processes hyperlapse footage internally, delivering stabilized results without post-production assembly.
Flight Planning for Complete Field Coverage
Systematic flight paths ensure you capture every angle without wasting battery on redundant footage.
The Grid Pattern Approach
For comprehensive coverage of rectangular fields:
- Set home point at field corner with vehicle access
- Fly perimeter at 60 meters AGL for establishing shots
- Create diagonal crossing pattern for interior coverage
- Descend to 15 meters for detail passes along rows
- Reserve 25% battery for return and safety margin
This pattern typically requires 2-3 batteries for fields exceeding 200 acres.
Wind Considerations in Open Terrain
Fields lack windbreaks that urban environments provide. The Mavic 4 Pro handles winds up to 27 mph, but optimal footage requires calmer conditions.
Wind speed guidelines:
- 0-10 mph: Ideal for all shot types
- 10-15 mph: Acceptable with gimbal compensation
- 15-20 mph: Limit to downwind flight paths
- 20+ mph: Postpone filming for quality results
Check wind speeds at your planned flight altitude, not ground level—conditions often differ by 5-10 mph at 100 meters AGL.
Common Mistakes to Avoid
Ignoring compass calibration in new locations Metal content in agricultural soil varies dramatically between fields. Calibrate your compass at each new location to prevent erratic flight behavior.
Flying during active spraying operations Chemical drift contaminates sensors and motors. Maintain minimum 500-meter distance from active spray equipment and wait 2 hours after application before filming treated areas.
Neglecting ND filter usage Bright field conditions require ND filters to maintain proper shutter speed for cinematic motion blur. Without filtration, footage appears jittery and unnatural.
Forgetting to check airspace restrictions Agricultural areas near airports often fall within controlled airspace. Verify LAANC authorization requirements before every shoot, even in seemingly remote locations.
Draining batteries completely Lithium batteries degrade faster when discharged below 20%. Land with remaining capacity to extend battery lifespan across hundreds of cycles.
Frequently Asked Questions
How do I prevent dust from damaging my Mavic 4 Pro during field operations?
Land and launch from a portable landing pad—a simple 60cm foam mat prevents rotor wash from kicking debris into motors and sensors. Store the drone in a sealed case between flights, and never change batteries with motors still spinning down. After each field session, use compressed air to clear all vents before storage.
What's the best time of day for filming agricultural fields?
The two hours after sunrise and two hours before sunset provide optimal lighting with long shadows that reveal field texture and topography. Midday sun flattens the landscape and creates harsh contrast. Overcast conditions work well for equipment close-ups but lack drama for wide establishing shots.
Can I use ActiveTrack to follow livestock across pastures?
Yes, but with limitations. ActiveTrack works best on animals with distinct coloring against their background. Maintain minimum 50-meter distance to avoid startling animals, and disable obstacle avoidance sounds that may cause distress. Never pursue animals—let them move naturally while the drone follows at a respectful distance.
Remote field filming rewards preparation and punishes shortcuts. The techniques outlined here represent hundreds of hours of trial, error, and refinement across diverse agricultural environments.
Your Mavic 4 Pro contains remarkable technology, but that technology only delivers results when paired with methodical workflows and genuine understanding of both the equipment and the environment.
Ready for your own Mavic 4 Pro? Contact our team for expert consultation.