Mavic 4 Pro for Construction Site Filming in Complex Terrain
Mavic 4 Pro for Construction Site Filming in Complex Terrain: A Practical Workflow That Holds Up When Conditions Shift
META: A field-tested tutorial on using Mavic 4 Pro for filming construction sites in complex terrain, with practical insight on obstacle avoidance, ActiveTrack, D-Log, and terrain-aware mapping workflows.
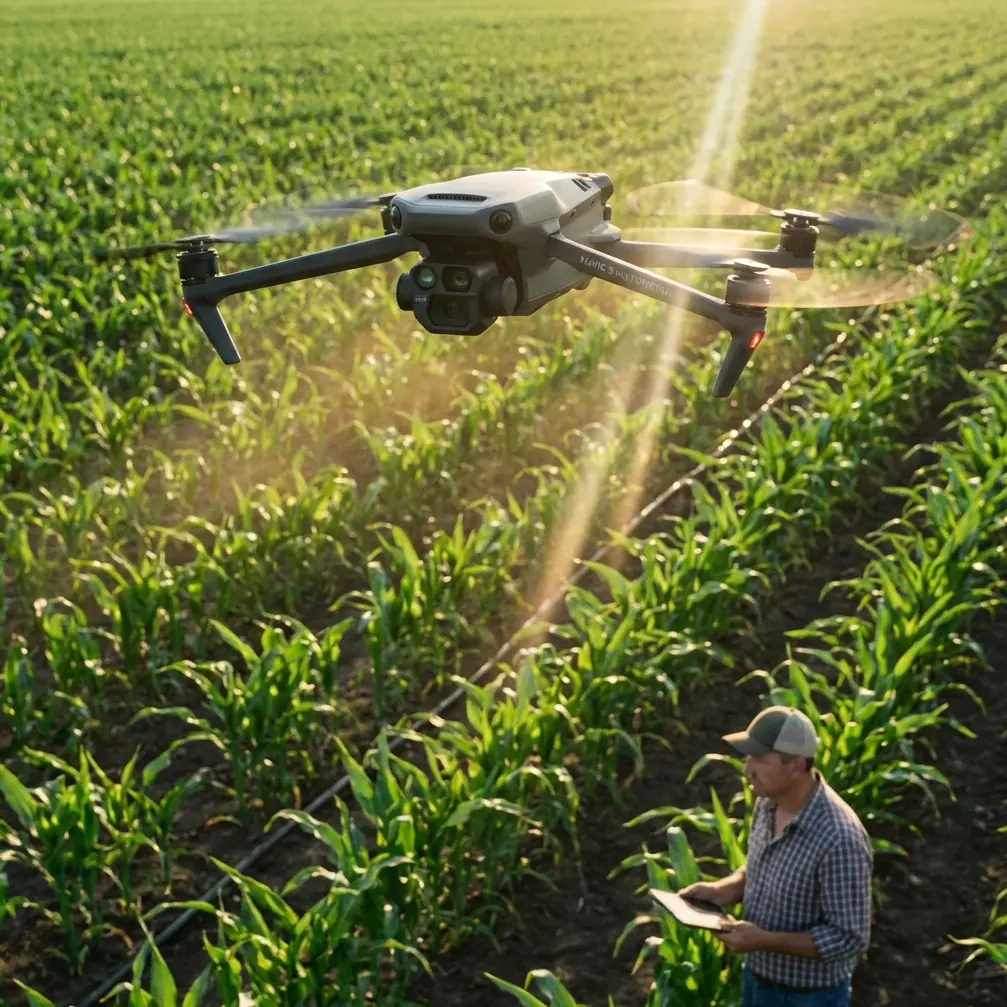
Construction sites rarely give you a clean flying environment. You deal with elevation changes, half-finished structures, reflective surfaces, stockpiles, cranes, access roads, dust, and wind that behaves differently from one corner of the site to the next. If you are flying a Mavic 4 Pro in that setting, image quality matters, but operational discipline matters more.
I approach this as a photographer first, but construction work forces you to think like a survey coordinator too. That mindset changes how you use the aircraft. You are not just collecting dramatic footage. You are building a visual record that people on the project team can actually use: progress communication, stakeholder updates, access planning, sequencing review, and cross-checking what is visible from the air against formal mapping outputs.
That is where the conversation gets more interesting. A drone like the Mavic 4 Pro can capture site footage quickly, but on complex terrain, the real value comes from flying with the same logic used in professional photogrammetry environments. The reference material behind this piece points to a useful benchmark: the MapMatrix product family is designed to serve very different production scales, from a single-workstation stereoscopic mapping setup to a full digital photogrammetry platform and even enterprise-level geospatial processing clusters. That matters because it reminds us that one flight can support multiple outcomes. Your video pass is not isolated from mapping logic. If you plan well, the same site visit can support cinematic deliverables, inspection context, and base imagery that fits into a larger geospatial workflow.
Why complex terrain changes how you fly the Mavic 4 Pro
A flat open site is forgiving. A terraced hillside project is not.
When the terrain steps down sharply, your visual composition can look balanced while your separation from ground obstacles collapses on one side of the frame. Add partially erected steel, temporary fencing, and moving machinery, and your safe corridor is constantly changing. In those conditions, obstacle avoidance is not a convenience feature. It is part of your shot planning.
I start by dividing a construction site into three layers:
- High-risk edges: cut slopes, embankments, crane swing areas, retaining walls
- Mid-altitude transition zones: roadways, stockpile fields, laydown areas
- Structured visual anchors: building cores, facades, tower stairwells, access spines
The Mavic 4 Pro is at its best when you stop asking it to “film the whole site” and instead assign each flight segment a job. One pass for context. One for vertical relationships. One for progress details. One for repeatable tracking. That sounds simple, but it prevents the most common mistake on complex terrain: trying to improvise every shot while the site and weather keep changing around you.
A tutorial workflow for filming construction progress
1. Begin with a terrain-reading orbit, not a hero shot
On arrival, I do not rush into QuickShots or a dramatic reveal. I climb to a safe altitude and make a slow orbit with the camera tilted to read the terrain transitions first. I want to see where the grade breaks, how wind moves dust, and which structures create turbulence.
This first pass is also where I decide whether ActiveTrack will help or become a liability. On a construction site, ActiveTrack can be useful for following a vehicle route or a superintendent walking a planned path, but only if the route is predictable and obstacle spacing is generous. If the site is congested, manual control still wins.
The operational significance here is the same principle that underpins high-end aerial mapping software: orientation and structure come before interpretation. The source material highlights ApplicationsMaster as the core interface in a professional system, handling project definition, data input and output, coordinate transformation, image processing, image orientation, and DTM management. You are obviously not running all of that in the air on a Mavic 4 Pro, but the lesson is relevant. Define the project before you chase the image. If you do not understand the terrain and spatial relationships, your footage becomes harder to reuse later.
2. Build a repeatable shot list around site function
For construction progress filming, I typically capture:
- A wide establishing sweep showing access roads and terrain context
- A medium-altitude lateral move along the primary structural face
- A descending pass that reveals level changes and excavation depth
- A top-down segment for logistics layout
- A close, controlled pass around one key milestone area
- A repeatable route for future comparison flights
This is where D-Log becomes important. On mixed-terrain sites, you often have bright concrete, dark excavations, reflective metal, and haze in the same frame. D-Log gives you more room in post to recover highlights and control contrast, especially when clouds move through and change the scene mid-flight.
I keep exposure strategy conservative. If the sky is unstable, protect the highlights. Construction clients usually care more about preserving visible detail in structures and work zones than about squeezing maximum brightness out of every shadow.
3. Use obstacle avoidance as a planning tool, not an excuse
Obstacle avoidance can help in complex terrain, but it is not a substitute for route discipline. I use it to support low-speed moves near vertical structures and when I need extra confidence in a reveal around incomplete building geometry. I do not use it to justify aggressive flight lines through uncertain gaps.
This distinction matters because construction sites contain “soft unpredictability”: suspended cables, temporary materials, dust plumes, and moving equipment that may not behave like permanent obstacles. Good operators treat the sensors as one layer of protection, not the primary strategy.
What happened when the weather turned mid-flight
One of my most useful Mavic 4 Pro construction flights started under stable light and ended in a completely different mood.
The site was built into a slope, with a series of retaining levels stepping down toward a partially completed service road. I had just finished a wide context pass and moved into a lower tracking segment along the road alignment. Then the wind shifted. Fast. You could see it first in the dust patterns near the stockpiles, then in the trees beyond the site boundary. Within minutes, the light flattened under a bank of cloud, and the exposed upper terrace became noticeably gusty.
That kind of moment tells you whether your plan is real or just theoretical.
I abandoned the long manual diagonal I had planned and switched to shorter, more controlled movements with clearer escape paths. The Mavic 4 Pro’s stabilized camera platform kept the footage usable even as the scene lost contrast, and obstacle avoidance provided a margin of safety near the retaining wall during a reposition. But the bigger win came from already having a structured shot sequence. Because the essentials were captured first, the weather change did not ruin the mission. I still had the establishing material, the progress pass, and enough medium-altitude footage to tell the site story coherently.
This is exactly why disciplined sequencing matters more than chasing every creative idea in the first ten minutes.
Subject tracking and ActiveTrack on a live site
ActiveTrack sounds attractive for construction because jobsites are full of movement. In practice, use it selectively.
It works best when:
- A vehicle follows a clear haul road
- A worker walkthrough is planned and authorized
- Background clutter is manageable
- The flight path leaves room for correction
It is less effective when:
- Equipment overlaps visually
- Structures block line of sight
- The subject passes under temporary elements
- Terrain elevation changes quickly under the aircraft
If I am tracking movement on a hillside road, I keep more lateral distance than I would on level ground. Why? Because terrain rise can erase your safety buffer faster than the frame suggests. The aircraft may appear comfortably offset from the subject while actually drifting closer to the uphill side than intended.
That is another place where professional photogrammetry thinking helps. The source material notes that Inpho’s aerial triangulation and orthophoto processing software holds the largest share in Europe, and that its systems became classics in high-end mapping. That is not trivia. It reflects decades of hard-won industry focus on reliable image relationships, orientation quality, and usable outputs across difficult surfaces. For a Mavic 4 Pro operator, the takeaway is practical: consistency beats flair. If your footage is going to support later comparison, site reporting, or even just informed discussion between teams, repeatability matters.
QuickShots and Hyperlapse: useful, but only after the record shots are done
QuickShots and Hyperlapse have a place on construction projects, but not as the foundation of the flight.
QuickShots can be effective for a short stakeholder-facing sequence, especially when you need a clean introductory visual for a monthly update. A controlled reveal over a graded pad or a backward pull from a building core can communicate scale quickly.
Hyperlapse is more specialized. I use it when the site has obvious motion patterns: concrete trucks arriving in sequence, a road corridor opening up through the day, or shadows moving over stepped terrain in a way that clarifies elevation. It can be excellent for showing site rhythm, but only if your primary documentation footage is already secure.
On a working site, the polished extra should never come at the expense of the repeatable baseline.
How filming and mapping can support each other
This is where many drone operators leave value on the table.
A construction client may ask for “progress video,” but the smartest projects treat aerial capture as a layered information source. Even if your primary task is filming, your flight design should respect the possibility that imagery may later be compared against orthomosaics, terrain models, or education and training workflows.
The reference material is useful here because it points to two ends of the same professional chain. On one side, MapMatrix includes configurations from single-machine stereoscopic mapping systems to enterprise geospatial processing clusters. On the other, MapMatrixEDU was built as a multi-source geographic data processing teaching system with three components: instructional analysis, interactive tutorials, and software assessment. The operational significance is straightforward. Skilled aerial output does not begin in post-production. It begins with repeatable acquisition habits that can be taught, checked, and scaled.
If you are using a Mavic 4 Pro on construction sites regularly, build your own internal training checklist around that idea:
- pre-flight terrain read
- route segmentation
- safe alternatives for wind shifts
- repeatable waypoint logic where appropriate
- image profile consistency
- note-taking for return flights
That discipline is what separates attractive clips from site media that teams actually trust.
A practical camera setup mindset for mixed terrain
For construction filming, I favor settings that preserve flexibility and reduce surprises later:
- D-Log for variable light
- deliberate white balance rather than auto in unstable cloud conditions
- moderate movement speed
- gimbal movements slow enough to remain readable in review meetings
- enough overlap in key passes that a frame can be pulled if needed
I also narrate observations into my field notes immediately after landing. If weather changed, if a crane blocked one axis, if dust reduced clarity over a stockpile area, I record it. Those notes become valuable when someone asks why a section looks different from last month or why a planned comparison shot shifted.
If you are building a repeatable construction workflow around the Mavic 4 Pro and need help choosing a sensible approach for terrain, shot planning, or post-processing handoff, you can message a drone workflow specialist here.
The real strength of the Mavic 4 Pro on difficult sites
The biggest advantage is not that it can make a site look dramatic. Almost any modern camera drone can do that in good conditions.
Its value is that it lets a single operator capture footage that remains useful when the terrain is uneven, the structures are incomplete, and the weather refuses to cooperate. Pair that with disciplined use of obstacle avoidance, careful ActiveTrack decisions, and a color workflow built around D-Log, and the aircraft becomes more than a flying camera. It becomes a reliable field tool for visual documentation.
Construction teams do not need airborne guesswork. They need clear, repeatable, spatially honest footage that can survive scrutiny after the flight is over.
That is the standard worth flying for.
Ready for your own Mavic 4 Pro? Contact our team for expert consultation.