Mavic 4 Pro Filming Guide for High-Altitude Coastlines
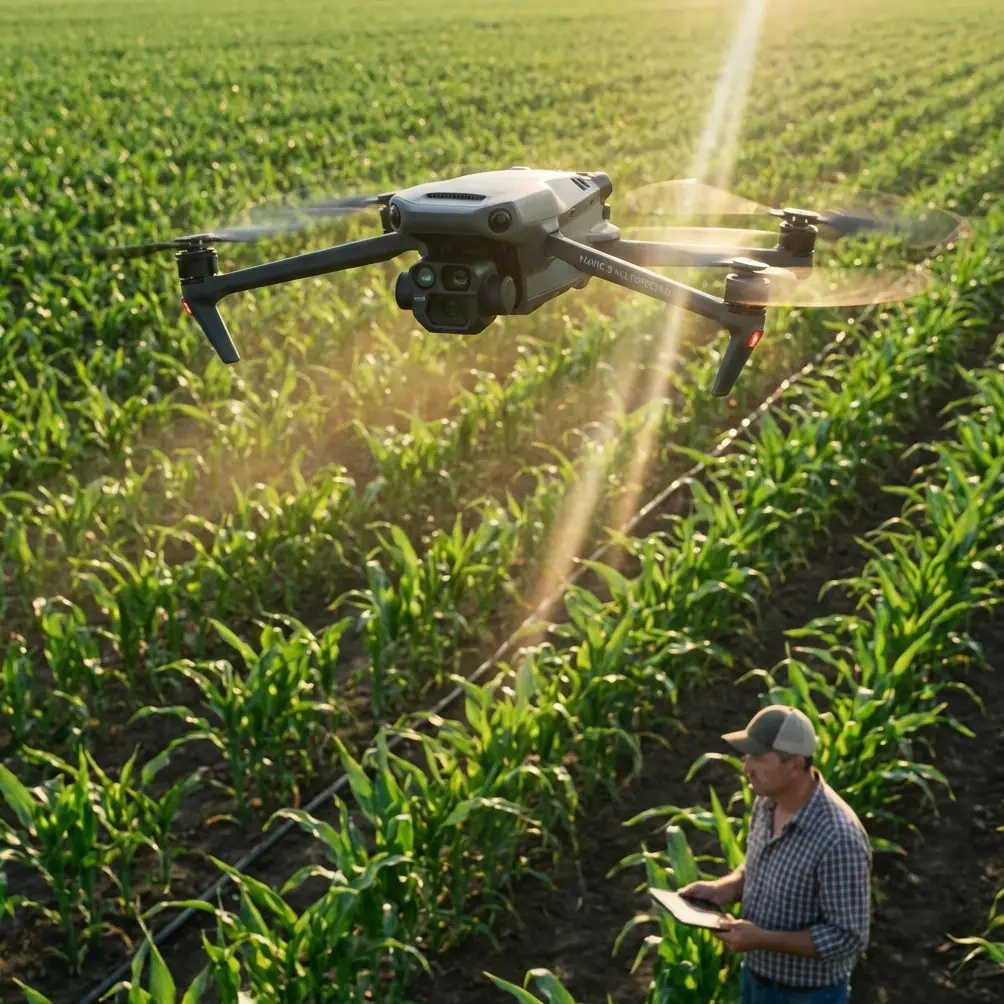
Mavic 4 Pro Filming Guide for High-Altitude Coastlines: A Smarter Workflow Built on Ground-Station Thinking
META: Learn how to use Mavic 4 Pro for high-altitude coastline filming with safer route planning, battery discipline, obstacle awareness, and repeatable capture methods inspired by DJI GS Pro mapping workflows.
Coastline work has a way of exposing weak habits.
A calm inland test flight can make almost any drone operator feel organized. Then you get above a ridge line near the sea, the wind starts shearing in layers, light bounces off water in unpredictable ways, and every lazy decision shows up in your footage. High-altitude coastal filming is where process matters more than confidence.
If I were setting up a Mavic 4 Pro day on a rugged shoreline, I would borrow a lesson from an older but still relevant DJI workflow: the ground-station logic behind DJI GS Pro. Back in 2017, GS Pro made a very specific promise feel real for non-specialist operators: tap a screen, let the aircraft automatically launch, execute a planned imaging task, and return to home with minimal stick input. That mattered then for orthophoto capture, and it still matters now for cinematic work with the Mavic 4 Pro. Not because filmmaking should feel robotic, but because repeatability is what lets you be creative without getting sloppy.
The GS Pro material also highlighted three functions that remain operationally useful as mental models today: virtual fence control, mapping-area style mission planning, and waypoint flight. Even if your goal is not survey-grade orthomosaics, those three ideas translate beautifully to coastline filming. They can keep your aircraft out of bad airspace geometry, help you define a practical shooting box, and turn a one-off lucky pass into footage you can reproduce at sunrise, at noon, and again when the tide changes.
This guide is about using that mindset with a Mavic 4 Pro in high, coastal terrain.
Start with a “mission box,” not a shot list
Most pilots begin with the romantic version of the day.
“I want a sweeping reveal over the cliff.” “I want to track the surf line.” “I want a fast pullback as the headland opens up.”
That is all fine, but on a real coast, those ideas are too vague. Before deciding on camera moves, define your operating box the way a mapping pilot would define a capture area.
GS Pro’s mapping-area mode was built for structured coverage. For a filmmaker, the useful takeaway is this: draw the zone first, then decide how to move within it. On a Mavic 4 Pro coastline session, your mission box should include:
- Your launch point
- The safe maximum downwind distance
- The highest terrain edge likely to interfere with line of sight
- The portion of sea surface whose glare may affect framing
- The return corridor you want preserved even if conditions worsen
This matters because coastal environments create false confidence. Over open water, the scene looks uncluttered, but operationally it is not simple. Cliffs rise unexpectedly. Wind can strengthen just beyond the lip of a bluff. GPS behavior may remain stable while your energy margin quietly disappears.
A defined mission box gives obstacle avoidance and subject tracking systems a better chance of helping you rather than rescuing you from bad planning. Obstacle sensing is not a substitute for route design, especially near irregular rock faces, sea stacks, or ridgelines where texture, shadow, and changing light can complicate detection.
Use virtual-fence thinking even if you are shooting manually
One of the most practical ideas in GS Pro was the virtual fence. For survey operators, that was a clean way to stop drift outside a planned zone. For Mavic 4 Pro filmmaking, you should adopt the same discipline whether or not you are flying a formal autonomous route.
I recommend setting three boundaries before the first launch:
1. A lateral limit
Pick a point along the coastline where you will not continue farther, no matter how attractive the composition becomes. This protects battery reserve and keeps your return leg manageable.
2. A vertical limit
High-altitude coastline filming often stacks risk. You may already be launching from elevated terrain, then climbing again for perspective. Establish a firm cap before takeoff so you do not slowly wander into a higher-energy profile than planned.
3. A “wind line”
This is the line beyond which the aircraft begins facing stronger offshore or cross-shore airflow. You usually discover it in the first flight. Once identified, mark it mentally and treat it like a fence.
The operational significance is straightforward: boundaries preserve decision quality. When the sea is dramatic and the light is perfect, pilots tend to negotiate with themselves. A virtual fence removes the negotiation.
Plan repeatable passes the way a waypoint pilot would
Another GS Pro function mentioned in the source was waypoint flight. That remains one of the most useful concepts for serious drone cinematography, even when your final output is expressive rather than technical.
If a coastline sequence is worth filming, it is worth being able to film twice.
The Mavic 4 Pro becomes far more valuable when you stop treating every clip as a single improvised chance and start building repeatable passes. I typically break coastal filming into four route categories:
- Establishing pass: broad lateral movement showing cliff, beach, and water relationship
- Contour pass: flight that follows the shape of the coastline at a controlled distance
- Reveal pass: approach with terrain obscuring the scene before opening to sea
- Retreat pass: controlled backward or ascending move that expands scale
Even if you hand-fly these, note your launch heading, first turn point, altitude, and approximate ground reference markers. On a Mavic 4 Pro, this is where ActiveTrack, subject tracking, and intelligent shot modes can support the workflow, but only after the pass itself is logically built. QuickShots and Hyperlapse are useful tools, not planning tools.
A good repeatable pass helps in three ways:
- It lets you refine framing without reinventing the route.
- It gives you continuity if wind or light forces a later re-flight.
- It makes post-production cleaner because movement characteristics stay consistent.
This is the same broad logic that made GS Pro meaningful to non-specialist users in 2017. The app lowered the chaos of flight execution. That same reduction of chaos is exactly what high-end Mavic 4 Pro footage needs.
Why orthophoto thinking helps a filmmaker
The original GS Pro document focused on orthographic image capture. On paper, that sounds far removed from coastline cinema. In practice, it is a hidden advantage.
Orthophoto missions demand overlap, consistency, and route discipline. Those habits transfer directly to filming difficult landscapes.
For example, if you are shooting a long headland sequence, think in segments rather than one grand uninterrupted flight. Divide the coast into overlapping visual blocks. That means the end of one pass should visually connect with the beginning of the next. You are effectively building your footage with editorial overlap, much like a mapping mission builds image overlap for later processing.
This has real operational value. If wind worsens midway, you still come home with complete sections rather than one incomplete hero attempt. You also reduce the temptation to fly too far offshore chasing a single unbroken shot.
Camera settings: protect the grade before you chase drama
High-altitude coastlines are beautiful and unforgiving. White surf, dark rock, mist, and reflective water can break footage fast. This is where D-Log becomes practical rather than fashionable.
If you are shooting in hard contrast, D-Log gives you room to hold highlight detail in surf and cloud while preserving texture in cliff shadows. But the benefit only appears if your flight path is stable enough to maintain usable exposure strategy. Jerky altitude changes and rushed reorientation make it much harder to expose consistently across a pass.
That is why route discipline matters as much as color profile selection.
For cinematic coastal work, I prefer to decide the movement first, then set the profile and exposure approach around that movement. If the pass includes a reveal from dark cliff face to bright open water, be realistic: the shot may need either a gentler move, a slightly different angle, or a separate version for editorial flexibility.
Mavic 4 Pro tools like subject tracking and automated modes can be helpful when following a boat, a vehicle on a coastal road, or a walker on a trail, but on exposed shorelines I would use them selectively. Cliffs, sudden elevation changes, and visual clutter can create edge cases. Use automation where the environment supports it, not where it merely looks impressive in theory.
Obstacle avoidance is strongest when you simplify the scene
Many pilots assume better sensing means they can fly more aggressively around terrain. My experience says the opposite. The smarter the obstacle avoidance system, the more value you get by giving it a cleaner problem to solve.
On a jagged coast, that means:
- Avoiding diagonal rushes toward broken cliff geometry
- Limiting fast backward moves when terrain rises behind the aircraft
- Keeping reveal shots on predictable arcs instead of improvised S-turns
- Preserving generous clearance over ridges and outcrops
This is especially true in high-altitude coastal air where gusts can translate into sudden positional corrections. If the aircraft has room, obstacle avoidance can support the flight. If the route is cramped, the system may have to negotiate too many variables at once.
Operationally, that is the modern version of why virtual fences and structured flight modes mattered in GS Pro. The safer route is usually the one that also looks more deliberate on screen.
My field battery rule for cliffs and sea wind
Here is the battery tip I wish more pilots used.
On inland jobs, operators often treat remaining battery percentage as the key metric. On high-altitude coastlines, I care just as much about battery shape as battery level. By that I mean how quickly the percentage is dropping under the current wind and climbing profile.
My rule is simple: the first battery is a diagnostic battery.
I do not burn it chasing hero footage. I use it to test the wind line, learn how the aircraft behaves near the cliff edge, and measure how the return leg feels against the airflow. If I see sharper-than-expected drain during an outward pass, I shorten every route on the next pack, even if the total percentage still looked “acceptable.”
A lot of unnecessary pressure comes from trying to get the best material immediately. You will usually get better footage by using battery one to study the site and battery two to execute the refined plan.
Also, avoid finishing a coastal battery with a long hover while deciding on “one last shot.” Hovering over a dramatic seascape feels harmless, but indecision consumes the reserve you may need for a conservative return. End each flight with a planned recovery corridor and a margin you respect.
Build your shoot around conditions, not features
The Mavic 4 Pro gives you an impressive set of tools: obstacle avoidance, ActiveTrack, QuickShots, Hyperlapse, and robust imaging options. The mistake is building the day around those labels.
Instead, build around the conditions.
If the air is stable and the surf pattern is rhythmic, Hyperlapse may become the right way to show coastal motion. If a hiker or vehicle provides scale on a cliff road, subject tracking or ActiveTrack may help. If the scene is too complex and the wind too uneven, a carefully repeated manual contour pass may outperform every automated mode on the aircraft.
That is the quiet lesson embedded in the older GS Pro story. Its breakthrough was not merely automation. It was structured automation serving a defined task. For Mavic 4 Pro operators filming coastlines, the same principle applies: use the feature set in service of the mission, not the other way around.
A practical high-altitude coastline workflow
If you want a simple framework, use this:
Before launch
Study wind direction, identify your return corridor, and define your mission box.
First flight
Treat it as reconnaissance. Test altitude layers, identify the wind line, and verify safe reveal angles.
Second flight
Capture your highest-priority repeatable passes: establishing, contour, reveal.
Third flight
Use specialty modes only where they fit the environment cleanly—QuickShots for simple geometry, Hyperlapse for broader landscape movement, ActiveTrack when the subject path is predictable.
Final flight
Pick up inserts, alternate heights, and D-Log safety takes for the edit.
If you work this way, the aircraft stops being a gadget and starts becoming a reliable aerial camera platform.
When planning discipline becomes creative freedom
There is a misconception that structured drone operation makes footage less artistic. The opposite is usually true.
The old GS Pro promise—that a non-professional user could trigger an automated imaging task from an iPad and let the aircraft take off, execute, and return—was not only about convenience. It was about reducing unnecessary pilot workload. The source even made a point that GS Pro was an iPad app, available through Apple’s App Store, and not a separate hardware station. That detail mattered because it lowered the barrier to disciplined operation. More people could adopt planned workflows instead of relying on improvisation.
For Mavic 4 Pro pilots filming coastlines today, that same reduction in workload is what creates headroom for better composition. If route, boundaries, and battery logic are settled, your attention can shift to wave timing, shadow direction, and the exact moment a cliff edge opens into sea.
That is where the footage gets better.
If you are refining a coastal shooting workflow and want to compare field planning ideas, you can message here for practical drone setup discussion.
The Mavic 4 Pro is at its best when you pair modern imaging and tracking features with old-school mission discipline. Draw the box. Respect the fence. Repeat the pass. Watch the battery shape, not just the percentage. Coastlines reward operators who think before they fly.
Ready for your own Mavic 4 Pro? Contact our team for expert consultation.