Mavic 4 Pro in Dusty Vineyards: A Practical Workflow
Mavic 4 Pro in Dusty Vineyards: A Practical Workflow for Safer Flights and Better Mapping Output
META: A field-tested Mavic 4 Pro workflow for dusty vineyard operations, covering pre-flight cleaning, obstacle avoidance reliability, subject tracking, and how photogrammetry outputs like orthomosaics, DEMs, point clouds, and 3D models fit into real inspection and survey work.
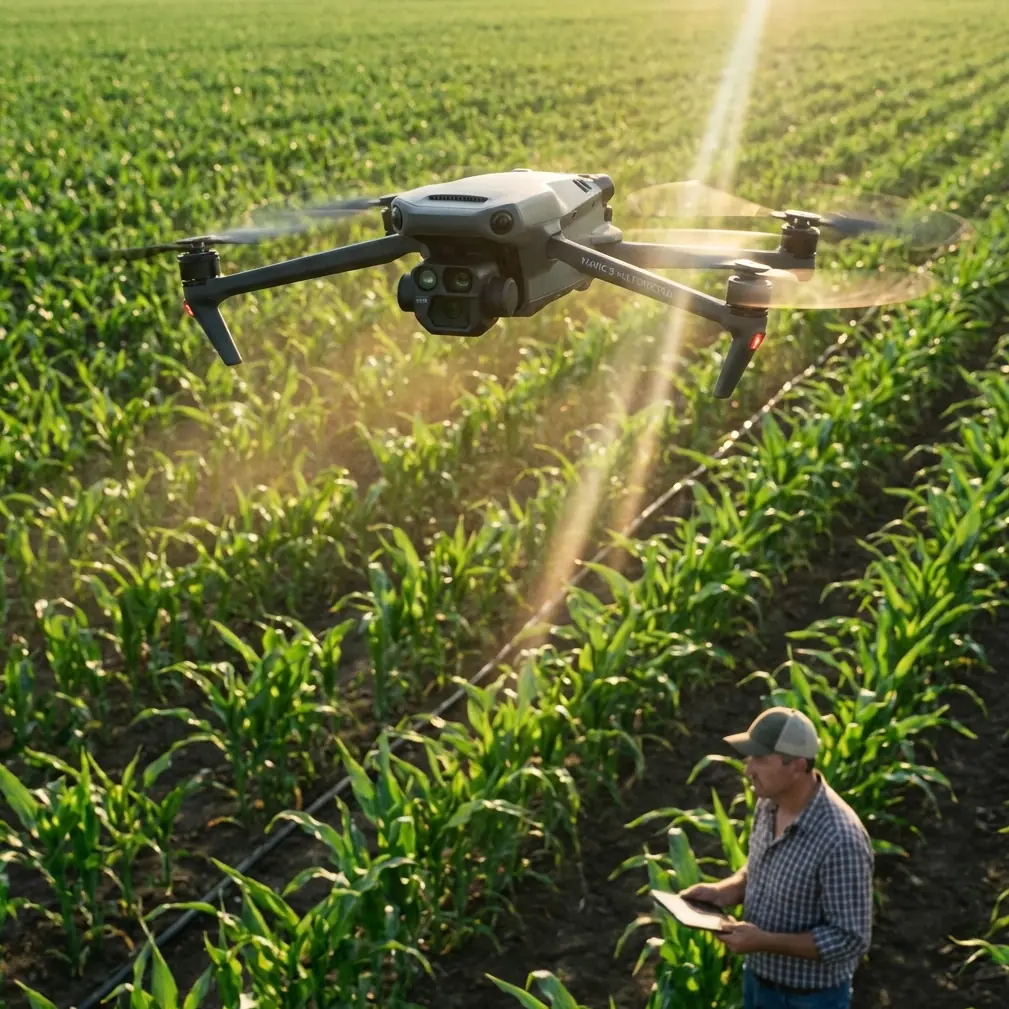
Dusty vineyards are harder on drones than many pilots expect.
The problem is not just dirt on the airframe. Fine dust changes how confidently you can trust obstacle sensing, how clearly the camera sees vine rows and access roads, and how useful your imagery will be once it leaves the aircraft and enters processing software. If you are flying a Mavic 4 Pro around vineyards for inspection, progress tracking, road access review, drainage checks, or site presentation work, your best results begin before takeoff.
This matters even more when the mission is not pure content capture. Once a vineyard operator wants an actual map, a terrain surface, or a usable 3D scene of roads, slopes, rows, and structures, the flying part becomes only one half of the job. The second half is the data pipeline. And that is where a disciplined Mavic 4 Pro workflow pays off.
Below is a practical method built around dusty vineyard conditions, with a special focus on one often-overlooked safety habit: cleaning before flight so the aircraft’s sensing and imaging systems are not working at a disadvantage.
Why dusty vineyards are a special case for Mavic 4 Pro
Vineyards create a very particular operating environment. You may be launching near gravel roads, dry soil, tractors, trellis systems, irrigation hardware, and repetitive plant geometry. Dust gets kicked up while landing, while repositioning the aircraft, and even while opening your kit on a windy day.
For a Mavic 4 Pro operator, that affects three things immediately:
- Obstacle avoidance confidence
- Image quality for mapping or inspection
- Tracking stability when following vehicles or workers along rows
Those are not separate issues. They are connected.
If the vision system is dusty, obstacle avoidance can become less trustworthy around poles, wires, trellis posts, and row-end structures. If the lens or sensor-facing glass is contaminated, images may lose contrast or fine detail. That can reduce the quality of outputs later produced from the mission, especially when you want more than a simple video clip.
The Mavic 4 Pro is attractive in vineyard work because it can cover ground quickly, follow movement intelligently with modern subject tracking modes, and capture polished visuals using profiles such as D-Log for grading flexibility. But none of that rescues a poorly prepared aircraft.
Step 1: Clean before every flight, not after every problem
Most pilots clean after they notice something wrong. In vineyards, reverse that logic.
Before powering up the Mavic 4 Pro, do a short dry-environment cleaning check:
- Wipe the main lens carefully with proper optical material
- Inspect obstacle sensing windows for dust film
- Check the downward sensors and landing area for loose grit
- Inspect gimbal movement before takeoff
- Confirm vents and arm joints are free of buildup
This is not cosmetic. It is operational.
The “narrative spark” here is simple: a pre-flight cleaning step directly supports safety features. Obstacle avoidance is only as useful as the sensing surfaces and visual inputs behind it. In vineyards, where you may be flying low along rows or near access roads, even a thin dust layer can undermine the margin you thought you had.
I treat this as part of the same checklist as battery seating and prop inspection. Especially if the aircraft was packed away after a dusty landing, clean first, then calibrate and launch.
Step 2: Match the mission type to the output you actually need
A lot of Mavic 4 Pro flights in vineyards fail at the planning stage because the pilot captures “good-looking” footage when the client really needs measurable outputs.
That distinction matters.
The reference material behind this article points to a mature photogrammetry workflow where thousands of images can be turned into precise 2D maps and 3D models without requiring heavy manual intervention. That is significant for vineyard operations because long access roads, sloped blocks, drainage channels, retaining features, and surrounding service areas often require more than a cinematic overview.
In practical terms, your vineyard mission usually falls into one of these buckets:
- Visual inspection: roads, erosion, trellis alignment, irrigation access
- Progress documentation: development, maintenance, seasonal comparison
- Terrain and drainage review: slope behavior, runoff paths, surface issues
- Road and service route survey support: internal tracks and approach roads
- Presentation assets: investor, owner, or contractor communication
If your result needs to become a map or model later, fly with overlap discipline from the start. If the result is only social content, use QuickShots, Hyperlapse, and dynamic tracking more freely. The Mavic 4 Pro can do both, but the flight pattern should not be the same.
Step 3: For mapping, think like the software, not like a videographer
This is where the reference data becomes especially useful.
One cited workflow includes outputs such as:
- Orthomosaics in GeoTIFF
- DEM exports in GeoTIFF and TXT
- Point clouds in PLY and TXT
- 3D models in OBJ
- Automatic accuracy reports
- Ground control point editing
- Aerial triangulation and block adjustment optimized for drone imagery
That list is not academic. It tells you exactly what kind of vineyard work benefits from a structured Mavic 4 Pro flight.
Why orthomosaics matter in vineyards
An orthomosaic is more than a stitched image. If processed correctly, it becomes a geometrically corrected site view that can support row planning, road edge review, staging layouts, and condition reporting. In a vineyard, that can help teams compare one block to another without perspective distortion getting in the way.
Why DEM output matters
A DEM, or digital elevation model, becomes useful fast in vineyard terrain. Vineyards often live on slopes, terraces, or uneven access routes. If you are reviewing washout risk, drainage direction, or grading quality on internal roads, elevation data matters more than a dramatic flyover ever will.
Why point clouds and OBJ models matter
A dense point cloud in PLY or TXT format and a 3D model in OBJ format give downstream teams more flexibility. Engineers, planners, contractors, and visualization teams can all use different representations of the same site. If a vineyard is adding service roads, retaining features, storage structures, or visitor-facing facilities, that 3D layer has genuine operational value.
So when you fly the Mavic 4 Pro for data capture, hold a steady altitude, maintain consistent overlap, and avoid aggressive cinematic moves. Save the creative pass for the end.
Step 4: Use tracking and obstacle avoidance where they help, not where they tempt you
Vineyards are visually repetitive. Rows can confuse distance judgment, and dusty backlight can reduce scene clarity. Subject tracking modes like ActiveTrack are helpful when you want to follow a utility vehicle, maintenance crew, or inspection cart moving between rows or along service roads. But tracking is not a substitute for mission design.
Use it in situations where:
- The route is open and predictable
- The subject has space around it
- You can maintain visual line of sight
- The vineyard infrastructure is well understood
Be more conservative when flying near:
- Trellis wires
- Irregular poles
- Netting systems
- Tight row turns
- Mixed tree and vine boundaries
- Dust plumes from moving vehicles
The Mavic 4 Pro’s obstacle avoidance suite is there to reduce risk, not erase it. Clean sensors improve reliability, but they do not change the fact that vineyards often contain thin, repetitive, and partially obscured obstacles.
A good rule is this: if you would hesitate to hand-fly the route due to visibility or wire complexity, do not ask tracking automation to solve it for you.
Step 5: Separate creative capture from survey capture
One mistake I see often is trying to produce a marketing reel and a mapping dataset in the same pass.
That usually degrades both.
For vineyard work, run two flight blocks:
Flight block A: Structured capture
Use this for the dataset intended for processing into map and model outputs. Fly methodically. Keep overlap consistent. Limit exposure variation. Think about the later products: orthomosaic, DEM, point cloud, and model.
Flight block B: Narrative visuals
Now use the Mavic 4 Pro the way content teams love to use it. This is where QuickShots, Hyperlapse, low-angle reveals, and D-Log footage have real value. D-Log is especially useful if the vineyard wants a polished deliverable that holds highlight detail in bright, dusty midday conditions and allows a cleaner grade in post.
The separation sounds simple, but it protects data integrity. The survey pass feeds the software. The creative pass feeds the story.
Step 6: Build your post-processing plan before the first battery
The source material highlights software that can convert aerial imagery into professional-grade mapping and modeling outputs with minimal manual intervention. One package supports automated production of 2D maps and 3D models from thousands of images. Another references full automatic stages such as aerial triangulation, dense point cloud generation, TIN construction, and automatic texture mapping. A separate modeling environment is designed for orientation, mapping, and modeling in one workflow, including detailed extraction of building outlines from multi-angle imagery.
Why does this matter for a Mavic 4 Pro vineyard mission?
Because it changes how you capture.
If you know the project will move into software capable of:
- automatic accuracy reporting,
- dense point cloud creation,
- TIN mesh generation,
- and textured true-3D model output,
then you stop flying casually. You capture with reconstruction in mind.
That is especially useful for vineyard estates with mixed terrain and built features such as tasting facilities, sheds, retaining walls, road intersections, parking areas, and water infrastructure. Multi-angle imagery becomes more valuable when the final model needs shape, not just surface color.
If you are planning a workflow like this and need to discuss fit for your site, you can send your mission details through this vineyard UAV workflow chat.
Step 7: Use oblique imagery when the terrain story is not enough
The reference data also points to oblique-photography modeling software built for fine-detail measurement and modeling. That matters because nadir-only capture is often not enough in vineyards with structures, embankments, walls, or varied building forms.
In plain terms:
- Top-down imagery is excellent for maps and broad surface understanding.
- Oblique imagery helps reveal the sides of objects and improves 3D realism.
For vineyard operators, that can help with:
- road cut and slope documentation,
- retaining wall condition review,
- winery building context,
- loading areas,
- storage yards,
- visitor facility modeling.
This is where the Mavic 4 Pro can bridge inspection and presentation. One well-flown dataset can support practical analysis first and communications later.
Step 8: Watch landing zones as carefully as flight paths
Dust often enters the workflow at the end, not the beginning.
A clean launch followed by a rough landing on dry soil can leave the aircraft dirty for the next mission and can put grit where you do not want it. In vineyards, I prefer:
- a landing pad,
- a hard case lid used as a temporary clean surface,
- or a firm cleared area away from vehicle movement.
This is not fussy field behavior. It protects the next flight’s obstacle avoidance and image quality.
If you are shooting Hyperlapse sequences late in the day or performing repeated short hops between blocks, those repeated takeoffs and landings become the main contamination source. Manage the ground, and the aircraft stays more predictable.
A practical vineyard workflow for Mavic 4 Pro operators
If I had to reduce all of this to one workable field routine, it would look like this:
- Clean sensors and optics before power-up
- Define the output first: map, terrain, model, inspection, or visuals
- Fly one structured mapping mission
- Fly a separate creative mission
- Use ActiveTrack only on open, low-risk routes
- Treat obstacle avoidance as support, not permission
- Plan for processing outputs in advance: GeoTIFF, DEM, point cloud, OBJ
- Protect the aircraft during landing to reduce dust carryover
That sequence reflects the operational reality behind the reference material. The real value is not just in collecting imagery. It is in collecting imagery that survives processing into useful products.
And that is the bigger point for Mavic 4 Pro users in vineyards. The aircraft can absolutely deliver attractive footage. But in dusty agricultural environments, the more serious advantage comes from disciplined capture that feeds mapping and modeling software capable of generating orthomosaics, terrain data, dense point clouds, textured meshes, and even automatic accuracy reporting.
When you combine that downstream capability with better pre-flight cleaning and more conservative use of automation around vineyard obstacles, the Mavic 4 Pro becomes more than a camera in the sky. It becomes a dependable field tool for site understanding.
Ready for your own Mavic 4 Pro? Contact our team for expert consultation.