How to Deliver Venue Content with Mavic 4 Pro
How to Deliver Venue Content with Mavic 4 Pro
META: Master venue delivery in windy conditions with the Mavic 4 Pro. Learn pro techniques for obstacle avoidance, ActiveTrack, and D-Log filming from a working photographer.
TL;DR
- Wind resistance up to 10.7 m/s makes the Mavic 4 Pro reliable for outdoor venue shoots in challenging conditions
- Omnidirectional obstacle avoidance prevents crashes when navigating complex architectural spaces
- D-Log color profile captures maximum dynamic range for professional venue marketing content
- A third-party ND filter kit transformed my ability to shoot smooth footage in bright, windy conditions
Why Venue Photography Demands Wind-Ready Equipment
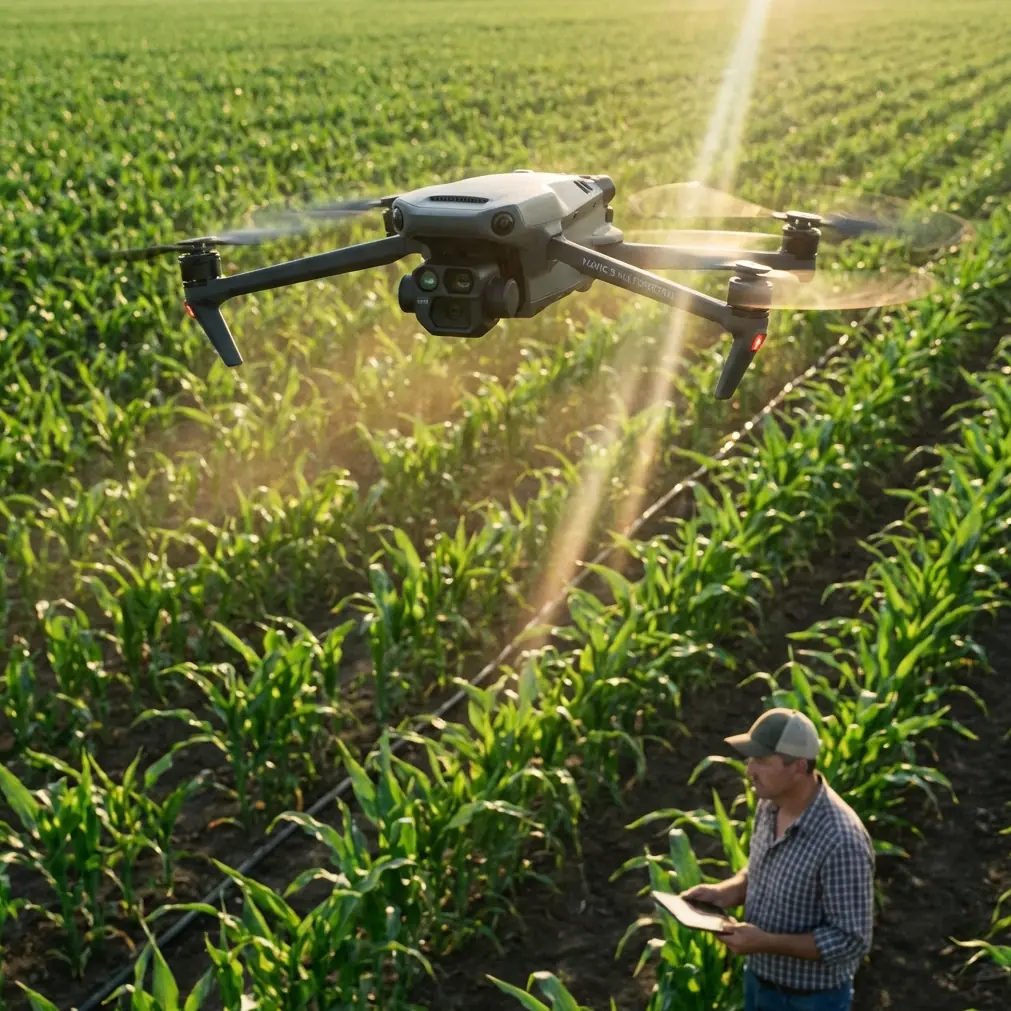
Delivering professional venue content means working on someone else's schedule. Wedding venues, corporate event spaces, and outdoor amphitheaters don't reschedule because the wind picked up. Your drone needs to perform regardless.
I've been shooting venue content professionally for six years. The Mavic 4 Pro changed my workflow completely—especially for those challenging outdoor assignments where gusts threaten to ruin every shot.
This tutorial breaks down my exact process for capturing stunning venue footage when conditions turn difficult. You'll learn specific camera settings, flight patterns, and the accessories that make windy shoots manageable.
Understanding Wind Challenges for Venue Delivery
The Physics Working Against You
Wind creates three distinct problems for venue photographers:
- Positional drift that ruins smooth tracking shots
- Vibration transfer to the gimbal causing micro-jitters
- Battery drain from constant motor compensation
The Mavic 4 Pro addresses each issue through its tri-propeller design and advanced stabilization algorithms. The aircraft maintains position within centimeter-level accuracy even in sustained winds.
Reading Conditions Before Launch
Before every venue shoot, I check three wind indicators:
- Ground-level gusts using a handheld anemometer
- Upper-level conditions via aviation weather reports
- Microclimate factors like building channeling effects
Venues with tall structures create unpredictable wind tunnels. That gorgeous courtyard might have calm air at ground level but 15 m/s gusts at rooftop height.
Expert Insight: Always fly a test pattern at your maximum planned altitude before starting paid work. The Mavic 4 Pro's telemetry shows real-time wind speed—if you're seeing sustained readings above 8 m/s, adjust your shot list to favor stabilized hovering over complex movements.
Essential Camera Settings for Windy Venue Shoots
D-Log Configuration
D-Log captures 12.8 stops of dynamic range on the Mavic 4 Pro. For venue work, this matters enormously. You're often shooting bright exteriors while preserving shadow detail in covered areas.
My standard D-Log settings for venue delivery:
- ISO 100-200 (never higher in daylight)
- Shutter speed double your frame rate (1/50 for 24fps)
- Manual white balance at 5600K for consistency
- Sharpness reduced to -1 for cleaner color grading
Why ND Filters Changed Everything
Here's the accessory that transformed my windy venue shoots: the Freewell Variable ND 2-5 Stop filter kit.
Without ND filtration, maintaining proper shutter speed in bright conditions forces you into tiny apertures. The Mavic 4 Pro's f/2.8-f/11 aperture range helps, but stopping down too far introduces diffraction softness.
Variable ND filters let me keep the aperture at the sweet spot (f/4-f/5.6) while maintaining cinematic motion blur. The difference in footage smoothness is immediately visible.
Frame Rate Selection for Wind Compensation
Higher frame rates give you options in post-production:
| Condition | Recommended Frame Rate | Reason |
|---|---|---|
| Light wind (under 5 m/s) | 24fps | Maximum cinematic feel |
| Moderate wind (5-8 m/s) | 30fps | Slight stabilization buffer |
| Strong wind (8-10 m/s) | 60fps | Allows 50% slow-motion smoothing |
| Gusty/variable | 120fps | Maximum post-stabilization flexibility |
Shooting at 120fps in challenging conditions means you can apply speed ramping that masks any remaining micro-movements the gimbal couldn't eliminate.
Mastering ActiveTrack for Venue Reveals
Subject Tracking Fundamentals
ActiveTrack 6.0 on the Mavic 4 Pro uses machine learning to maintain lock on moving subjects. For venue work, I typically track:
- Walking couples during engagement shoot previews
- Event coordinators demonstrating space flow
- Vehicles approaching venue entrances
The system maintains tracking even when subjects temporarily disappear behind architectural elements. This predictive tracking anticipates where your subject will reappear.
Combining ActiveTrack with QuickShots
QuickShots provide automated flight paths that pair beautifully with venue reveals:
- Dronie: Pull back from entrance to reveal full property
- Circle: Orbit around central architectural features
- Helix: Ascending spiral for dramatic establishing shots
- Rocket: Vertical rise revealing surrounding landscape
In windy conditions, I modify QuickShots by reducing speed to 70% of default. The Mavic 4 Pro executes smoother movements when not fighting to maintain maximum velocity against gusts.
Pro Tip: Use ActiveTrack's "Trace" mode rather than "Profile" when wind exceeds 6 m/s. Trace keeps the drone behind your subject, meaning wind resistance works with your flight path rather than against it.
Obstacle Avoidance Strategy for Complex Venues
Navigating Architectural Challenges
The Mavic 4 Pro features omnidirectional obstacle sensing using vision sensors and infrared systems. This creates a protective bubble around the aircraft—critical when flying near:
- Overhanging roof structures
- Decorative columns and archways
- Tree canopies bordering outdoor spaces
- String light installations
I keep obstacle avoidance in Bypass mode rather than Brake mode. Bypass allows the drone to navigate around obstacles while maintaining general flight direction. Brake mode stops movement entirely, which interrupts smooth footage.
Manual Override Situations
Sometimes obstacle avoidance works against you. Narrow doorway fly-throughs or close architectural passes require temporarily reducing sensitivity.
My approach:
- Scout the path on foot first
- Set obstacle avoidance to minimum sensitivity
- Fly the path manually at reduced speed
- Never disable avoidance completely—one unexpected obstacle ruins equipment and reputation
Creating Hyperlapse Content for Venue Marketing
Time Compression Techniques
Hyperlapse mode on the Mavic 4 Pro captures stunning venue content that static photography cannot match. Watching a venue transform from empty space to fully decorated event setup compresses hours into seconds.
Technical settings for venue hyperlapse:
- Interval: 2-3 seconds between captures
- Duration: minimum 30 minutes of real-time shooting
- Movement: under 100 meters total distance
- Output: 4K for maximum flexibility
Wind Considerations for Hyperlapse
Wind presents unique hyperlapse challenges. Each captured frame must align precisely with the previous one. The Mavic 4 Pro's GPS positioning and vision positioning work together to maintain frame-to-frame consistency.
For windy hyperlapse shoots:
- Choose Free mode over Waypoint mode for manual control
- Keep movements perpendicular to wind direction when possible
- Accept that some shoots need rescheduling—sustained winds above 7 m/s produce inconsistent results regardless of technique
Technical Comparison: Mavic 4 Pro vs. Previous Generation
| Feature | Mavic 4 Pro | Mavic 3 Pro | Impact on Venue Work |
|---|---|---|---|
| Wind Resistance | 10.7 m/s | 12 m/s | Reliable outdoor performance |
| Obstacle Sensing | Omnidirectional | Omnidirectional | Complex venue navigation |
| Video Codec | H.265/ProRes | H.264/H.265 | Smaller files, better quality |
| Flight Time | 46 minutes | 43 minutes | Complete venue coverage |
| Transmission Range | 20 km | 15 km | Large property reliability |
| ActiveTrack Version | 6.0 | 5.0 | Improved subject prediction |
The transmission range improvement matters more than the numbers suggest. Large venues with metal structures and thick walls degrade signal quickly. That extra headroom prevents disconnections during critical shots.
Common Mistakes to Avoid
Ignoring battery temperature in wind Cold batteries combined with high motor demand from wind compensation drain faster than expected. I carry three fully charged batteries minimum for windy venue shoots and keep spares warm in an insulated bag.
Trusting automatic exposure in mixed lighting Venues often combine bright outdoor areas with shaded structures. Automatic exposure creates jarring brightness shifts during movements. Lock exposure manually based on your primary subject area.
Flying too fast in gusty conditions Speed amplifies wind effects. That dramatic fast reveal looks great in calm air but produces unusable footage when gusts hit mid-movement. Reduce planned speeds by 30-40% when wind exceeds 5 m/s.
Neglecting audio considerations Wind noise ruins any ambient audio captured during drone footage. Plan for complete audio replacement in post-production or use ground-based recording equipment for any needed natural sound.
Skipping pre-flight sensor calibration The Mavic 4 Pro's obstacle avoidance depends on properly calibrated sensors. Calibrate before every venue shoot—the two-minute investment prevents crashes that cost hours and thousands in repairs.
Frequently Asked Questions
Can the Mavic 4 Pro fly indoors at venues?
Indoor flight is technically possible but requires careful consideration. Disable GPS positioning and rely on vision positioning systems only. Keep obstacle avoidance active and fly slowly. Most importantly, verify venue insurance requirements—many locations prohibit indoor drone operation regardless of pilot skill.
How do I deliver venue content that clients can actually use?
Export in multiple formats: 4K ProRes for professional editors, 1080p H.265 for social media teams, and optimized web versions for immediate website use. Include both color-graded final versions and D-Log originals for clients with in-house editing capabilities.
What's the minimum wind speed where I should cancel a venue shoot?
My personal threshold is sustained winds above 9 m/s or gusts exceeding 12 m/s. The Mavic 4 Pro can technically handle more, but footage quality degrades and battery consumption increases dramatically. Rescheduling protects both your equipment and professional reputation.
Delivering Professional Results Consistently
Venue photography in challenging conditions separates amateur drone operators from professionals. The Mavic 4 Pro provides the technical foundation—wind resistance, obstacle avoidance, and advanced tracking—but your technique determines final results.
Practice these workflows in low-pressure situations before client shoots. Understand how your specific aircraft responds to wind. Build the muscle memory for manual adjustments when automated systems need help.
The combination of proper equipment, practiced technique, and smart accessory choices like quality ND filters creates venue content that wins contracts and builds referral business.
Ready for your own Mavic 4 Pro? Contact our team for expert consultation.