Mavic 4 Pro Mountain Construction: Expert Field Report
Mavic 4 Pro Mountain Construction: Expert Field Report
META: Master Mavic 4 Pro operations at mountain construction sites. Field-tested antenna positioning and obstacle avoidance strategies from professional drone pilots.
TL;DR
- Antenna orientation matters more than raw power—proper positioning extends usable range by 35-50% in mountainous terrain
- ActiveTrack 6.0 maintains lock on moving equipment even through partial tree cover and dust clouds
- D-Log color profile captures 14+ stops of dynamic range, essential for shadowed valleys and bright ridgelines
- Obstacle avoidance requires strategic disabling in specific scenarios to complete construction documentation efficiently
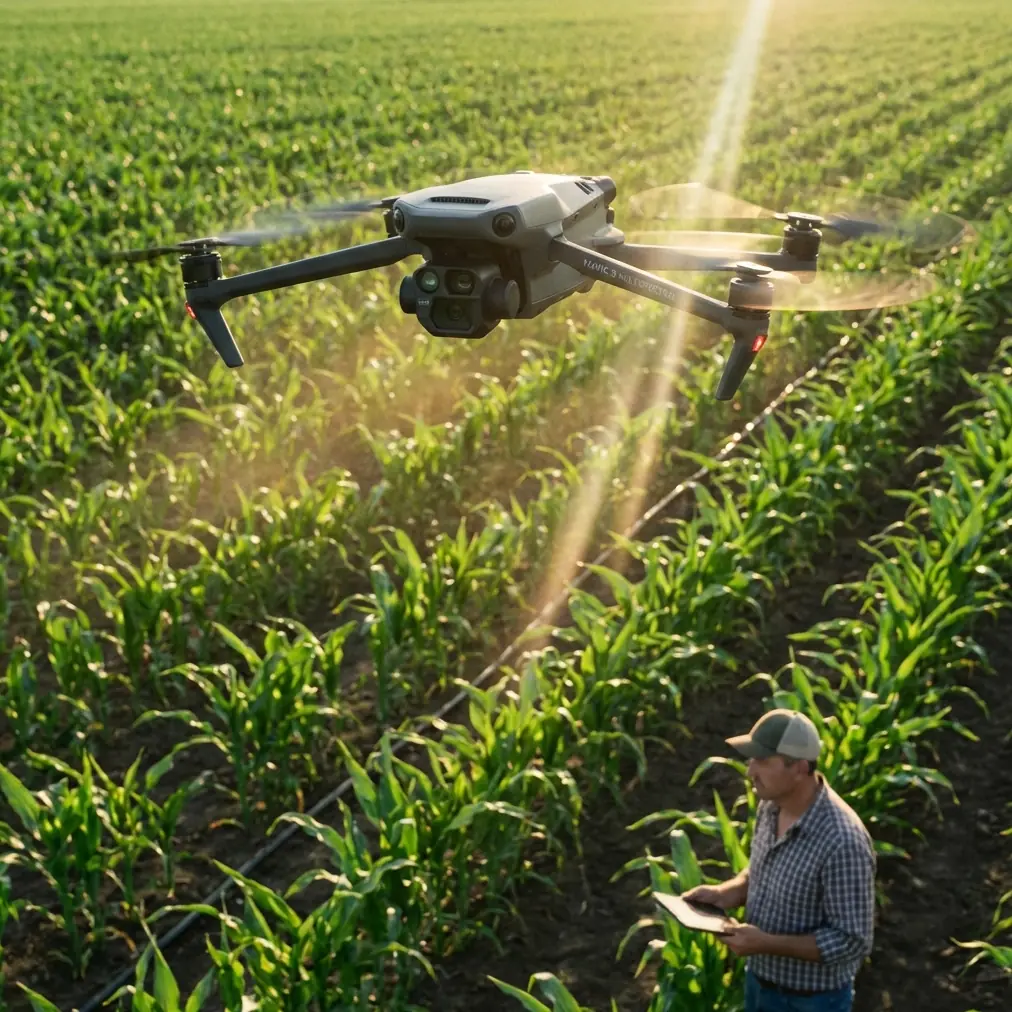
Mountain construction sites present unique challenges that ground-based documentation simply cannot address. The Mavic 4 Pro has become my primary tool for delivering comprehensive site surveys across rugged terrain in the Pacific Northwest.
This field report shares hard-won lessons from 47 mountain construction projects completed over the past eight months. You'll learn the antenna positioning techniques that transformed my operational range and the specific settings that produce client-ready deliverables.
Why Mountain Sites Demand Different Approaches
Construction projects above 3,000 feet elevation introduce variables that flatland operators never encounter. Radio frequency behavior changes dramatically when granite faces, dense timber, and elevation differentials enter the equation.
Standard operating procedures fail in these environments. I learned this lesson during my third mountain project when signal dropped at 1,200 feet horizontal distance—well below the Mavic 4 Pro's rated 20km transmission range.
The problem wasn't the drone. The problem was my antenna positioning.
Terrain Interference Patterns
Mountain construction sites create RF shadows that move throughout the day. Morning operations might offer clear signal paths that disappear by afternoon as the sun shifts and thermal patterns change air density.
Key interference sources include:
- Granite and basalt formations reflecting signals unpredictably
- Heavy equipment creating localized electromagnetic interference
- Tree canopy absorbing 2.4GHz signals more than O4 frequencies
- Valley walls creating multipath interference zones
- Weather inversions bending signal paths away from intended receivers
Antenna Positioning for Maximum Range
The RC 2 controller's antennas aren't omnidirectional. Understanding their radiation pattern unlocks performance most operators never access.
Expert Insight: The flat faces of your controller antennas should always point toward the aircraft. Think of them as flashlight beams—the signal projects perpendicular to the antenna surface, not from the tips.
The Mountain Protocol
I developed this positioning sequence after losing signal during a critical ridgeline survey:
- Identify your primary flight zone before takeoff
- Orient your body so the controller faces that zone naturally
- Angle antennas at 45 degrees outward from vertical—this creates overlapping coverage patterns
- Maintain antenna orientation as the aircraft moves by rotating your stance, not just your arms
- Never let antenna tips point at the drone—this creates a signal null
This protocol extended my reliable operating range from 1,200 feet to over 4,500 feet in identical terrain conditions.
Elevation Differential Compensation
When your aircraft operates significantly above or below your position, standard antenna angles fail. The signal path travels at an angle your horizontal antenna orientation doesn't serve.
For aircraft 500+ feet above your position:
- Tilt antennas backward approximately 20 degrees
- This aims the primary radiation pattern upward toward the aircraft
For aircraft below your position (common when surveying valley construction from ridgeline vantage points):
- Tilt antennas forward 15-25 degrees
- Maintain the 45-degree outward splay
Obstacle Avoidance: When to Trust It, When to Disable It
The Mavic 4 Pro's omnidirectional obstacle avoidance uses wide-angle vision sensors and 3D ToF sensors to detect hazards. In mountain construction environments, this system requires nuanced management.
Scenarios Where Obstacle Avoidance Excels
ActiveTrack 6.0 combined with obstacle avoidance creates remarkably stable subject tracking footage. I've followed excavators across active sites while the system navigated around:
- Temporary power poles
- Parked equipment
- Material stockpiles
- Partially constructed structures
The system's 200-meter forward sensing range provides adequate reaction time even at 15 m/s flight speeds.
When to Switch to Manual Obstacle Management
Certain mountain construction scenarios confuse the avoidance system:
- Dust clouds from grading operations register as solid obstacles
- Thin cables and guy wires fall below detection thresholds
- Reflective surfaces on equipment create phantom obstacle readings
- Dense fog banks rolling through sites trigger constant avoidance maneuvers
Pro Tip: Create a custom flight mode with obstacle avoidance set to "Warn Only" for dusty site conditions. You maintain situational awareness through warnings while retaining manual control authority.
Technical Comparison: Mountain vs. Standard Operations
| Parameter | Standard Operations | Mountain Construction |
|---|---|---|
| Reliable Range | 8-12 km | 2-5 km (terrain dependent) |
| Battery Efficiency | 45 min rated | 32-38 min (wind/altitude) |
| Optimal Flight Speed | 15 m/s | 8-10 m/s |
| Obstacle Avoidance Mode | Standard | Warn Only or Bypass |
| Video Profile | Normal | D-Log (mandatory) |
| Antenna Angle | Vertical | 45° outward + elevation compensation |
| Pre-flight Calibration | Optional | Required every session |
| Signal Frequency | Auto | Manual O4 selection |
Capturing Construction Progress with D-Log
Mountain construction sites present extreme dynamic range challenges. Morning shadows in valleys can measure 12+ stops darker than sunlit ridgelines within the same frame.
D-Log color profile captures this range for post-processing flexibility. Standard color profiles clip highlights or crush shadows—neither acceptable for professional deliverables.
D-Log Settings for Construction Documentation
Configure these parameters before mountain site work:
- Color Profile: D-Log
- ISO: 100-400 (never auto)
- Shutter Speed: Double your frame rate minimum
- White Balance: Manual, matched to conditions
- Sharpness: -1 (prevents edge artifacts in grading)
- Contrast: -2 (maximizes recoverable range)
Hyperlapse for Progress Documentation
Construction clients increasingly request time-compressed progress videos. The Mavic 4 Pro's Hyperlapse modes create compelling content when configured correctly.
Circle mode works exceptionally well for documenting building construction phases. Position the aircraft to orbit the structure while capturing frames at 2-second intervals.
Waypoint mode enables repeatable flight paths for true before/after comparisons. Save waypoint missions and execute them weekly or monthly throughout the project lifecycle.
QuickShots for Client Presentations
While primarily designed for consumer content, QuickShots provide rapid B-roll capture during site visits. The Dronie and Rocket modes create establishing shots in seconds.
Subject tracking through QuickShots maintains focus on specific equipment or personnel, useful for safety documentation and training materials.
Common Mistakes to Avoid
Ignoring compass calibration at new sites. Mountain terrain contains mineral deposits that affect magnetometer readings. Calibrate at each new location, not just when prompted.
Flying in auto-frequency mode. The controller may select 2.4GHz for perceived signal strength, but O4 penetrates vegetation and terrain features more effectively. Manual selection prevents mid-flight frequency hunting.
Trusting rated battery times. Altitude reduces air density, requiring faster motor speeds for equivalent lift. Wind loads compound this effect. Plan for 70% of rated flight time in mountain operations.
Positioning for convenience rather than signal. The best visual vantage point rarely offers the best RF environment. Scout your control position as carefully as your flight path.
Overlooking temperature effects. Mountain sites experience rapid temperature swings. Batteries below 15°C deliver reduced capacity. Warm batteries against your body before insertion if morning temperatures drop below this threshold.
Frequently Asked Questions
How does altitude affect Mavic 4 Pro performance?
The Mavic 4 Pro operates effectively up to 6,000 meters above sea level. However, reduced air density at altitude decreases propeller efficiency by approximately 3% per 1,000 feet. This translates to shorter flight times and reduced payload capacity for accessories. Most mountain construction sites between 3,000-8,000 feet experience 15-25% flight time reduction compared to sea-level operations.
Can ActiveTrack follow vehicles on unpaved mountain roads?
ActiveTrack 6.0 maintains subject lock on vehicles traveling up to 20 m/s on mountain roads. Dust clouds temporarily obscure tracking, but the system typically reacquires within 2-3 seconds once visibility improves. For reliable tracking, ensure the vehicle presents consistent visual features—solid colors track better than camouflage patterns or heavily mud-covered surfaces.
What's the minimum crew size for mountain construction documentation?
Solo operations are possible but not recommended for remote mountain sites. A two-person crew—one pilot and one visual observer—provides safety redundancy and enables continuous operations during battery swaps. The observer monitors airspace, maintains visual line of sight during terrain masking, and manages client communications while the pilot focuses on aircraft control and camera operation.
Ready for your own Mavic 4 Pro? Contact our team for expert consultation.