Mavic 4 Pro Vineyard Photography: Altitude Guide
Mavic 4 Pro Vineyard Photography: Altitude Guide
META: Learn how to capture stunning vineyard aerial photography at high altitude with the Mavic 4 Pro. Expert tutorial covering D-Log, ActiveTrack, and more.
TL;DR
- Pre-flight sensor cleaning is essential for reliable obstacle avoidance at vineyard altitudes above 1,500 meters
- D-Log color profile preserves 13+ stops of dynamic range, critical for capturing vineyard terrain with extreme light contrast
- ActiveTrack 6.0 and Subject tracking enable cinematic vineyard fly-throughs without a dedicated camera operator
- Master Hyperlapse and QuickShots modes to produce professional vineyard content in a single battery cycle
Why Vineyard Aerial Photography at Altitude Demands a Different Approach
High-altitude vineyard shoots are among the most technically demanding scenarios in aerial photography. Thinner air reduces propeller efficiency, intense UV light skews color balance, and rolling terrain creates unpredictable wind patterns that challenge even experienced pilots. This tutorial breaks down every setting, technique, and pre-flight step you need to capture breathtaking vineyard imagery with the Mavic 4 Pro—whether you're documenting a boutique winery in the Andes or surveying terraced vineyards across the highlands of southern Europe.
I'm Jessica Brown, a photographer who has spent the last eight years shooting agricultural landscapes from the air. After logging over 400 vineyard flights across three continents, I've refined a workflow specifically built around the Mavic 4 Pro's sensor suite, intelligent flight modes, and color science. Let me walk you through it.
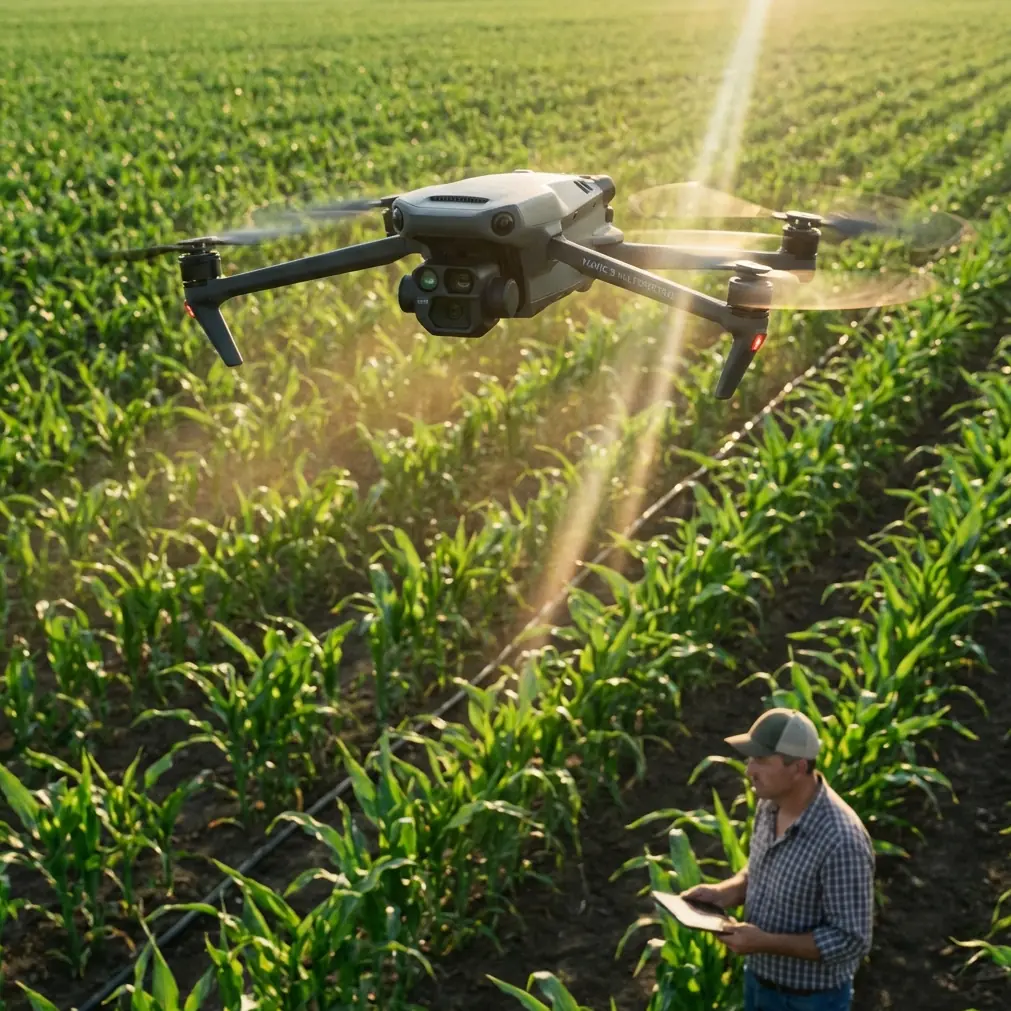
The Pre-Flight Step Most Pilots Skip: Cleaning Your Safety Sensors
Before we talk about camera settings or flight paths, let's address the single most overlooked step that directly impacts your safety and image quality: cleaning the obstacle avoidance sensors.
The Mavic 4 Pro features an omnidirectional obstacle avoidance system with sensors positioned on all six sides of the aircraft. At vineyard sites, these sensors accumulate dust, pollen, and moisture residue faster than you'd expect—especially during harvest season. A thin film of vineyard dust on just one downward-facing sensor can cause the drone to misread terrain clearance by as much as 1.5 meters.
My Sensor Cleaning Checklist
- Microfiber cloth — Wipe each vision sensor and infrared sensor gently before every flight
- Compressed air canister — Clear debris from sensor recesses without touching the lens coating
- Lens pen — Remove stubborn smudges on the main camera lens and the forward obstacle avoidance sensors
- Visual inspection — Confirm no cracks, condensation, or fogging on any sensor surface
- Gimbal lock removal check — Verify the gimbal cover is removed and the gimbal calibrates freely
Expert Insight: At altitudes above 1,200 meters, UV intensity increases by roughly 10-12% per 1,000 meters of elevation gain. This doesn't just affect your photos—it degrades plastic sensor covers faster over time. I replace my sensor protective films every 50 flight hours when shooting at altitude.
Skipping this step doesn't just risk a collision with vineyard trellises or irrigation infrastructure. Dirty sensors degrade the performance of ActiveTrack, Subject tracking, and the intelligent return-to-home function. When you're flying between vine rows at 3 meters AGL, every millimeter of sensor accuracy matters.
Camera Settings for High-Altitude Vineyard Shoots
Why D-Log Is Non-Negotiable
The Mavic 4 Pro's Hasselblad camera shoots in D-Log color profile, and for vineyard work at altitude, this is the only profile worth using. Here's why: high-altitude vineyards present extreme dynamic range challenges. You're dealing with deep green canopy in shadow, sunlit limestone soil between rows, and often a bright sky with haze at the horizon.
D-Log captures a flat, desaturated image that preserves detail across the entire tonal range. In post-production, this gives you the flexibility to:
- Recover up to 3 additional stops of highlight detail compared to shooting in Normal mode
- Color-grade vine canopy greens independently from soil tones
- Match footage across golden hour, midday, and overcast conditions seamlessly
- Maintain skin tone accuracy if winery staff appear in the frame
Recommended Camera Settings Table
| Parameter | Morning Shoot (Golden Hour) | Midday Shoot | Overcast Conditions |
|---|---|---|---|
| Color Profile | D-Log | D-Log | D-Log / HLG |
| ISO | 100-200 | 100 | 200-400 |
| Shutter Speed (Video) | 1/60 at 30fps | 1/120 at 60fps | 1/60 at 30fps |
| Aperture | f/2.8 – f/4 | f/5.6 – f/8 | f/2.8 – f/4 |
| White Balance | 5600K manual | 5200K manual | 6500K manual |
| ND Filter | ND8 | ND32 – ND64 | None – ND4 |
| Resolution | 4K / 5.1K | 4K / 5.1K | 4K / 5.1K |
Pro Tip: Always set white balance manually rather than using auto. At high altitude, the increased UV scatter tricks the auto white balance algorithm into adding warmth, which muddies the green tones that make vineyard footage compelling.
Altitude-Specific Adjustments
Flying at 1,500+ meters above sea level introduces specific challenges:
- Reduced air density means the Mavic 4 Pro's motors work harder, reducing max flight time from the rated 46 minutes to approximately 38-40 minutes in my experience
- Higher UV index creates a subtle blue-purple cast in shadows—correct this with a UV/Clear protective filter on the lens
- Faster wind speed variations at altitude demand smoother gimbal settings; set gimbal smoothing to at least 25 in the controller menu
- Lower humidity at elevation produces clearer air, which paradoxically means less atmospheric haze to create natural depth—you may want to add subtle haze in post for layered landscape shots
Mastering Intelligent Flight Modes Over Vineyards
ActiveTrack 6.0 for Vineyard Fly-Throughs
The Mavic 4 Pro's ActiveTrack 6.0 has transformed how I shoot vineyard content. Previously, tracking a subject—say, a winemaker walking between rows—required a two-person crew: one flying, one operating the camera. Now, Subject tracking handles this autonomously.
For vineyard fly-throughs, configure ActiveTrack as follows:
- Set tracking mode to Trace (drone follows behind the subject)
- Adjust following distance to 8-12 meters for tight row work
- Enable obstacle avoidance in "Bypass" mode so the drone navigates around end-of-row posts
- Lock altitude at 4-5 meters AGL to stay above trellis height while maintaining an intimate perspective
- Set camera angle to 15-20 degrees below horizon for a natural following perspective
QuickShots for Social Media Content
Vineyard clients increasingly want short-form content for Instagram and TikTok alongside traditional deliverables. The Mavic 4 Pro's QuickShots modes are purpose-built for this.
My go-to QuickShots for vineyard work:
- Dronie — Pull away from a central subject (a bottle, a table setting, a vine row marker) to reveal the broader vineyard panorama
- Helix — Spiral upward around a chateau, tasting room, or distinctive tree to create a dramatic reveal shot
- Rocket — Straight vertical ascent centered on a subject for a powerful opening shot
- Circle — Orbit a vineyard's most photogenic feature at consistent altitude for smooth, professional footage
Each QuickShot takes 15-30 seconds of battery time and produces a fully stabilized, ready-to-post clip.
Hyperlapse for Vineyard Time Compression
Hyperlapse mode is where the Mavic 4 Pro truly differentiates itself for vineyard storytelling. A well-executed Hyperlapse showing cloud shadows rolling across vine rows, or golden hour light sweeping across a hillside vineyard, can become the centerpiece of a winery's brand video.
My Hyperlapse workflow:
- Mode: Waypoint (set 4-6 waypoints along the vineyard's contour)
- Interval: 3 seconds between frames for cloud movement; 5 seconds for light changes
- Duration: Plan for 20-30 minutes of real-time shooting to produce 8-12 seconds of Hyperlapse footage
- Speed: Keep movement speed below 2 m/s to avoid jittery output
- Altitude: 30-50 meters AGL gives the best perspective on row patterns and terrain undulation
Post-Production Workflow for D-Log Vineyard Footage
Shooting in D-Log means you'll need a proper color grading workflow. Here's my streamlined process:
- Import into DaVinci Resolve or Adobe Premiere Pro
- Apply DJI's official D-Log to Rec.709 LUT as a starting point
- Adjust exposure — Bring midtones up by 0.5-1.0 stop to compensate for the flat profile
- Refine greens — Use HSL controls to separate vine canopy greens from grass greens; shift vine canopy toward teal-green for a premium look
- Add contrast curve — Create a gentle S-curve to restore depth without clipping highlights
- Sharpen selectively — Apply 60-70% sharpening at 1.0 pixel radius for 4K delivery
Common Mistakes to Avoid
- Ignoring altitude performance loss — Failing to account for reduced flight time at elevation leads to rushed shots and risky low-battery returns. Always plan flights with a 30% battery reserve at high altitude.
- Leaving obstacle avoidance on "Stop" mode near vine rows — The drone will halt abruptly when it detects trellises, ruining smooth footage. Switch to Bypass mode for cinematic flight paths.
- Shooting in Normal color profile — You'll clip highlights on bright soil and lose shadow detail in the canopy simultaneously. D-Log solves this.
- Flying at midday without ND filters — Overexposed, harsh footage is the number one amateur mistake. Always carry an ND filter set (ND8, ND16, ND32, ND64).
- Using auto white balance across multiple flights — This creates inconsistent color between clips, tripling your color grading time in post.
- Neglecting sensor cleaning between flights — Vineyard dust accumulates rapidly. One dirty sensor can disable obstacle avoidance mid-flight near trellises and infrastructure.
- Flying too high — New pilots default to 100+ meters AGL for safety. This eliminates vineyard texture and row detail. The most compelling shots happen between 5 and 30 meters.
Frequently Asked Questions
How does altitude affect the Mavic 4 Pro's obstacle avoidance performance?
The obstacle avoidance system itself functions identically at altitude since it relies on vision sensors and infrared rather than air-pressure-dependent mechanisms. However, thinner air makes the drone less responsive to avoidance maneuvers—the motors require more power to execute quick lateral movements. At altitudes above 2,000 meters, increase your minimum safe distance from obstacles by at least 50% compared to sea-level flights. Always ensure sensors are clean and unobstructed for the most reliable performance.
What is the best time of day to shoot vineyard aerial footage?
The golden hours—the first 90 minutes after sunrise and the last 90 minutes before sunset—produce the most cinematic vineyard footage. Low-angle light creates long shadows that emphasize row patterns and terrain contours. At high-altitude vineyard locations, golden hour light is often more intense and warmer due to reduced atmospheric filtration, giving you richer tones without heavy grading. Midday shooting works for mapping and survey purposes but rarely produces compelling portfolio-quality imagery.
Can I use ActiveTrack and obstacle avoidance simultaneously during vineyard fly-throughs?
Yes, and you absolutely should. The Mavic 4 Pro is designed to run ActiveTrack 6.0 with full omnidirectional obstacle avoidance enabled simultaneously. When tracking a subject through vine rows, set obstacle avoidance to Bypass mode rather than Stop mode. This allows the drone to navigate around end-of-row posts and trellis structures while maintaining smooth tracking. Keep the drone's speed below 5 m/s in tight row environments to give the obstacle avoidance system adequate reaction time.
Ready for your own Mavic 4 Pro? Contact our team for expert consultation.