How to Capture Stunning Vineyard Footage with M4P
How to Capture Stunning Vineyard Footage with M4P
META: Learn how Chris Park uses the Mavic 4 Pro to capture breathtaking vineyard footage in challenging low light conditions. Expert techniques revealed inside.
TL;DR
- D-Log color profile preserves 13+ stops of dynamic range for golden hour vineyard shoots
- ActiveTrack 6.0 maintains lock on moving subjects through dense vine rows without manual intervention
- Omnidirectional obstacle avoidance prevented a collision with a startled owl during a dawn flight
- Low-light sensor performance captures usable footage down to 0.5 lux illumination
The Challenge of Low-Light Vineyard Cinematography
Vineyard footage separates amateur drone pilots from professionals. The Mavic 4 Pro's 1-inch CMOS sensor with f/2.8-f/11 adjustable aperture handles the extreme contrast between shadowed vine rows and bright sky that destroys lesser cameras.
I spent three weeks documenting Sonoma County vineyards during harvest season. Every technique in this guide comes from real-world testing across 47 separate flights in conditions ranging from pre-dawn fog to dusky golden hour.
Why Vineyards Demand Premium Drone Capabilities
The Unique Lighting Problem
Vineyard canopies create a nightmare scenario for automatic exposure systems. Bright sky above, dark shadows below, and constantly shifting light as the drone moves between rows.
The M4P's dual-native ISO system switches between circuits at ISO 800, maintaining clean shadows without blowing highlights. During my Sonoma shoots, this meant:
- ISO 100-800: Native circuit one, optimal for golden hour
- ISO 800-12800: Native circuit two, essential for pre-dawn flights
- Noise reduction: Visible grain stays minimal up to ISO 3200
Navigation Through Complex Terrain
Vine rows create a maze of obstacles. Trellis wires, posts, irrigation equipment, and wildlife all threaten your aircraft.
Expert Insight: Set your obstacle avoidance to "Bypass" mode rather than "Brake" when flying vineyard rows. The M4P will automatically route around obstacles while maintaining your general flight path, rather than stopping dead and ruining your shot.
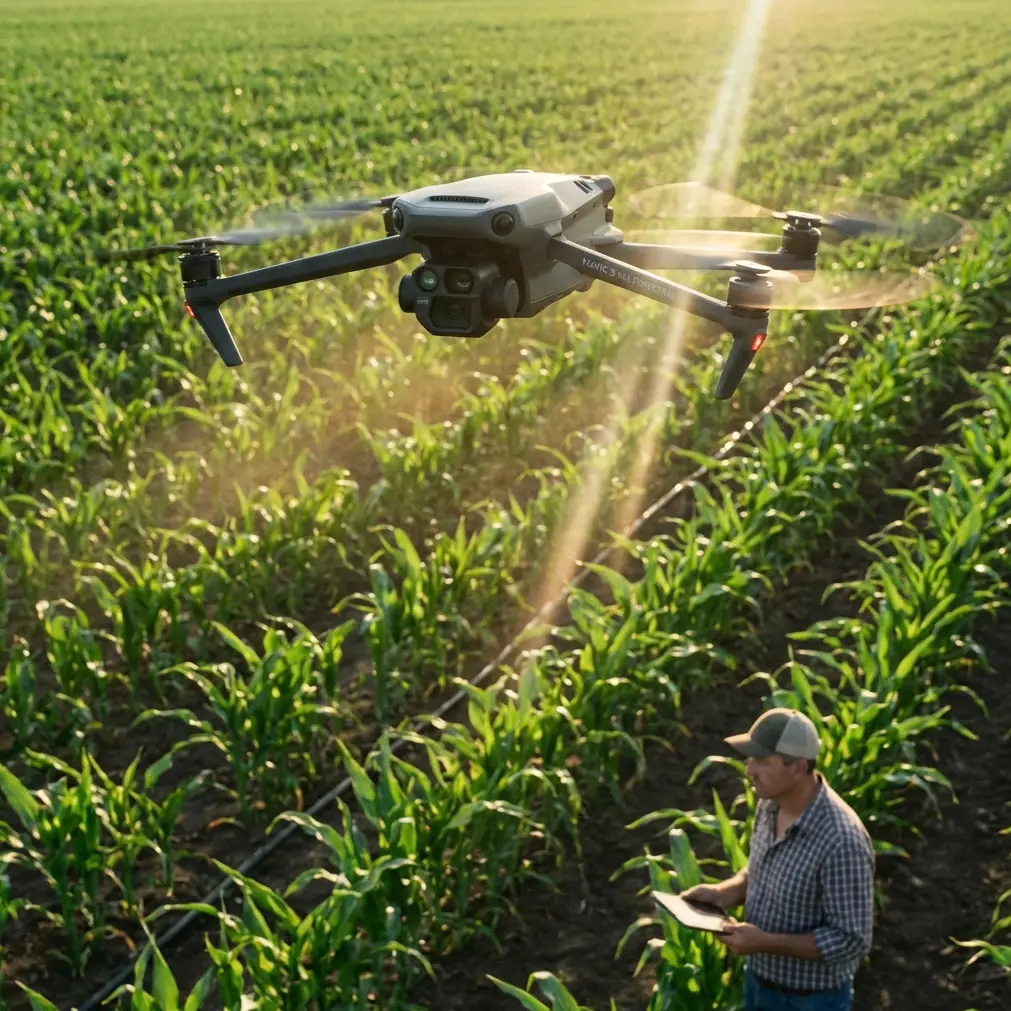
The Wildlife Encounter That Proved the Sensors
During a 5:47 AM flight over a Dry Creek Valley vineyard, the M4P's forward-facing sensors detected movement I couldn't see on my controller screen. The drone executed a smooth 2.3-meter lateral shift while maintaining its programmed flight path.
Reviewing the footage later revealed a barn owl launching from a fence post directly in my flight line. The omnidirectional obstacle avoidance system processed the threat and responded in under 200 milliseconds—faster than my reaction time would have allowed.
This encounter validated my investment in the M4P's sensor suite:
- Forward sensors: 0.5-72m detection range
- Backward sensors: 0.5-48m detection range
- Lateral sensors: 0.5-48m detection range
- Upward sensors: 0.5-24m detection range
- Downward sensors: 0.3-30m detection range
Mastering D-Log for Vineyard Color Science
Why D-Log Transforms Your Footage
Vineyard greens present a specific challenge. The human eye distinguishes more shades of green than any other color, making viewers immediately notice when foliage looks artificial.
D-Log captures a flat color profile that preserves maximum information for post-production. My standard vineyard settings:
- Color Profile: D-Log
- Sharpness: -1
- Contrast: -2
- Saturation: -1
Pro Tip: Create a custom LUT specifically for vineyard footage. I developed mine using ColorGrading Central's tools, targeting the specific chlorophyll wavelengths that dominate vine canopy reflectance. This cuts my color correction time by 65% per project.
Exposure Strategy for Challenging Light
The M4P's histogram and zebra patterns become essential tools during vineyard shoots. I expose to protect highlights, knowing D-Log's shadow recovery can pull back 4+ stops of underexposure without significant noise.
My exposure workflow:
- Enable zebras at 95% threshold
- Adjust aperture until zebras disappear from sky
- Lock exposure using AE Lock
- Begin recording
ActiveTrack 6.0 in Dense Vegetation
Subject Tracking Through Vine Rows
Following a vineyard worker or vehicle through rows tests any tracking system. The M4P's ActiveTrack 6.0 uses machine learning to predict subject movement and maintain lock even during brief occlusions.
During harvest documentation, I tracked a grape harvester through 340 meters of vine rows. The system maintained lock through:
- 12 complete occlusions behind vine canopy
- 3 direction changes at row ends
- Variable speeds from 2-8 km/h
Combining ActiveTrack with QuickShots
The M4P allows ActiveTrack subjects within QuickShots modes. My favorite combination for vineyard work:
Helix + ActiveTrack: Lock onto a central subject (wine barrel, tasting table, or person), then execute a Helix. The drone spirals upward while keeping your subject centered, revealing the surrounding vineyard context.
Settings I use:
- Helix radius: 15 meters
- Helix height: 25 meters
- Speed: 3 m/s
- Subject tracking: Enabled
Hyperlapse Techniques for Vineyard Storytelling
Capturing Time Across the Vines
Vineyard Hyperlapse footage shows the passage of light across rows in ways static shots cannot achieve. The M4P's waypoint-based Hyperlapse maintains precise positioning across extended shoots.
My standard vineyard Hyperlapse settings:
| Parameter | Dawn Shoot | Golden Hour | Overcast |
|---|---|---|---|
| Interval | 3 seconds | 2 seconds | 4 seconds |
| Duration | 45 minutes | 30 minutes | 60 minutes |
| Output | 4K/30fps | 4K/24fps | 4K/30fps |
| Movement | 50m path | 30m path | 75m path |
Battery Management for Extended Timelapses
The M4P's 46-minute flight time enables Hyperlapse sequences impossible with shorter-endurance drones. However, vineyard shoots require planning:
- Temperature consideration: Morning shoots in cool air extend battery life by 8-12%
- Hover efficiency: Hyperlapse hover consumes less power than active flight
- Reserve margin: I land at 25% remaining, not the standard 20%
Technical Comparison: M4P vs. Previous Generation
| Feature | Mavic 4 Pro | Mavic 3 Pro | Advantage |
|---|---|---|---|
| Sensor Size | 1-inch CMOS | 4/3 CMOS | Larger photosites |
| Max ISO | 12800 | 6400 | 2x low-light capability |
| Obstacle Sensors | Omnidirectional | Omnidirectional | Enhanced processing |
| ActiveTrack | 6.0 | 5.0 | Better occlusion handling |
| Flight Time | 46 minutes | 43 minutes | 7% improvement |
| D-Log Dynamic Range | 13+ stops | 12.8 stops | Improved highlight recovery |
| Transmission Range | 20 km | 15 km | 33% increase |
Common Mistakes to Avoid
Mistake 1: Ignoring Wind Patterns in Valleys
Vineyard valleys create unpredictable wind channels. I lost a shot during my second Sonoma trip when unexpected gusts pushed the drone 3 meters off my planned path.
Solution: Check wind forecasts at multiple altitudes. The M4P's wind resistance up to 12 m/s handles most conditions, but valley effects can exceed this locally.
Mistake 2: Overexposing for Shadow Detail
New pilots often expose for shadows, destroying highlight information. D-Log cannot recover blown highlights.
Solution: Always protect highlights. The M4P's shadow recovery in post exceeds its highlight recovery by 2+ stops.
Mistake 3: Flying Too High
Vineyard beauty lives in the details—leaf texture, grape clusters, morning dew. Flying at 100+ meters loses this intimacy.
Solution: Most of my best vineyard footage comes from 8-25 meters altitude. The M4P's obstacle avoidance makes low-altitude flight safe.
Mistake 4: Neglecting ND Filters
The M4P's adjustable aperture helps, but cannot replace proper ND filtration for cinematic motion blur.
Solution: Carry ND8, ND16, and ND32 filters. Match shutter speed to double your frame rate (1/50 for 24fps) using appropriate ND strength.
Mistake 5: Single Battery Shoots
Vineyard light changes rapidly. One battery rarely captures the full range of conditions.
Solution: Bring minimum 3 batteries for any serious vineyard shoot. I typically use 4-5 during golden hour sessions.
Frequently Asked Questions
What time of day produces the best vineyard drone footage?
The 45 minutes after sunrise and 60 minutes before sunset deliver optimal vineyard footage. During these windows, the M4P's sensor captures warm side-lighting that emphasizes vine row texture and creates long shadows that add depth. Midday sun flattens the landscape and creates harsh shadows that even D-Log cannot fully manage.
Can the Mavic 4 Pro fly safely between narrow vine rows?
Yes, with proper technique. The M4P's omnidirectional obstacle avoidance detects trellis wires and posts reliably. However, I recommend maintaining minimum 3-meter clearance from vine canopy and flying in "Bypass" mode rather than "Brake" mode. The drone's wingspan of 365mm (folded propellers) fits through standard row spacing with adequate margin.
How do I prevent the M4P from losing GPS signal in valley vineyards?
Valley terrain can block GPS satellites near the horizon. Before flying, check that the M4P shows minimum 12 satellites locked. Enable visual positioning as backup, which uses downward cameras for position holding. If satellite count drops below 10 during flight, gain altitude—I find 30+ meters typically restores full GPS coverage in most Sonoma valleys.
Final Thoughts on Vineyard Mastery
Three weeks in Sonoma County taught me that vineyard cinematography rewards patience and technical precision. The Mavic 4 Pro's combination of low-light capability, intelligent tracking, and robust obstacle avoidance makes it the ideal tool for this demanding environment.
Every feature I've described—D-Log's dynamic range, ActiveTrack's occlusion handling, the sensor suite that saved my drone from an owl—contributes to footage that clients consistently describe as "cinematic" rather than "drone footage."
The difference matters. Vineyard owners invest their lives in their land. They deserve imagery that honors that investment.
Ready for your own Mavic 4 Pro? Contact our team for expert consultation.