Mavic 4 Pro in Remote Terrain: A Technical Field Review
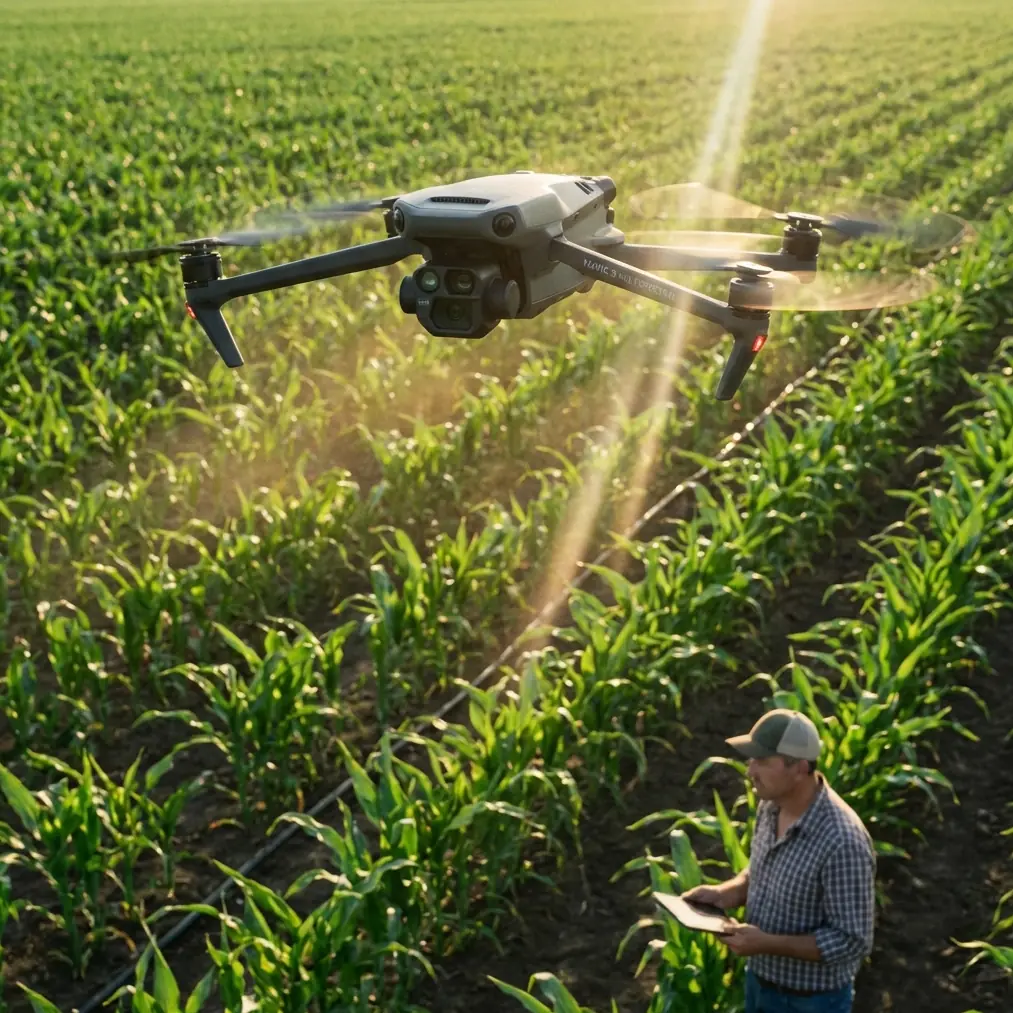
Mavic 4 Pro in Remote Terrain: A Technical Field Review for Mapping-Minded Creators
META: A technical review of using Mavic 4 Pro for remote venue capture, with terrain-class planning, contour interval logic, obstacle avoidance, D-Log workflow, and practical tips for hilly and mountainous sites.
Remote venue capture sounds cinematic until the terrain starts dictating every decision.
That is where the Mavic 4 Pro becomes more interesting than a simple camera drone. In flat open sites, almost any modern UAV can produce attractive footage. In isolated venues surrounded by uneven ground, ridgelines, terraces, or steep access roads, the real test is not image quality alone. It is whether the aircraft, the flight plan, and the output standard all match the terrain.
I approached the Mavic 4 Pro from that angle: not as a lifestyle gadget, but as a compact platform for serious site capture in hard-to-reach environments. The deeper lesson is that remote venue work sits between creative production and practical aerial survey thinking. If you ignore the second part, you may still come home with good-looking clips, but not with reliable coverage.
Why terrain classification matters before you even launch
A useful reference point from aerial photogrammetry standards is the classification of terrain by ground slope angle. Flat land is defined as α < 2°. Hilly land falls at 2° ≤ α < 6°. Mountainous terrain is 6° ≤ α < 25°, and high mountain terrain is α ≥ 25°.
Those numbers are not academic filler. They tell you how quickly your “simple” venue shoot can turn into a visibility, safety, and consistency problem.
With the Mavic 4 Pro, obstacle avoidance and subject tracking features such as ActiveTrack help reduce pilot workload, especially when moving around buildings, tree lines, and narrow access corridors. But remote venues are often deceptive. A wedding property on paper may be “one site,” yet in practice it can contain flat staging areas, hilly perimeter roads, and steep backdrops that qualify as mountain terrain by slope. Once you cross from under 6° into the 6° to 25° range, altitude management and line-of-sight awareness become far less forgiving.
That matters operationally for three reasons:
Obstacle sensing has terrain context, not just object context.
A drone can avoid a tree or wall, but it cannot simplify a ridge that rises into your flight path faster than expected.Tracking reliability changes with elevation transitions.
ActiveTrack performs best when the subject-background relationship remains readable. In sloped terrain, a vehicle or person can slip against complex topography, forcing more intervention than in flat land.Shot continuity suffers when terrain forces abrupt altitude corrections.
This is especially noticeable in Hyperlapse or long orbit sequences where smooth vertical consistency matters as much as horizontal framing.
In other words, the Mavic 4 Pro’s smart features are valuable, but they work best when the pilot thinks like a terrain analyst first.
The hidden connection between cinematic flying and contour interval logic
One of the most overlooked ideas in remote capture is basic contour interval discipline. The source material lays out recommended base contour intervals tied to terrain class and map scale. For example, in flat terrain at 1:500 scale, a base interval of 0.5 is used. In mountain terrain at 1:500, that rises to 1. At 1:2000, both flat and mountainous categories often move to 2, while at 1:5000, several categories sit at 5.
If you are shooting with a Mavic 4 Pro rather than producing a formal topographic map, why should you care?
Because contour interval logic teaches you how much vertical variation the site can tolerate before detail either becomes cluttered or disappears.
A remote venue capture job usually has one of two deliverables:
- a cinematic presentation of the location
- a planning-oriented visual package for owners, operators, or event teams
In both cases, your aerial work benefits from a consistent sense of vertical structure. The source also includes a practical note: within the same survey area and at the same scale, one basic contour interval should preferably be used. Translated into drone workflow, that means consistency beats improvisation. If one portion of the site is filmed with broad, floating reveal shots and another with aggressive low-altitude terrain-hugging moves, the final package can feel visually incoherent even if every clip looks good on its own.
That is where the Mavic 4 Pro’s controlled flight modes become more useful than flashy. QuickShots are handy, but in remote venue work they are best treated as supplements, not the backbone. A repeatable manual flight profile, matched to the site’s terrain category, usually produces better continuity.
What the Mavic 4 Pro does well in remote venue environments
The strongest argument for the Mavic 4 Pro in this kind of work is balance.
You want a platform small enough to carry into locations where vehicle access is limited, but stable and intelligent enough to manage mixed terrain and varied compositions. That balance is exactly why this aircraft fits remote venue capture so well.
Obstacle avoidance that reduces mental load
In remote sites, the obvious hazards are not always the most dangerous. Tall trees, utility poles, rooflines, retaining walls, and uneven terrain edges all compete for attention. Good obstacle avoidance does not replace piloting judgment, but it frees cognitive bandwidth for framing, route correction, and airspace awareness.
That becomes more valuable when operating in hilly terrain from 2° to under 6°, where elevation changes are subtle enough to be missed in planning but significant enough to disrupt a lateral pass. The Mavic 4 Pro’s sensing systems help keep the aircraft usable in places where a simpler platform would force a more conservative, less productive flight envelope.
ActiveTrack and subject tracking for venue motion sequences
Remote venues often need motion to communicate scale. A static aerial image can show layout, but a moving sequence reveals approach roads, transitions between buildings, and the relationship between foreground activity and distant landscape.
ActiveTrack is especially effective here when capturing a vehicle arrival, a walking host, or operational movement across the property. The trick is to use it in the right terrain. In flatter sections, tracking has room to work cleanly. In mountain terrain, especially above the 6° slope threshold, I would rely more on manually supervised tracking and shorter sequence lengths.
That distinction matters. Smart tracking is not an all-or-nothing feature. Used selectively, it can save time and improve repeatability.
D-Log for mixed-light landscapes
Remote venues are rarely lit evenly. You may launch in open sun, pivot toward a shaded hillside, then finish with reflective roofs or pale stone surfaces that push contrast hard. D-Log gives the Mavic 4 Pro real value here because it preserves flexibility across those exposure transitions.
For venue clients or creators building a premium visual package, D-Log is not about chasing a “cinematic look” for its own sake. It is about protecting gradation in scenes where terrain and architecture create fast tonal shifts. Ridgelines and valley shadow can make standard profiles feel brittle. D-Log gives you room to unify the site visually in post.
A third-party accessory that actually improved the workflow
Most accessory talk around drones is noise. In the field, only a few add-ons truly change output.
The one that made a measurable difference for remote venue work was a high-efficiency third-party landing pad with weighted edge stakes, especially on sloped, dusty, or grassy terrain. It sounds minor until you work in a site with loose gravel, uneven grass, or fine dust blowing across the takeoff zone.
The benefit was not just cleaner launches. It improved:
- gimbal cleanliness at takeoff
- repeatable setup on irregular ground
- safer handoff between battery cycles
- less contamination during low-light resets near the venue
On remote properties, the launch point is often compromised. A stable portable pad effectively gives the Mavic 4 Pro a controlled micro-base, which matters more than people expect when trying to maintain a disciplined capture sequence.
I also found that a third-party sun hood for the controller display was surprisingly helpful. In exposed hill sites, seeing telemetry clearly is not a luxury. It directly affects flight precision, particularly when trying to maintain height relationships across sloping terrain.
Planning flights using survey-style thinking
The source material includes another subtle but important idea: even when optional contour intervals exist, the chosen interval depends on actual use needs. Some entries include bracketed alternatives, such as 0.5 (1.0) or 2.0 (2.5), indicating that output requirements can justify adjustment.
That mindset maps perfectly to Mavic 4 Pro mission planning.
You do not fly every remote venue the same way. The route depends on the intended use:
- a promotional film for a destination venue
- a planning overview for event logistics
- a site progress record for owners or contractors
- a visual archive for future layout changes
For creative capture, you may prioritize dramatic reveals, edge passes, and temporal transitions. For planning or inspection-adjacent documentation, you want consistent overlap, stable altitude references, and slower, more legible movement.
The smart move is to establish one dominant visual “scale” for the job. Again, the survey principle applies: keep one coherent interval system for one area at one scale. In drone terms, pick a visual logic and stick with it. If your primary pass is medium-altitude, slow, site-reading footage, do not dilute the deliverable with random low skims just because the drone can do them.
Remote venue capture is not just filming; it is interpretation
This is where many reviews miss the point. The Mavic 4 Pro is not only useful because it flies well or records attractive footage. Its value rises when the operator understands what the terrain is saying.
A venue in high mountain terrain at α ≥ 25° is not simply “more dramatic.” It introduces more compressed launch options, stronger visual layering, and steeper altitude relationships between foreground and background. That changes how you use obstacle avoidance, how aggressively you rely on QuickShots, and how much trust you place in automated motion patterns.
A venue in flat terrain under 2° may sound easier, but it comes with a different problem: visual monotony. Here the Mavic 4 Pro’s subject tracking and controlled Hyperlapse capability become more important because the landscape itself does less compositional work.
Different terrain categories create different storytelling burdens.
Where QuickShots and Hyperlapse fit without taking over
QuickShots are excellent when used with restraint. For remote venues, they are best deployed as punctuation:
- a brief reveal of the main structure
- a pullback from a ridge-facing terrace
- a compact orbit around a standout feature like a pavilion or cliff-edge deck
Hyperlapse is more specialized. It can work beautifully for changing light over a remote property, especially where weather and terrain interact visibly. But if the site has major slope transitions, stability and framing discipline become critical. Hyperlapse exaggerates every planning mistake. If the route drifts visually because the terrain rises unpredictably, the final sequence feels nervous instead of intentional.
The Mavic 4 Pro has the intelligence to support these modes, but the pilot still has to curate them. Good remote capture is edited in the air long before the files reach post.
Practical takeaway for creators working beyond easy-access sites
If your goal is to capture remote venues professionally, the Mavic 4 Pro earns its place not through one headline feature, but through how its tools stack together. Obstacle avoidance reduces risk in uneven environments. ActiveTrack helps create movement-based sequences where access is limited. D-Log protects image integrity across complex natural lighting. Compact form factor keeps the system realistic for field carry.
Yet the real advantage appears when you combine those strengths with terrain-based planning.
Know whether the site is effectively flat, hilly, mountainous, or high mountain. Understand that a slope break from under 6° to over 6° is not trivial. Use one consistent visual logic across the site, the same way a survey area should use one basic contour interval at the same scale. And bring practical accessories that improve launch discipline rather than just adding weight to the bag.
If you are comparing workflows for a specific remote venue project and want a grounded discussion around terrain, flight modes, or accessory setup, you can reach out here: message the field team directly.
The Mavic 4 Pro is at its best when treated as a precise field tool with creative range, not as an autopilot for dramatic scenery. Remote locations expose weak habits quickly. They also reward good planning with footage that feels calm, intentional, and genuinely useful.
Ready for your own Mavic 4 Pro? Contact our team for expert consultation.