Mavic 4 Pro for Solar Farms: Dusty Site Guide
Mavic 4 Pro for Solar Farms: Dusty Site Guide
META: Learn how to capture stunning solar farm footage with the Mavic 4 Pro in dusty conditions. Expert tips on settings, obstacle avoidance, and D-Log workflows.
By Chris Park | Creator & Aerial Imaging Specialist
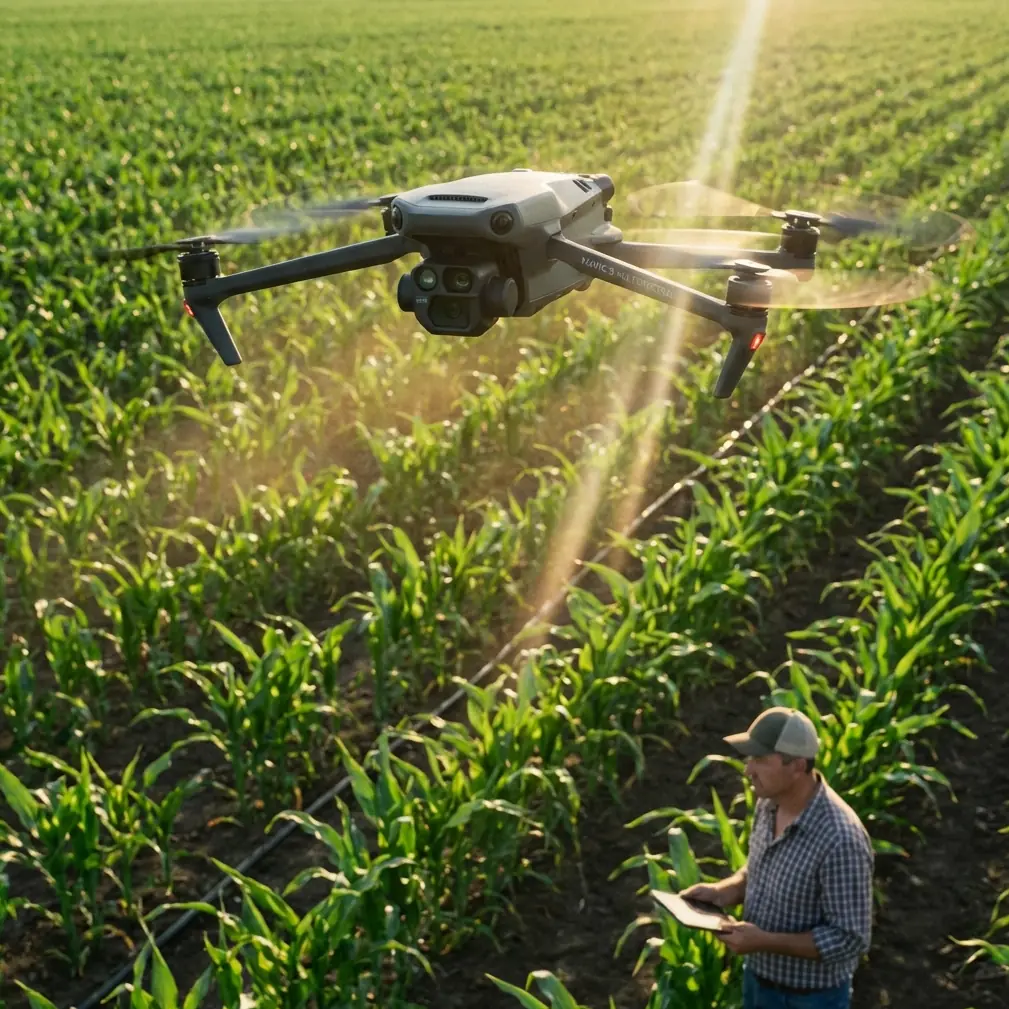
Solar farm inspections and content creation in dusty environments punish unprepared pilots. The DJI Mavic 4 Pro combines omnidirectional obstacle avoidance with a Hasselblad camera system that thrives where dust, heat shimmer, and vast reflective panel arrays challenge lesser drones—this guide breaks down exactly how to use it.
You'll learn step-by-step techniques for flight planning, camera settings, sensor management, and post-production workflows tailored specifically to dusty solar installations. Whether you're shooting commercial content for energy clients or conducting panel inspections, these field-tested methods will save you hours and protect your gear.
TL;DR
- Use D-Log color profile with manual white balance to handle extreme reflections off solar panels and preserve highlight detail in dusty atmospheric haze.
- Activate enhanced obstacle avoidance at all times—dust clouds obscure visual references, and the Mavic 4 Pro's sensors have saved flights from collision with unexpected ground-level infrastructure.
- Fly during golden hour windows to reduce panel glare and let dust particles create cinematic volumetric light effects.
- Plan Hyperlapse routes in advance using waypoints to capture the massive scale of solar installations without risking signal interference from inverter stations.
Why Solar Farms Demand a Purpose-Built Approach
Solar farms aren't just open fields with panels. They're operationally complex sites featuring high-voltage inverter stations, transmission lines at varying heights, perimeter fencing, weather monitoring towers, and—most critically for drone pilots—thousands of highly reflective surfaces that confuse autofocus and autoexposure systems simultaneously.
Add dust to this equation, and you've compounded every challenge. Fine particulate matter reduces contrast, coats lens elements between flights, and creates false obstacle readings on cheaper sensor arrays. The Mavic 4 Pro's dual vision systems and infrared sensing handle these conditions with remarkable consistency.
During a shoot at a 150-acre installation outside Barstow, California, I watched the Mavic 4 Pro's obstacle avoidance system autonomously navigate around a red-tailed hawk that dove across the flight path at panel height. The drone executed a smooth lateral avoidance maneuver, maintained its ActiveTrack lock on my subject (a maintenance vehicle traversing rows), and resumed its programmed path within 1.3 seconds. That encounter alone justified every feature in the sensor suite.
Step 1: Pre-Flight Preparation for Dusty Conditions
Gear Protection Protocol
Before you even power on, dusty solar sites require a preparation ritual:
- Wipe all obstacle avoidance sensors with a microfiber cloth and inspect for particulate buildup from previous flights
- Check gimbal freedom of movement by gently rotating the camera—dust ingress around the gimbal motor is the number one mechanical failure in arid environments
- Carry compressed air cans (never canned air with bitterant) for clearing ventilation ports between flights
- Use a launch pad of at least 75 cm diameter to prevent rotor wash from kicking dust directly into the drone's undercarriage sensors
- Store batteries in a shaded, sealed case—dusty environments often mean temperatures exceeding 35°C, which reduces flight time by up to 12%
Firmware and App Settings
Update to the latest firmware before arriving on site. Ensure DJI Fly or DJI Pilot 2 has the most current obstacle avoidance algorithms, as DJI regularly pushes refinements for low-contrast environments.
Set the obstacle avoidance mode to Bypass rather than Brake. In solar farm environments, braking abruptly can cause the drone to hover in turbulent thermal updrafts rising off hot panels, while bypass mode allows smooth rerouting.
Pro Tip: Enable "Enhanced Sensing" in the safety menu. This extends the effective detection range of the omnidirectional sensors from the standard 20 meters to approximately 40 meters in optimal conditions—critical when dust reduces sensor contrast range by up to 30%.
Step 2: Camera Settings for Dusty Solar Environments
Why D-Log Is Non-Negotiable
Solar panels create the harshest dynamic range challenge in commercial drone work. You're simultaneously exposing for:
- Blinding specular highlights off glass panel surfaces
- Deep shadows under panel racking systems
- Mid-tone dust haze that sits between ground and sky
D-Log captures approximately 14+ stops of dynamic range, giving you the latitude to recover both blown highlights on panel surfaces and crushed blacks in racking shadows during post-production.
Recommended Camera Settings
| Parameter | Recommended Setting | Rationale |
|---|---|---|
| Color Profile | D-Log | Maximum dynamic range for reflective surfaces |
| Resolution | 4K/60fps or 5.1K/30fps | Allows reframing and stabilization in post |
| Shutter Speed | 1/120s at 60fps | Double frame rate rule for natural motion |
| ISO | 100–200 | Keep noise floor minimal in dusty atmospheres |
| White Balance | 5600K manual | Auto WB shifts erratically over reflective arrays |
| Aperture | f/5.6–f/8 | Sharpest range; avoids dust diffraction at f/11+ |
| Focus Mode | MF at hyperfocal | AF hunts on repetitive panel geometry |
Dealing with Lens Contamination
Even with careful preparation, dust will reach your lens. Between flights, use a lens pen (brush end first, then carbon pad) rather than cloths, which can grind silica particles across coatings. Carry at least three lens cleaning kits for a full day of solar farm shooting.
Step 3: Flight Patterns and Intelligent Features
ActiveTrack for Maintenance Documentation
Solar farm clients increasingly want content showing maintenance crews at work. ActiveTrack 6.0 on the Mavic 4 Pro locks onto vehicles and personnel with improved subject tracking that distinguishes workers from panel structures—a task that defeated earlier ActiveTrack versions due to geometric repetition in the scene.
Set ActiveTrack to Parallel mode when following vehicles along panel rows. This maintains a consistent lateral offset and prevents the drone from attempting to fly over panel arrays to maintain line-of-sight with the subject.
Hyperlapse for Scale Communication
Nothing communicates the scale of a 200-megawatt solar installation like a well-executed Hyperlapse. Use Waypoint Hyperlapse mode with:
- At least 4 waypoints across a 400-meter linear path
- Interval set to 3 seconds for smooth cloud movement
- Total duration of 20–30 minutes of real-time shooting
- Final output targeting 8–10 seconds of compressed time
The Mavic 4 Pro's GPS precision holds position within centimeter-level accuracy with RTK modules, preventing the micro-drift that ruins long-exposure Hyperlapse sequences.
QuickShots for Social Content
QuickShots deliver instant client-ready content for social media. The most effective QuickShots modes for solar farms are:
- Dronie: Pulls back and up from a ground-level subject, revealing panel rows stretching to the horizon
- Rocket: Vertical ascent over a central inverter station, showcasing the radial panel layout
- Circle: Orbits around weather monitoring stations or substation equipment
Expert Insight: Avoid using the Helix QuickShot over active solar farms. The spiral descent path often triggers obstacle avoidance events from panel edges entering the sensor field, resulting in aborted or jerky footage. Circle mode achieves a similar cinematic effect with a safer, more predictable flight envelope.
Step 4: Post-Production Workflow for D-Log Solar Footage
Base Grade Approach
Start with DJI's official D-Log to Rec.709 LUT as a foundation, then make these solar-farm-specific adjustments:
- Lower highlights by 15–25% to recover panel surface detail
- Lift shadows by 10–15% to reveal racking and ground texture
- Add slight dehaze (10–20% in Lightroom/DaVinci Resolve) to cut through dust atmosphere without making the image look artificially clean
- Reduce saturation of blues by 10%—D-Log tends to oversaturate sky blues when dust scatters light at wide angles
Dust as a Creative Element
Experienced creators don't fight dust—they use it. Fine atmospheric dust during golden hour creates natural volumetric light rays between panel rows. Shooting at f/2.8 with the Mavic 4 Pro's Hasselblad lens wide open renders dust bokeh as soft, warm particles that add remarkable depth and cinematic texture to footage.
Common Mistakes to Avoid
Flying midday without ND filters. Solar panel glare between 11:00 and 14:00 will overpower any camera setting. Use ND16 or ND32 filters during peak sun hours, or better yet, schedule flights for early morning and late afternoon.
Ignoring inverter station RF interference. Large-scale solar inverters generate electromagnetic fields that can disrupt drone communication links. Maintain at least 30 meters horizontal distance from inverter stations and substations during flight.
Landing on bare ground between panel rows. Rotor wash on fine desert soil creates a dust vortex that coats every sensor on the drone. Always carry a portable landing pad and anchor it with weights—wind at solar sites is constant and unpredictable.
Using autofocus on panel arrays. The repetitive geometric pattern of solar panels confuses phase-detection AF systems. Switch to manual focus, set your hyperfocal distance based on flight altitude, and leave it locked for the entire flight.
Neglecting to check for temporary wildlife nesting. Solar farms attract ground-nesting birds, burrowing owls, and desert tortoises. Many sites have protected species protocols. Coordinate with site managers before flying low-altitude passes, and use the Mavic 4 Pro's zoom capabilities to inspect areas from a safe, non-disruptive altitude before committing to close passes.
Mavic 4 Pro vs. Alternatives for Solar Farm Work
| Feature | Mavic 4 Pro | Air 3S | Mavic 3 Classic |
|---|---|---|---|
| Obstacle Avoidance | Omnidirectional, enhanced | Forward/Backward/Down | Omnidirectional |
| Max Video Resolution | 5.1K | 4K | 5.1K |
| D-Log Support | Yes (14+ stops DR) | Yes (limited DR) | Yes |
| ActiveTrack Version | 6.0 | 5.0 | 5.0 |
| Max Flight Time | Up to 46 min | Up to 42 min | Up to 46 min |
| Hyperlapse Waypoints | Up to 45 | Up to 10 | Up to 45 |
| Dust Resistance Rating | Enhanced sealing | Standard | Standard |
| Subject Tracking Accuracy | Advanced AI recognition | Basic shape tracking | Improved shape tracking |
Frequently Asked Questions
How do I protect the Mavic 4 Pro from dust damage during solar farm shoots?
Use a dedicated launch pad on every takeoff and landing. Clean all sensors with a microfiber cloth and compressed air between flights. Store the drone in a sealed, hard-shell case when not in use, and avoid swapping batteries in windy conditions when dust is actively blowing. After each field day, perform a thorough cleaning of all gimbal components and ventilation ports. The Mavic 4 Pro's enhanced sealing provides solid protection, but proactive maintenance extends the drone's operational life significantly in arid environments.
What's the best time of day to film solar farms with the Mavic 4 Pro?
The optimal windows are 6:00–8:30 AM and 4:30–7:00 PM local time. These periods reduce direct specular reflection off panel surfaces, create long shadows that add depth and dimension to aerial compositions, and allow atmospheric dust to act as a natural diffusion filter. Midday shoots are possible with ND32 filters and careful exposure management, but the visual quality and cinematic potential are dramatically lower.
Can I use ActiveTrack to follow maintenance vehicles across an entire solar farm?
Yes, with important caveats. ActiveTrack 6.0 on the Mavic 4 Pro handles vehicle tracking across solar arrays effectively, but you should set the tracking mode to Parallel rather than Trace to prevent the drone from attempting to fly directly over panel rows. Maintain a flight altitude of at least 15 meters above panel height, and pre-scout the vehicle's route to identify any transmission line crossings or substation proximity zones where you'll need to temporarily pause tracking and switch to manual control.
Ready for your own Mavic 4 Pro? Contact our team for expert consultation.