Mavic 4 Pro Case Study: Capturing Remote Highways
Mavic 4 Pro Case Study: Capturing Remote Highways With a Cinema-Grade Workflow
META: A field-tested case study on using Mavic 4 Pro for remote highway filming, with practical insights on D-Log style workflows, ISO control, white balance discipline, tracking, obstacle avoidance, and post-production flexibility.
Remote highway work exposes every weak link in an aerial workflow.
The light changes faster than your route plan. Dust and haze flatten contrast. One stretch of road bakes in hard sun while the next dips into cloud shadow. If the goal is more than a pretty orbit—if you need consistent footage for infrastructure documentation, project updates, tourism media, or transport-sector storytelling—then the aircraft is only half the equation. The camera workflow matters just as much.
That is where the Mavic 4 Pro becomes interesting.
This article is built around a practical scenario: capturing highways in remote areas, where reshoots are expensive and environmental conditions are unpredictable. The drone’s flight intelligence gets plenty of attention in public discussions, and rightly so. Obstacle avoidance, ActiveTrack-style subject following, QuickShots, and Hyperlapse all help in the field. But for serious production, the more decisive advantage is often the discipline you bring to image capture. And that discipline has a lot in common with the logic behind older professional camera profiles such as Protune: manual control over white balance, color profile, ISO limits, sharpness, and exposure to preserve grading flexibility later.
For Mavic 4 Pro operators, that mindset is the difference between footage that merely records a road and footage that can anchor a polished deliverable.
Why highway filming in remote regions is hard
Highways seem simple from the air. They are not.
A road is a long reflective surface that changes character every few kilometers. Pale concrete, black asphalt, painted lines, moving vehicles, roadside vegetation, gravel shoulders, cut slopes, bridges, and drainage channels all respond differently to light. In remote areas, you are often dealing with fewer support resources, less predictable weather, and a tighter battery window because your launch points are constrained.
This puts pressure on three things at once:
- exposure consistency
- motion consistency
- post-production consistency
If one sequence is warm and another drifts cool because white balance was left floating on auto, the finished edit starts to look patched together. If one run is bright but noisy and another is darker but cleaner, the variation becomes obvious on large screens. If the drone overprocesses color in-camera, your ability to match clips shot at different times of day shrinks.
These are not abstract concerns. They affect whether the final output can support investor presentations, contractor progress reports, destination marketing, or a branded documentary on regional connectivity.
The camera lesson that still matters for Mavic 4 Pro
One useful reference point comes from the logic of Protune-style capture settings. The underlying idea was straightforward: unlock more control over the image by manually managing white balance, color profile, ISO limits, sharpness, and exposure rather than letting the camera make every decision.
That philosophy remains highly relevant for Mavic 4 Pro users.
Two details from that reference stand out because they directly translate into remote highway filming practice.
First, white balance options such as 3000K, 5500K, 6500K, and Native were treated as deliberate production choices rather than automatic conveniences. Operationally, this matters because highway shoots often span sunrise warmth, neutral midday light, and cooler overcast stretches. If white balance shifts from shot to shot, the road surface and landscape never settle into a coherent visual identity. Locking a value—often near daylight conditions—or choosing a minimally processed mode for later correction gives your editor a stable base. On a long-form road sequence, that stability saves hours.
Second, the reference highlighted how ISO limit settings create a balance between brightness and image noise, with specific examples like 6400 producing a brighter low-light image but with more noise, while 400 produces a darker image with reduced noise. That is operationally significant for Mavic 4 Pro in remote highway environments because dawn, dusk, tunnels, deep cuttings, and cloud-heavy terrain can tempt operators to let sensitivity climb too far. The result is footage that looks acceptable on the controller but falls apart in grade. Setting a disciplined ISO ceiling preserves texture in asphalt, lane markings, and earthworks.
In other words, the real advantage is not simply “better quality.” It is predictable footage under changing field conditions.
How I would set up a Mavic 4 Pro highway shoot
If I were building this as Chris Park, creator and field operator, I would approach the Mavic 4 Pro as a flying camera platform first and an automated drone second.
That starts before takeoff.
1. Lock the look before the route begins
For a highway project, I would avoid relying completely on automatic white balance. The reference material’s logic around fixed settings—3000K for warm light, 5500K for general daylight, 6500K for cloudy conditions, or a minimally processed “Native” style approach—translates directly into drone work. On Mavic 4 Pro, that means choosing a consistent Kelvin value or a log-oriented workflow such as D-Log when the deliverable requires grading latitude.
Why does this matter? Because roads are linear subjects. The viewer’s eye is already tracking continuity. Any color drift becomes more obvious than it would in a chaotic urban montage.
For remote highway filming under mixed sun and cloud, a daylight-anchored setting is usually safer than auto. If the weather is fully overcast, a cooler fixed setting can preserve realism without introducing random shifts.
2. Keep ISO on a leash
The Protune reference makes a blunt point: increasing ISO helps brightness in low light, but noise rises with it. That tradeoff is still brutally real.
On remote highways, there is often a temptation to chase the last few minutes of twilight because the roads look dramatic. But unless the project truly needs that mood, pushing sensitivity too high can damage the footage. The lane striping, aggregate texture, and shadow detail in roadside embankments are exactly the things that start to crumble first.
A conservative ISO limit is often the better professional choice. If a clip ends up a little darker but cleaner, it usually grades better than a brighter noisy clip. The old 6400-versus-400 contrast from the reference is extreme enough to make the lesson obvious: brightness is not free.
3. Use a flatter profile when matching matters
The reference also noted that a flat or neutral color profile preserves more detail in shadows and highlights and gives more room to match footage from other devices. For Mavic 4 Pro users, that is the strongest case for a D-Log-style workflow on a highway production.
Why? Because road projects rarely live in isolation. You may be combining drone footage with vehicle-mounted cameras, handheld ground shots, or progress images from separate capture dates. A flatter profile gives the colorist or editor room to align those sources instead of fighting baked-in contrast and saturation.
For a solo creator doing rapid-turnaround work, this may feel like extra effort. It is. But on infrastructure and transport content, consistency beats convenience.
Where Mavic 4 Pro’s flight features actually help
Camera settings alone do not solve the field problems.
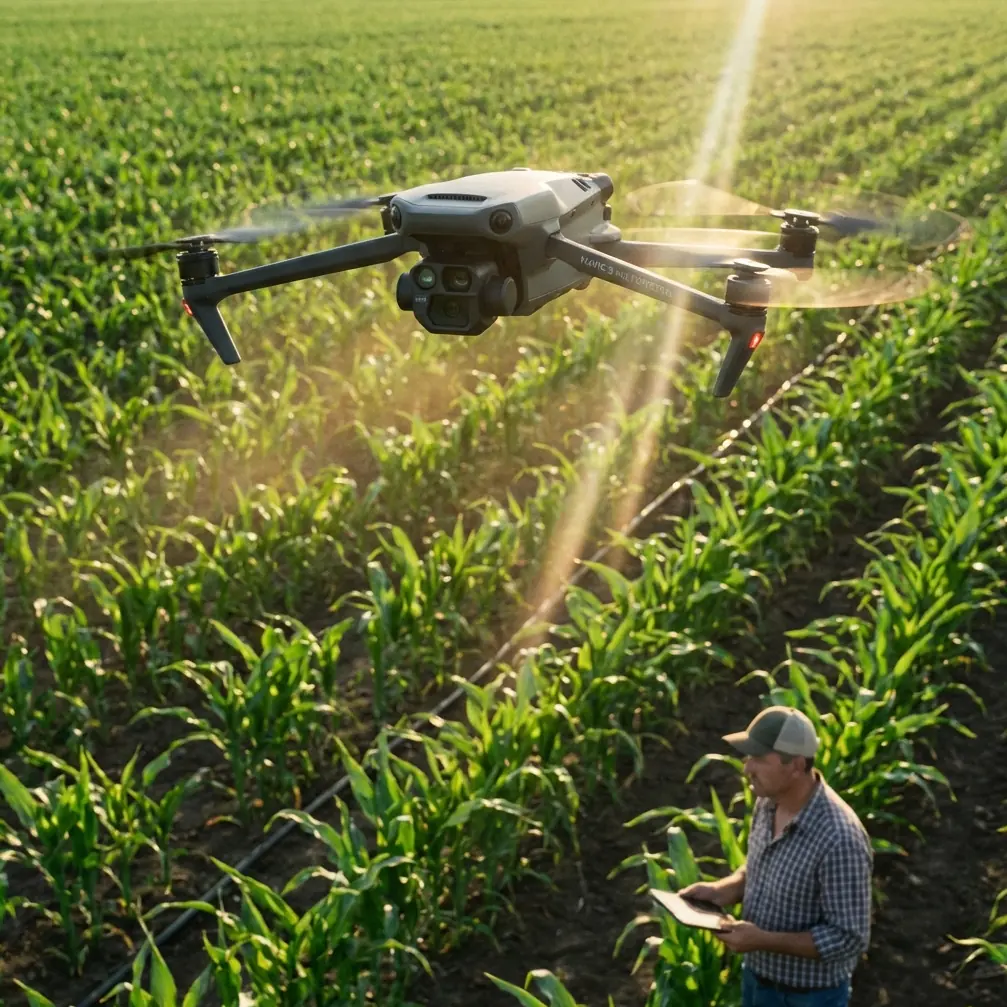
This is where the Mavic 4 Pro’s modern flight tools earn their place. If you are filming a highway in remote terrain, obstacle avoidance is not just for dramatic cliffside flying. It helps when operating near utility corridors, roadside trees, bridge approaches, sign structures, or uneven launch zones where situational awareness is split between framing and safety.
Subject tracking and ActiveTrack-style functionality also have practical value when the highway story includes a lead vehicle, inspection convoy, or maintenance team. The advantage is not that the drone “flies itself.” The advantage is that tracking support allows the operator to think more carefully about composition, spacing, and speed while keeping a moving subject coherent in frame.
QuickShots are less central for serious documentation, but they can be useful for short social edits around a larger road project. Hyperlapse, on the other hand, can be surprisingly effective for showing traffic flow, weather movement over a corridor, or the progression of work activity at an interchange.
Each of these tools has a place. None of them replace camera discipline.
The accessory that changed the output
The single biggest third-party upgrade I would mention for this type of work is a quality ND filter set.
That sounds mundane until you shoot a road at midday.
Remote highways often force you to capture during harsh light because access windows are fixed. Without ND filters, you end up raising shutter speed to maintain exposure, and motion starts to look brittle. Vehicles lose natural blur. Passing textures shimmer. The footage feels electronic rather than cinematic.
A well-matched third-party ND filter kit gave me more stable shutter control and smoother motion rendering, especially during long tracking passes above moving traffic or service vehicles. On a road sequence, this difference is visible immediately. The drone may be advanced, but if the shutter is wrong, the image still looks wrong.
That accessory also made the flatter color workflow more effective. When exposure is controlled cleanly in-camera, D-Log style footage grades with less effort and fewer compromises.
A practical field sequence for remote highways
A typical remote highway session on Mavic 4 Pro might look like this:
Start with a high establishing pass shortly after first light, using a locked white balance rather than auto. This prevents the warm horizon from pushing the camera into inconsistent corrections as the drone yaws across the landscape.
Then move into lower-altitude tracking shots over the centerline or shoulder, with obstacle avoidance active and a conservative ISO limit in place. If traffic or convoy movement is central to the piece, use ActiveTrack carefully, but verify that the drone’s path remains clean around signage, wires, and vegetation.
Mid-session, capture static or slow lateral clips designed for editing flexibility. These become lifesavers when the hero movement shots are too abrupt to bridge. In flatter profiles, these inserts hold up well under grading and can smooth out transitions between different lighting zones.
If clouds roll in, resist the temptation to leave the camera on auto-everything. Shift your locked white balance deliberately if needed. The old reference values—5500K for general daylight, 6500K for cloudy conditions—still reflect a useful production habit: make intentional changes, not accidental ones.
For teams handling repeat corridor updates, standardizing these choices across every mission builds a usable archive. Six months later, the footage still matches.
Post-production is where disciplined capture pays off
The old Protune concept emphasized compatibility with professional color correction tools and the benefit of minimally processed image data. That remains one of the clearest lessons for Mavic 4 Pro operators doing serious road content.
When you return from a remote location, your options are limited by what you captured.
If the footage was heavily baked in-camera, noisy from uncontrolled ISO, and inconsistent in color temperature, post can only do so much. If instead you captured with a flatter profile, managed ISO carefully, and locked white balance with intention, then the road, the terrain, and the movement can be shaped into a coherent visual sequence.
That is not just a filmmaker’s concern. It matters for engineering firms showing progress to stakeholders, developers presenting access routes, tourism boards promoting scenic drives, and contractors documenting work zones in a way that still looks polished enough for public-facing use.
For teams refining their Mavic workflow for this kind of project, it helps to discuss the full field-to-post pipeline with operators who understand both flight practice and image finishing. If you want to compare setup ideas or accessory choices, you can message the team here.
The real takeaway
The Mavic 4 Pro is strong because it combines smart flight assistance with the kind of image control that rewards professional habits. On remote highways, that combination matters.
Obstacle avoidance reduces operational friction. ActiveTrack helps with moving subjects. QuickShots and Hyperlapse add supplementary storytelling options. But the footage that holds up under scrutiny usually comes from quieter decisions: fixed white balance, restrained ISO, a flatter profile, controlled shutter through ND filtration, and an edit plan built before takeoff.
That is why the older camera-control logic behind professional profiles still deserves attention today. Manual white balance options such as 3000K, 5500K, 6500K, or a minimally processed native-style output are not menu trivia. They are continuity tools. ISO limits are not just technical settings; they are a choice about whether the road surface stays clean or turns noisy when light falls off.
For remote highway projects, those choices define the final result more than any headline feature.
Ready for your own Mavic 4 Pro? Contact our team for expert consultation.