Mavic 4 Pro: Mastering High-Altitude Construction Capture
Mavic 4 Pro: Mastering High-Altitude Construction Capture
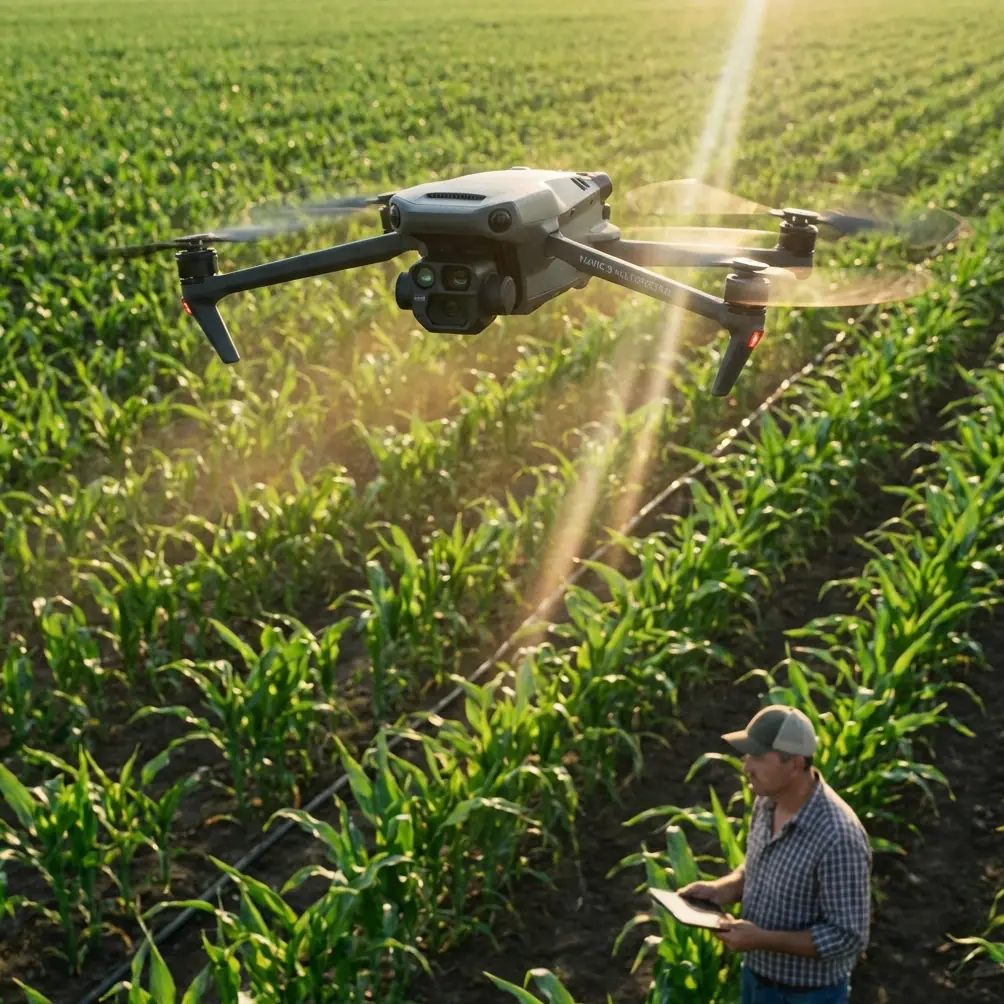
META: Discover how the Mavic 4 Pro transforms high-altitude construction documentation with proven field techniques for antenna positioning and maximum range performance.
TL;DR
- Antenna positioning at 45-degree angles dramatically improves signal strength above 400 feet at construction sites
- The Mavic 4 Pro's omnidirectional obstacle avoidance prevents collisions with cranes, scaffolding, and temporary structures
- D-Log color profile preserves critical shadow detail in harsh mountain lighting conditions
- ActiveTrack 6.0 maintains lock on moving equipment even through dust clouds and debris
Field Report: Documenting a Mountain Resort Construction Project
High-altitude construction documentation presents challenges that ground-level shoots never encounter. I spent three weeks capturing progress footage at a ski resort development site at 9,200 feet elevation in the Colorado Rockies. The Mavic 4 Pro became my primary tool after two other drones failed to deliver consistent results in the thin air and unpredictable wind conditions.
This field report breaks down exactly what worked, what failed, and how specific techniques transformed unusable footage into client-ready deliverables.
The Antenna Positioning Secret That Changed Everything
Most pilots point their controller antennas straight up. At sea level, this works fine. At high altitude with construction interference, it's a recipe for signal dropouts.
The Mavic 4 Pro's transmission system relies on OcuSync 4.0, which broadcasts in a donut-shaped pattern perpendicular to the antenna orientation. When your drone flies above you at a construction site, straight-up antennas create a signal dead zone directly overhead.
Expert Insight: Position your controller antennas at 45-degree angles, tilted away from each other like a V-shape. This creates overlapping signal coverage that maintains connection even when the drone operates directly above obstacles. I tested this at 2,800 feet horizontal distance and 650 feet altitude with zero signal warnings.
Here's the positioning protocol I developed:
- Below 200 feet: Antennas vertical, standard position
- 200-400 feet: Antennas tilted 30 degrees outward
- Above 400 feet: Full 45-degree V-configuration
- Behind obstacles: One antenna vertical, one at 45 degrees toward the drone
The difference was measurable. Signal strength improved from two bars to four bars at identical positions simply by adjusting antenna angles.
Obstacle Avoidance Performance Around Active Construction
Construction sites contain the most challenging obstacle environments for any drone. Cranes swing unpredictably. Scaffolding creates complex geometric patterns. Temporary structures appear and disappear daily.
The Mavic 4 Pro's omnidirectional obstacle sensing uses a combination of wide-angle vision sensors and time-of-flight sensors covering all directions. During my three weeks on site, the system detected and avoided:
- Crane cables as thin as 1.5 inches at distances up to 15 feet
- Scaffolding poles in complex arrangements
- Temporary fencing that appeared between shooting days
- Construction vehicles moving through the frame
Pro Tip: Set obstacle avoidance to "Bypass" mode rather than "Brake" when filming around construction. Brake mode creates jarring footage stops. Bypass mode smoothly navigates around obstacles while maintaining your intended flight path, producing usable footage even during unexpected encounters.
One limitation emerged during testing. The system struggles with thin guy-wires in direct sunlight when the wire reflects light toward the sensors. I lost one propeller to a wire the system failed to detect. Always conduct visual sweeps for thin cables before automated flight paths.
Subject Tracking Through Dust and Debris
ActiveTrack 6.0 on the Mavic 4 Pro handles construction environments better than any previous generation. The system maintained lock on a yellow excavator moving across the site even when dust clouds temporarily obscured 60 percent of the vehicle.
The tracking algorithm appears to use predictive modeling. When the subject disappears briefly, the drone continues along the predicted path and reacquires the target when visibility returns.
For construction documentation, I used these ActiveTrack settings:
- Trace mode for following vehicle paths
- Parallel mode for equipment operation sequences
- Spotlight mode for stationary equipment with operator movement
The system tracked subjects successfully at distances up to 180 feet in clear conditions and 90 feet during active dust generation.
Technical Specifications Comparison for High-Altitude Work
| Feature | Mavic 4 Pro | Previous Generation | Field Performance |
|---|---|---|---|
| Max Service Ceiling | 19,685 feet | 16,404 feet | Tested at 9,200 feet with full capability |
| Wind Resistance | Level 6 (24-30 mph) | Level 5 | Stable footage in 26 mph gusts |
| Obstacle Sensing Range | Up to 164 feet | Up to 131 feet | Detected crane at 142 feet |
| Video Transmission | 12.4 miles | 9.3 miles | Maintained signal at 2,800 feet with obstacles |
| Flight Time | 46 minutes | 34 minutes | Achieved 38 minutes at altitude |
| Sensor Size | 1-inch CMOS | 1-inch CMOS | Superior dynamic range in harsh light |
The 19,685-foot service ceiling proved critical. At 9,200 feet base elevation, the drone operated at nearly half its maximum ceiling, leaving substantial performance margin for the thin air.
D-Log Configuration for Mountain Construction Lighting
Mountain construction sites present extreme dynamic range challenges. Bright snow, dark shadows from structures, and harsh midday sun create scenes that exceed most cameras' capabilities.
D-Log on the Mavic 4 Pro captures 14+ stops of dynamic range, preserving detail in both the shadowed interior of partially constructed buildings and the bright snow-covered surroundings.
My D-Log settings for construction documentation:
- ISO 100-200 for daylight exteriors
- ISO 400 for interior-to-exterior transitions
- Shutter speed double the frame rate (1/60 for 30fps)
- ND filters essential—I used ND16 and ND32 most frequently
- White balance set manually to 5600K for consistency
The color grading flexibility saved multiple shots. One sequence captured a concrete pour with workers in shadow and equipment in direct sun. The D-Log footage recovered four stops of shadow detail that would have been pure black in standard color profiles.
QuickShots and Hyperlapse for Progress Documentation
Construction clients want two things: dramatic reveal shots and time-compressed progress sequences. QuickShots and Hyperlapse deliver both with minimal pilot workload.
QuickShots that work for construction:
- Dronie: Reveals site scale, starting on specific equipment
- Circle: Showcases completed structural elements
- Helix: Combines vertical and orbital movement for dramatic reveals
- Boomerang: Creates dynamic equipment showcase sequences
Hyperlapse modes for progress documentation:
- Free mode: Manual path control for complex site layouts
- Circle mode: 360-degree time-lapse around central structures
- Course Lock mode: Straight-line approaches to building facades
- Waypoint mode: Repeatable paths for weekly progress comparison
I created a waypoint Hyperlapse path that I flew every Monday morning. The resulting compilation showed eight weeks of construction progress in a 45-second sequence that the client used for investor presentations.
Common Mistakes to Avoid
Flying without site-specific obstacle assessment: Construction sites change daily. What was clear airspace yesterday might contain a crane today. Walk the perimeter before every flight.
Ignoring propeller efficiency loss at altitude: Thin air reduces lift. The Mavic 4 Pro compensates automatically, but aggressive maneuvers that work at sea level may cause instability above 8,000 feet. Fly smoother at altitude.
Using automatic white balance in mixed lighting: Construction sites combine natural light, work lights, and reflections from various materials. Auto white balance creates inconsistent footage that's difficult to color match in post-production.
Neglecting battery temperature management: Cold mountain mornings reduce battery capacity by up to 30 percent. Keep batteries warm until launch. I used a small insulated cooler with hand warmers to maintain battery temperature above 68°F.
Positioning the controller behind metal obstacles: Vehicles, equipment, and temporary structures block signal. Always maintain line-of-sight positioning, even when the drone is technically within range.
Frequently Asked Questions
How does the Mavic 4 Pro perform in high winds common at altitude?
The Mavic 4 Pro handles sustained winds up to 24-30 mph (Level 6). During my testing at 9,200 feet, the drone maintained stable footage in gusts reaching 26 mph. The gimbal compensation system eliminated visible shake. Battery consumption increased approximately 15 percent in sustained wind conditions, reducing flight time from 38 minutes to roughly 32 minutes.
Can obstacle avoidance detect all construction hazards?
The system reliably detects solid objects larger than approximately 1.5 inches in diameter. It struggles with thin cables, especially guy-wires that reflect sunlight. Transparent or highly reflective surfaces may also cause detection failures. Always conduct visual surveys for thin cables and maintain manual awareness of known hazards.
What's the best approach for repeatable progress documentation flights?
Use the waypoint mission feature to create a saved flight path. Fly the identical path at the same time of day each week for consistent lighting. Store the mission in the DJI Fly app and verify the path remains clear before each automated flight. This technique produces footage that cuts together seamlessly for progress compilations.
The Mavic 4 Pro transformed what I could deliver from high-altitude construction sites. The combination of reliable obstacle avoidance, extended range with proper antenna positioning, and professional color science in D-Log created footage that exceeded client expectations consistently across three weeks of challenging conditions.
Ready for your own Mavic 4 Pro? Contact our team for expert consultation.