Mavic 4 Pro coastline shooting in dusty wind
Mavic 4 Pro coastline shooting in dusty wind: field tactics that actually hold up
META: Expert Mavic 4 Pro how-to for filming coastlines in dusty, windy conditions with safer flight settings, cleaner footage, smarter tracking, and better D-Log results.
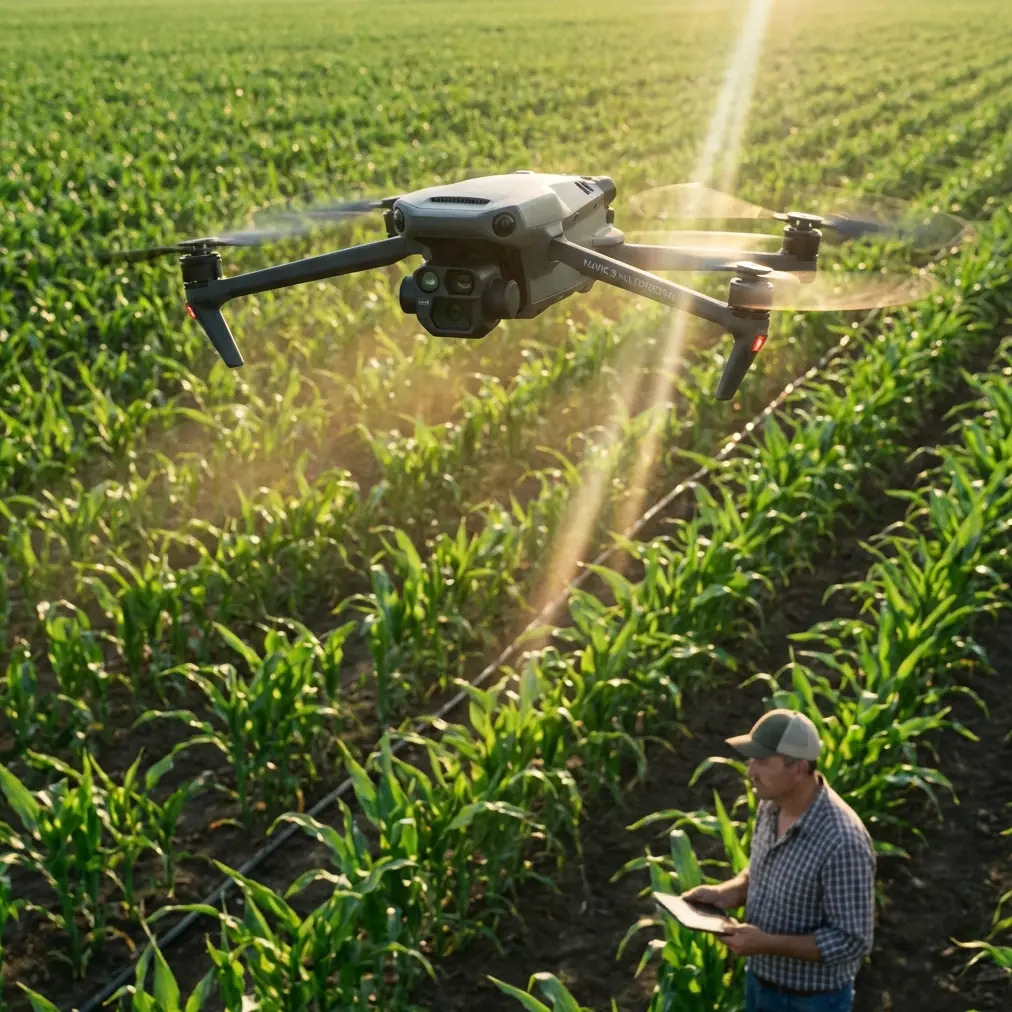
Coastlines are deceptive places to fly. They look wide open, almost forgiving, until the aircraft meets crosswind off the water, grit blowing off the cliff path, and contrast-heavy light bouncing between pale sand and dark rock. If you’re taking a Mavic 4 Pro into that environment, the goal is not just getting airborne. The goal is coming back with usable footage, a clean aircraft, and no nasty surprises from spray, dust, or a tracking system that latches onto the wrong subject.
That is where the Mavic 4 Pro separates itself from lighter, more casual camera drones. On paper, features like obstacle avoidance, ActiveTrack, D-Log, QuickShots, and Hyperlapse can sound like a checklist. On the coast, they become operational tools. Used correctly, they let you work faster in unstable conditions while keeping the footage controlled instead of chaotic.
This guide is built for one specific mission: capturing coastlines in dusty conditions with the Mavic 4 Pro. Not mountain lakes. Not urban reveals. Salt air, uneven wind, airborne grit, moving water, and subjects that don’t hold still.
Start by planning for dust, not just flight time
Most pilots think first about batteries, then exposure, then composition. For a dusty shoreline session, I’d reverse the first two priorities. Dust is the hidden limiter. It affects gimbal smoothness, sensor clarity, landing safety, and the confidence you bring into every follow-up flight.
With the Mavic 4 Pro, the smartest move is to treat takeoff and landing as the highest-risk phase of the entire shoot. That means avoiding loose sand whenever possible and using a hard surface, compact rock, a landing pad, or a hand launch and catch if you are trained and local conditions allow it. The aircraft may be capable in the air, but prop wash near the ground can kick debris directly upward. Once grit gets involved, even a small issue at the gimbal level can ruin an otherwise excellent session.
This is also one place where obstacle avoidance has real value beyond crash prevention. On cliff edges, car parks near shore paths, or scrub-covered bluff tops, the system gives you more margin when your attention is split between wind behavior, subject framing, and where the dust is moving. Competitor drones can track well in ideal conditions, but the Mavic 4 Pro tends to feel more composed when a shot develops from a clean straight-line pass into a more layered scene with rock outcrops, fence lines, and elevation changes. That matters on a coastline because the environment rarely stays simple for long.
Read the wind off the water before you launch
A coastline gives you wind clues for free if you know where to look. Watch whitecaps offshore. Check how sea grass is moving near your launch point. Look at the dust itself. If it’s rising in random swirls rather than running consistently in one direction, expect turbulence close to terrain.
The operational significance here is straightforward: your first thirty seconds in the air should be diagnostic, not cinematic. Climb to a safe hover, yaw slowly, and watch how the Mavic 4 Pro holds position from different headings. This tells you more than a phone weather app ever will. Coastal wind can change dramatically with angle and altitude, especially near cliffs or sea walls.
When pilots ignore this and jump directly into a reveal shot, they often burn time correcting drift, overworking the gimbal, or letting ActiveTrack interpret a sudden sideways shove as subject movement. The result is footage that feels nervous. If you spend one battery being disciplined at the start, the rest of the shoot gets more efficient.
Use ActiveTrack selectively, not blindly
ActiveTrack is one of the best reasons to use the Mavic 4 Pro for coastline work, especially when your subject is a walker on a headland trail, a cyclist on a seafront path, or a vehicle moving along a coastal road. But the coast is full of visual traps: breaking waves, reflective wet sand, birds, surf foam, and shadow bands crossing the ground.
This is where operator judgment matters more than raw feature lists. If your subject is moving against a clean background with strong separation, ActiveTrack can save enormous effort and deliver smoother framing than manual stick inputs alone. If your subject is visually merging with rocks, brush, or fast-moving surf patterns, you are usually better off flying manually and using the tracking tools only after the scene simplifies.
That distinction is operationally significant because tracking failure near water or cliffs is not just a creative problem. It can become a positioning problem fast. A system trying to maintain framing while the environment throws it false visual cues may place the aircraft somewhere you would not have chosen manually. The Mavic 4 Pro is strong here compared with many rivals because its obstacle awareness and tracking behavior generally give you more confidence in mixed terrain. Still, smart pilots use automation as an assistant, not a substitute for judgment.
Shoot D-Log when the coastline starts fighting your dynamic range
Coastal light is brutal in the best possible way. It can give you dramatic specular highlights on the water, rich texture in dark rock, and a luminous horizon all in one frame. It can also blow your highlights apart and bury detail in shadow if you’re not careful.
That is why D-Log matters so much on the Mavic 4 Pro in this environment. It gives you more room when the scene contains bright water, reflective sand, and darker landforms at the same time. The practical advantage is not abstract. It means you have a better chance of preserving cloud detail while keeping usable information in a cliff face or dune grass.
If you know you’ll grade later, D-Log is usually the right call for your hero shots. For quick-turn social clips, standard color may be more efficient, but only when the light is predictable. In broken coastal light, D-Log gives you insurance.
One caution: dusty air can flatten contrast more than people expect, especially when the sun is low and the particles are backlit. That haze can trick you into thinking the exposure is softer than it really is. Monitor your highlights carefully. If the water is clipping, you won’t get that texture back in post no matter how nice the rest of the frame looks.
QuickShots are useful here, but only two or three of them
QuickShots are often treated like beginner tools. That misses the point. On a coast, where wind direction and terrain can force you to move quickly between safe windows, QuickShots can help you capture repeatable motion patterns without wasting time.
The trick is restraint. Don’t run through every automated move because the menu is there. Pick the ones that suit geography. A controlled reveal off a cliff edge, a pullback over layered rock shelves, or an orbit around a stationary lookout point can work beautifully. If the wind is gusting or the airspace near your subject is visually cluttered, skip anything that adds complexity for the sake of it.
Operationally, this matters because battery management is more demanding at the coast. Fighting wind costs power. Repeating takes because the move wasn’t suited to the terrain costs more. The Mavic 4 Pro gives you polished automated options, but the best use of them is surgical, not enthusiastic.
Hyperlapse works best when the landscape moves slower than the atmosphere
Coastlines are one of the best places to use Hyperlapse, especially when you have clouds stacking offshore, tide movement around rocks, or long shadows crawling across a headland. But dusty, windy conditions create a common mistake: pilots try to force Hyperlapse while the aircraft is battling too much air movement.
The Mavic 4 Pro can handle serious work, but Hyperlapse still rewards stability. If the wind is variable enough that the drone is visibly correcting every few seconds, your result may feel jittery no matter how dramatic the location is. Save Hyperlapse for the calmer edge of the day or for sheltered positions where the landform breaks the gusts.
A good rule is simple: if you would not trust a slow cinematic push in the current air, you probably should not start a Hyperlapse either.
Work the coastline in layers
The strongest Mavic 4 Pro coastline footage usually comes from a layered approach rather than a single hero altitude. Start low and safe, with texture. Drift past grass, rock, or weathered fencing to establish scale. Then climb into mid-altitude passes that reveal the relationship between shoreline, surf, and terrain. Finish with a higher frame that explains the geography.
This is where the aircraft’s obstacle avoidance earns its keep again. Lower-altitude movement along irregular ground is where compositional opportunities live, but also where mistakes happen. The Mavic 4 Pro gives you more freedom to explore those layers confidently than many drones that feel happiest in open, uncluttered air. That doesn’t make it invincible. It means you can push toward more interesting framing while still respecting the environment.
If you want to workshop a route before you fly it, send the location and wind direction through our flight planning chat. That kind of prep often matters more than any individual setting.
Camera movement should contrast the landscape
A noisy environment does not need noisy camera work. If the sea is already active, your movement should usually calm the scene rather than compete with it. The Mavic 4 Pro is capable of dramatic motion, but coastlines often reward steadier inputs.
Three approaches work especially well:
A lateral pass parallel to the shoreline lets waves provide motion while the aircraft stays measured.
A slow push toward a cliff or headland creates depth as the textures separate.
A gentle rise from behind foreground cover gives you a natural reveal without the overproduced feel of an aggressive automated move.
Competitor drones can produce similar shot types, of course, but the Mavic 4 Pro excels when you need to move through a visually busy environment without making the footage feel frantic. That balance is harder than it sounds. Good coastal footage should feel like the aircraft belongs there.
Protect the aircraft after the shot, not just before it
Pilots are careful before launch and careless after landing. On a dusty coast, that is backwards. The aircraft often picks up the most contamination during recovery and packing.
Once the Mavic 4 Pro is down, don’t throw it straight into a bag. Give it a moment in still air. Check the gimbal area, body vents, and landing surfaces. Wipe only with appropriate clean materials. Avoid grinding particles into the shell or lens area. If you’ve been close to sea spray, that inspection matters even more. Salt and dust together are far less forgiving than either one alone.
The reason this deserves emphasis is simple: many “mysterious” issues pilots blame on firmware, calibration, or rough transport start with contamination after the previous flight. Coastal environments magnify bad habits.
A reliable coastline setup for the Mavic 4 Pro
If I were walking onto a dusty shoreline with the Mavic 4 Pro and limited battery time, my sequence would look like this:
First battery: wind check, low-risk establishing shots, no hero attempts. Learn the air.
Second battery: subject work using ActiveTrack only where the background is clean and predictable.
Third battery: D-Log hero passes timed for the best light, plus one or two QuickShots if the terrain suits them.
Final minutes: either a Hyperlapse in calmer air or a conservative manual closing shot if the wind picks up.
That order matters. It prevents you from spending the best battery on the worst assumptions.
The bigger takeaway
The Mavic 4 Pro is not interesting because it has advanced features. Plenty of drones do. It is interesting because those features become genuinely useful on hard-location shoots like dusty coastlines, where conditions change fast and the margin for sloppy decisions shrinks.
Obstacle avoidance helps when terrain gets irregular and your attention is divided. ActiveTrack can deliver efficient, polished subject shots when the scene gives it enough separation. D-Log keeps difficult coastal light from collapsing your image. QuickShots and Hyperlapse add efficiency, but only when deployed with discipline.
That is the real skill ceiling with this aircraft. Not pushing every feature at once. Knowing which one earns its place in the moment.
If you approach the coast that way, the Mavic 4 Pro stops being a bundle of specs and becomes what you actually need in the field: a dependable camera platform that can handle a beautiful, abrasive, unpredictable landscape without making the work harder than it already is.
Ready for your own Mavic 4 Pro? Contact our team for expert consultation.